Archive
The Archive App is XRHUB’s built-in repository for storing, organizing, and visualizing all your creative assets: from artworks and 3D models to videos, GIFs, and documents.
Every file uploaded to the Archive is automatically synchronized across the XR Dashboard, XR Creator Studio, and the Metaverse, making it easy to access and display your creations anywhere in the XRHUB ecosystem.
Archive also supports AR visualization, allowing users to instantly preview their works through generated links or QR codes, and stores detailed metadata for provenance, dimensions, and artist information.
Uploading an Asset
To begin, navigate to the Archive tab under Apps in the XRHUB sidebar.
When uploading, you can choose between three asset categories. Each includes unique metadata fields suited to its purpose:
- File – for general media and 3D assets.
- Digital Art – for original artistic works with creative and legal metadata.
- Digital Twin Art – for digital representations of physical artworks, including dimensional and digitization details.
Uploading a File
To upload a standard file to your Archive:
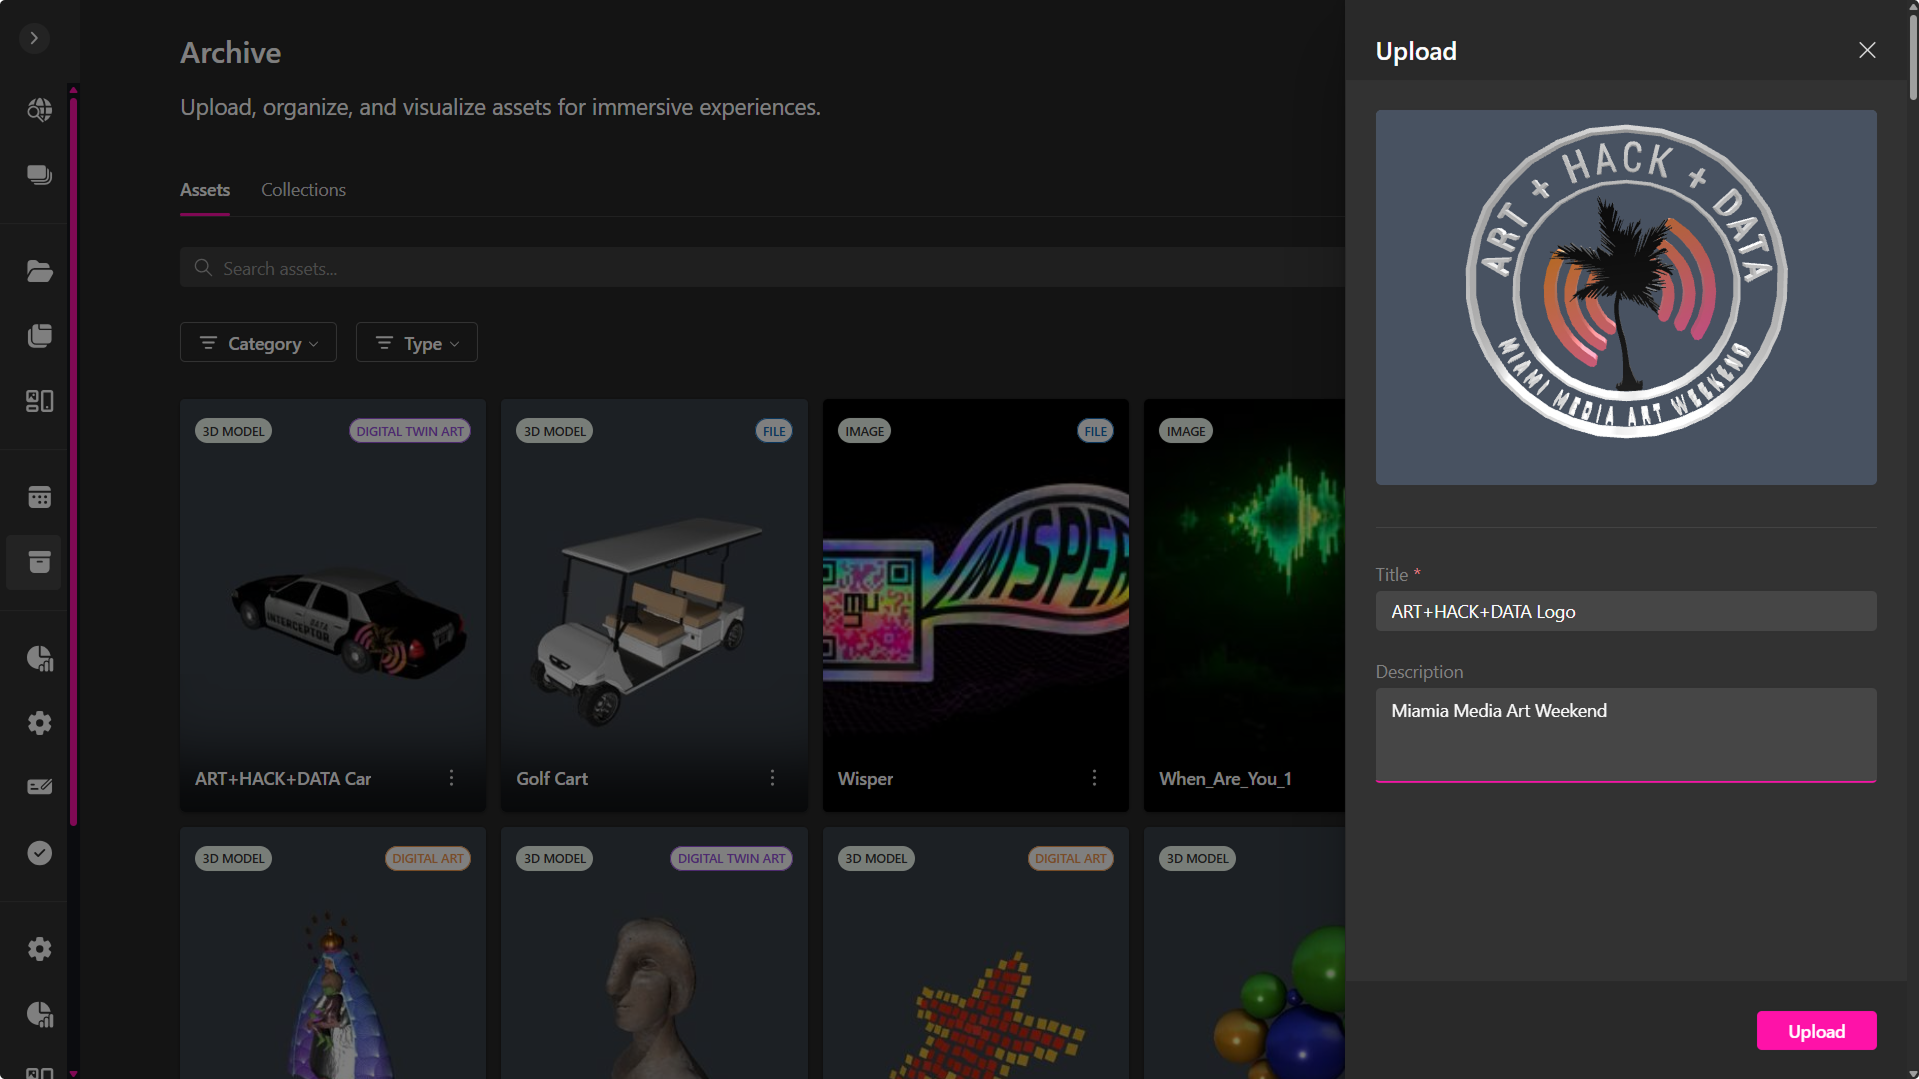
- Click + Upload in the top-right corner of the Archive interface.
- Select File from the upload type menu.
- Drag and drop your file or click to browse.
- Fill in the required fields:
- Title*
- Description
- Click Upload to complete the process.
Supported File Types: GLB, PNG, JPG, GIF, PDF, MP4, MP3
Maximum File Size: 50 MB
Tip: Use descriptive titles and tags to improve asset discoverability.
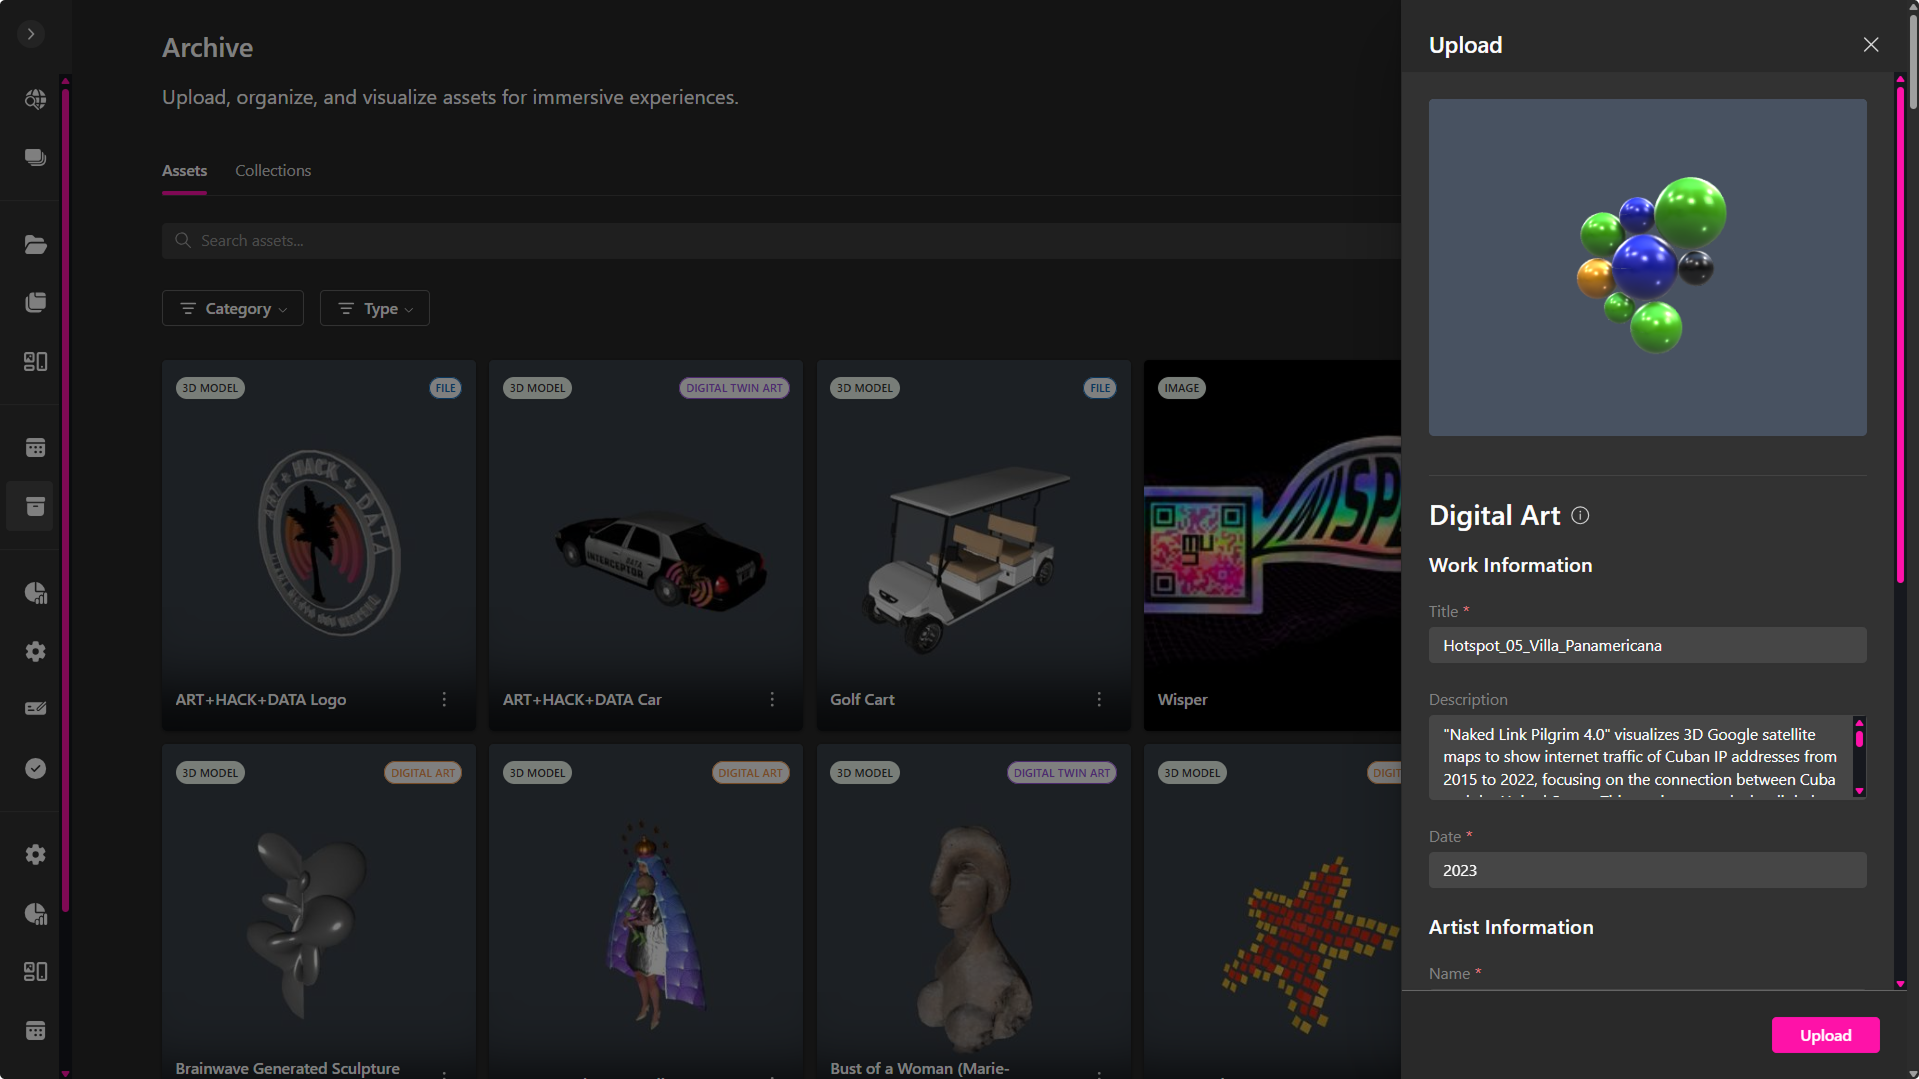
Uploading Digital Art
The Digital Art upload option is designed for artworks that include creative context, author information, and ownership details.
- Click + Upload → Digital Art.
- Drag & drop your media file or add a URL.
- Under Work Information, complete the following fields:
- Title*
- Description
- Date of creation*
- In Artist Information, add:
- Artist Name*
- Bio (brief biography)
- Artist Statement (vision, goals, or artwork intent)
- Under Legal and Rights Information, specify:
- Declaration of originality
- Optional AI creation indication
- Acceptance of terms and conditions
- Click Upload to finalize.
Note: Metadata is embedded and remains accessible when viewing or sharing the artwork in AR or within the Metaverse.
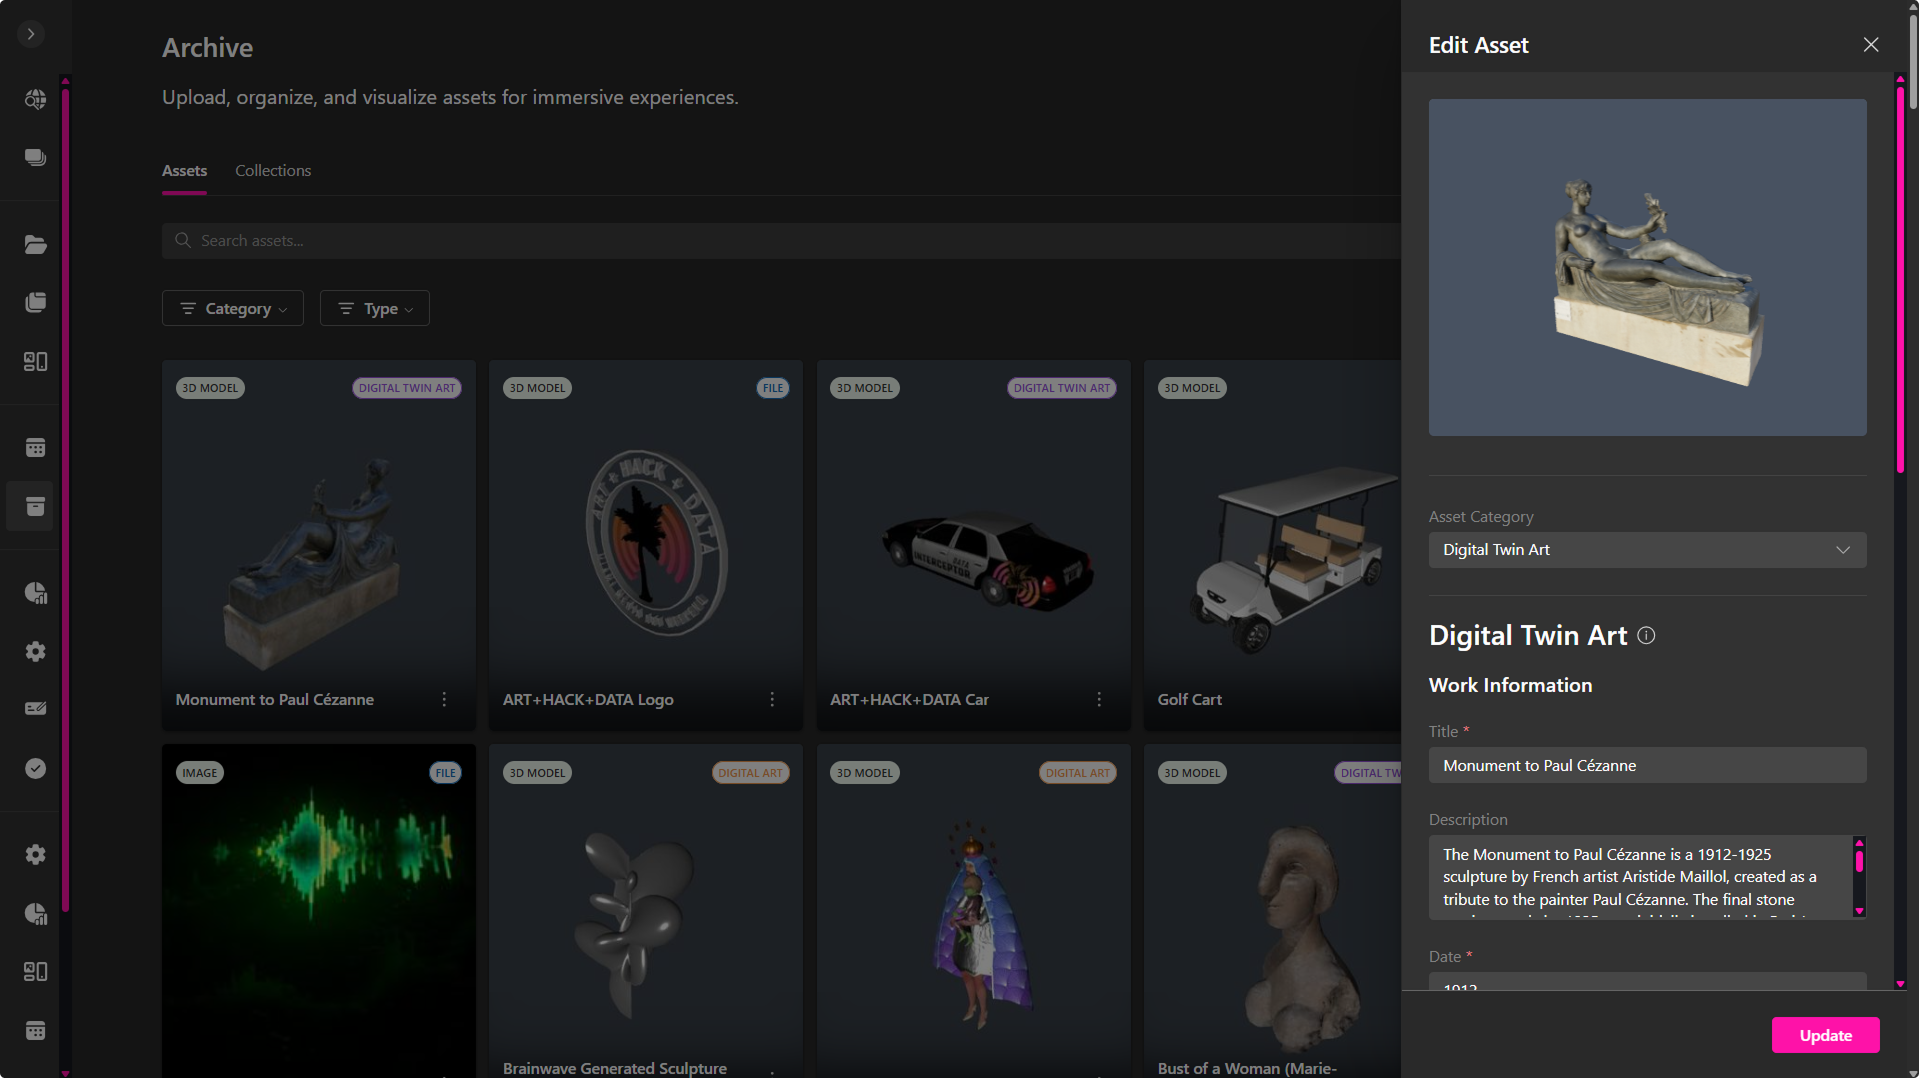
Uploading Digital Twin Art
The Digital Twin Art option is built for documenting and visualizing physical artworks as 3D digital twins. This includes measurement data and digitization methods.
- Click + Upload → Digital Twin Art.
- Drag & drop your model or select it from your files.
- Fill in Work Information:
- Title*
- Description
- Date*
- Dimensions (Height, Width, Depth in cm or in)
- Digitization Technique (e.g., 2D scanning, photogrammetry, LiDAR)
- Current State (e.g., in storage, on display, in restoration)
- Complete Artist Information: Name, Bio, and Statement.
- In Legal and Rights Information, provide:
- Creation declaration
- Optional AI creation indication
- Terms acceptance
- Click Upload to create the record.
Recommendation: Use this type for physical installations, sculptures, or mixed-media works that exist both digitally and tangibly.
Managing Assets in the Archive
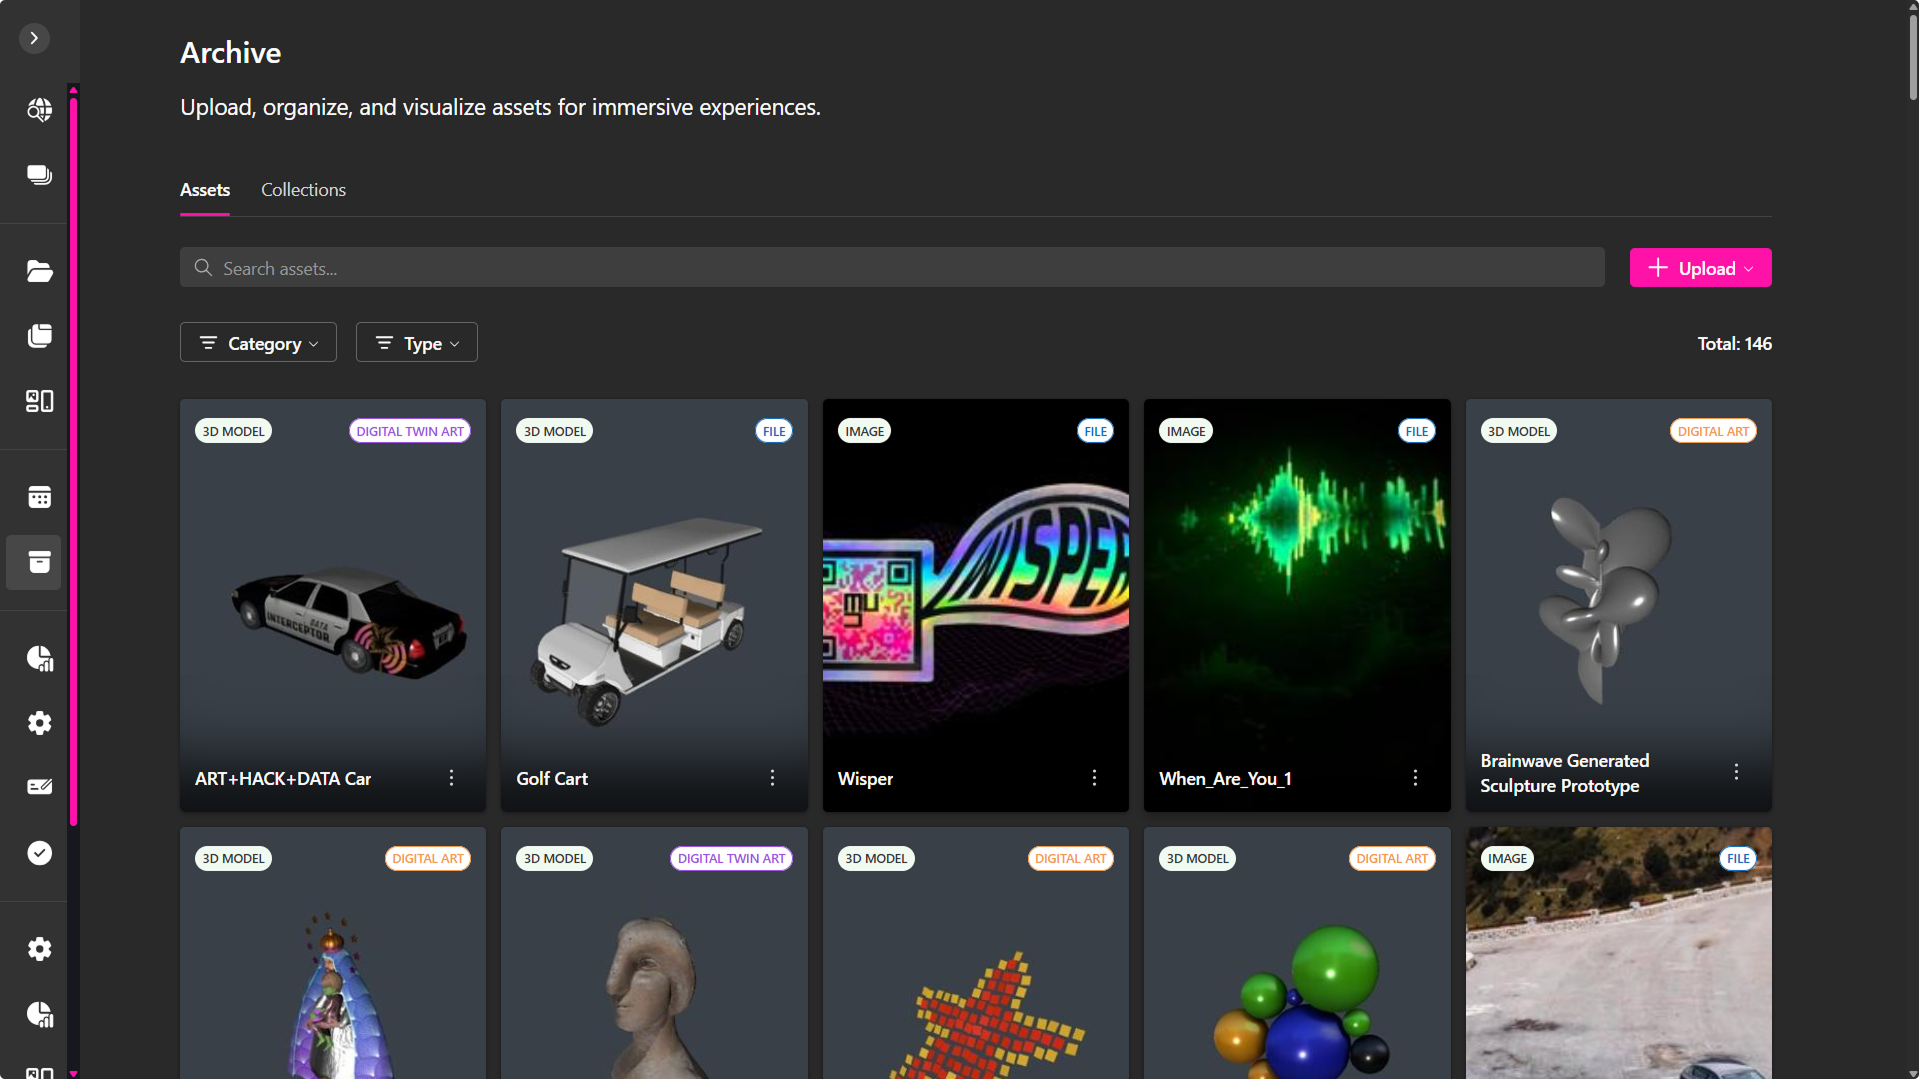
Once an asset has been uploaded, it appears as a thumbnail card inside the Archive → Assets view.
From each card, you can preview, edit, organize, and publish your content across XRHUB.
All uploaded items appear in a visual grid. Each asset card displays a preview, file type, and category tag.
You can:
- Filter by Category or Type (3D Models, Videos, Images, Audio, GIFs, PDFs, Digital Art, Digital Twin Art, etc).
- Use the search bar to quickly locate files.
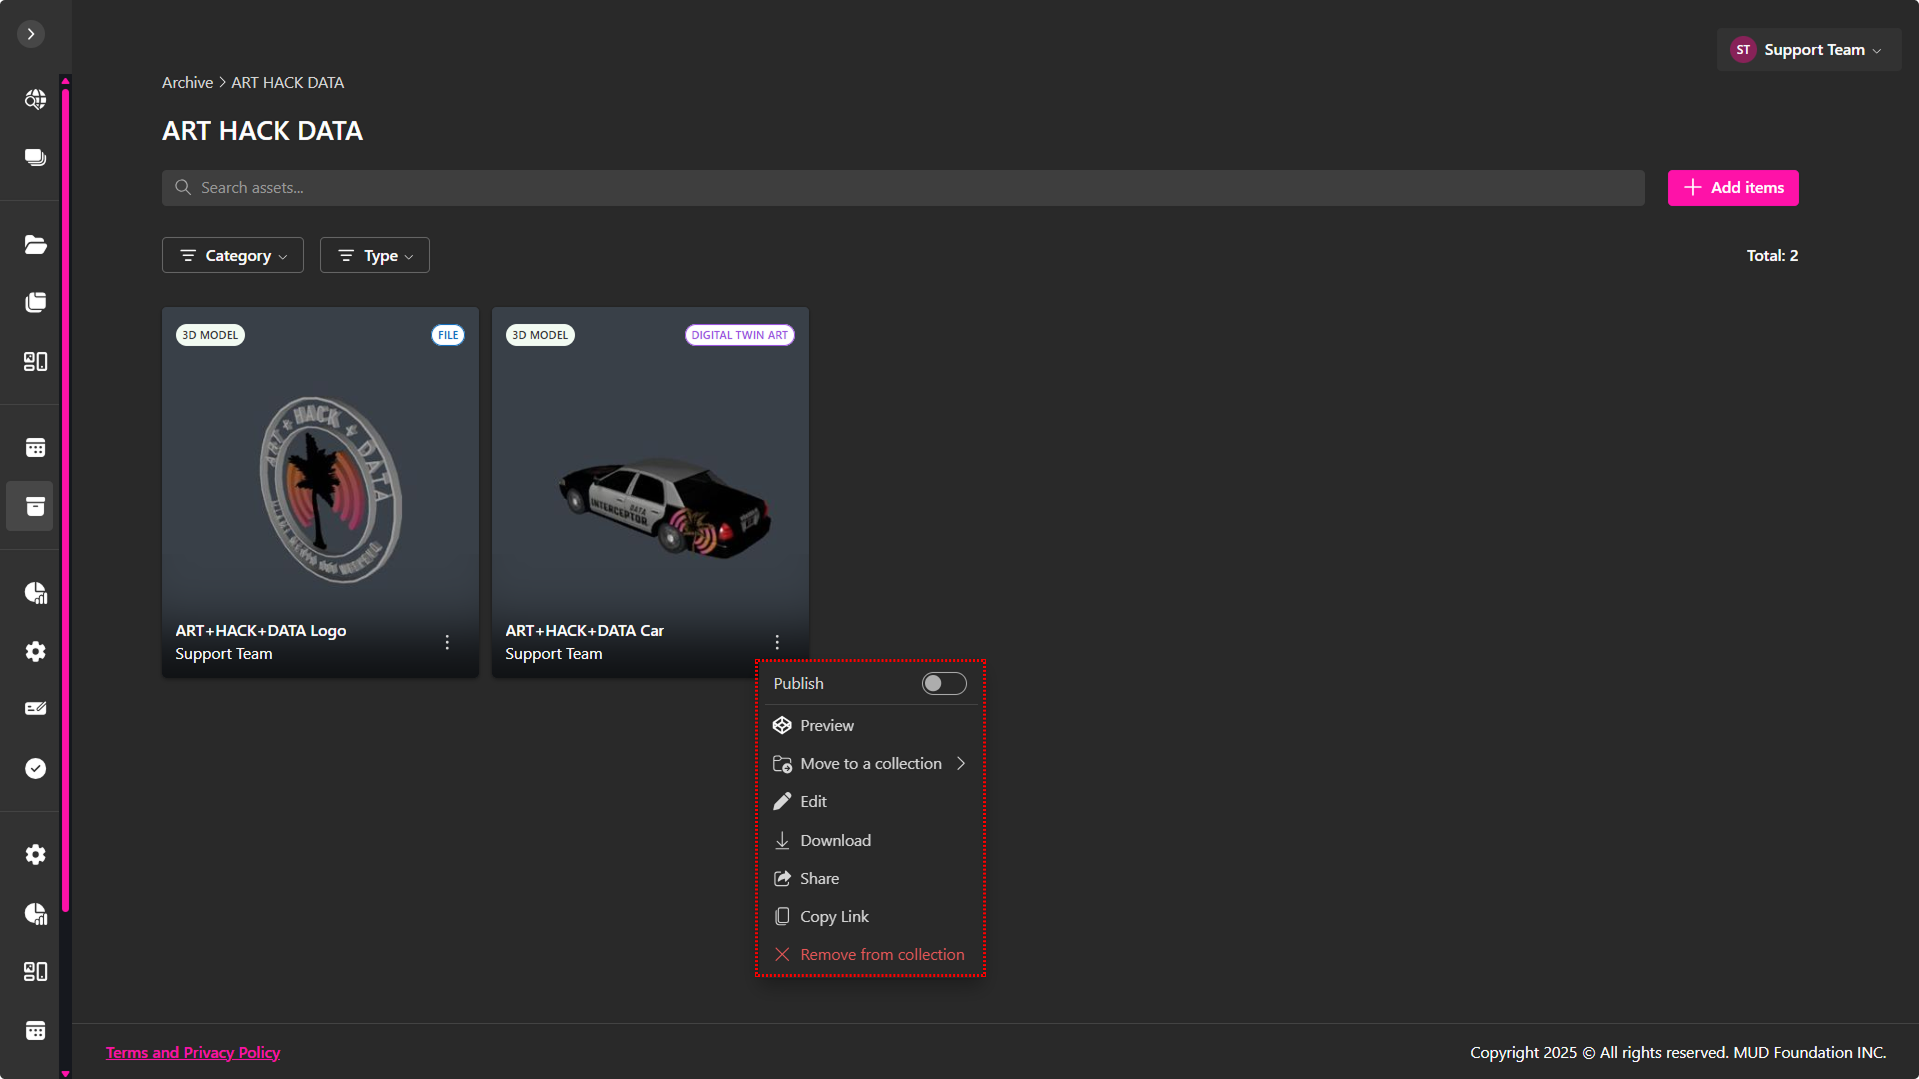
Managing Options
To access management controls, hover over an asset and click the ⋯ (More) icon.
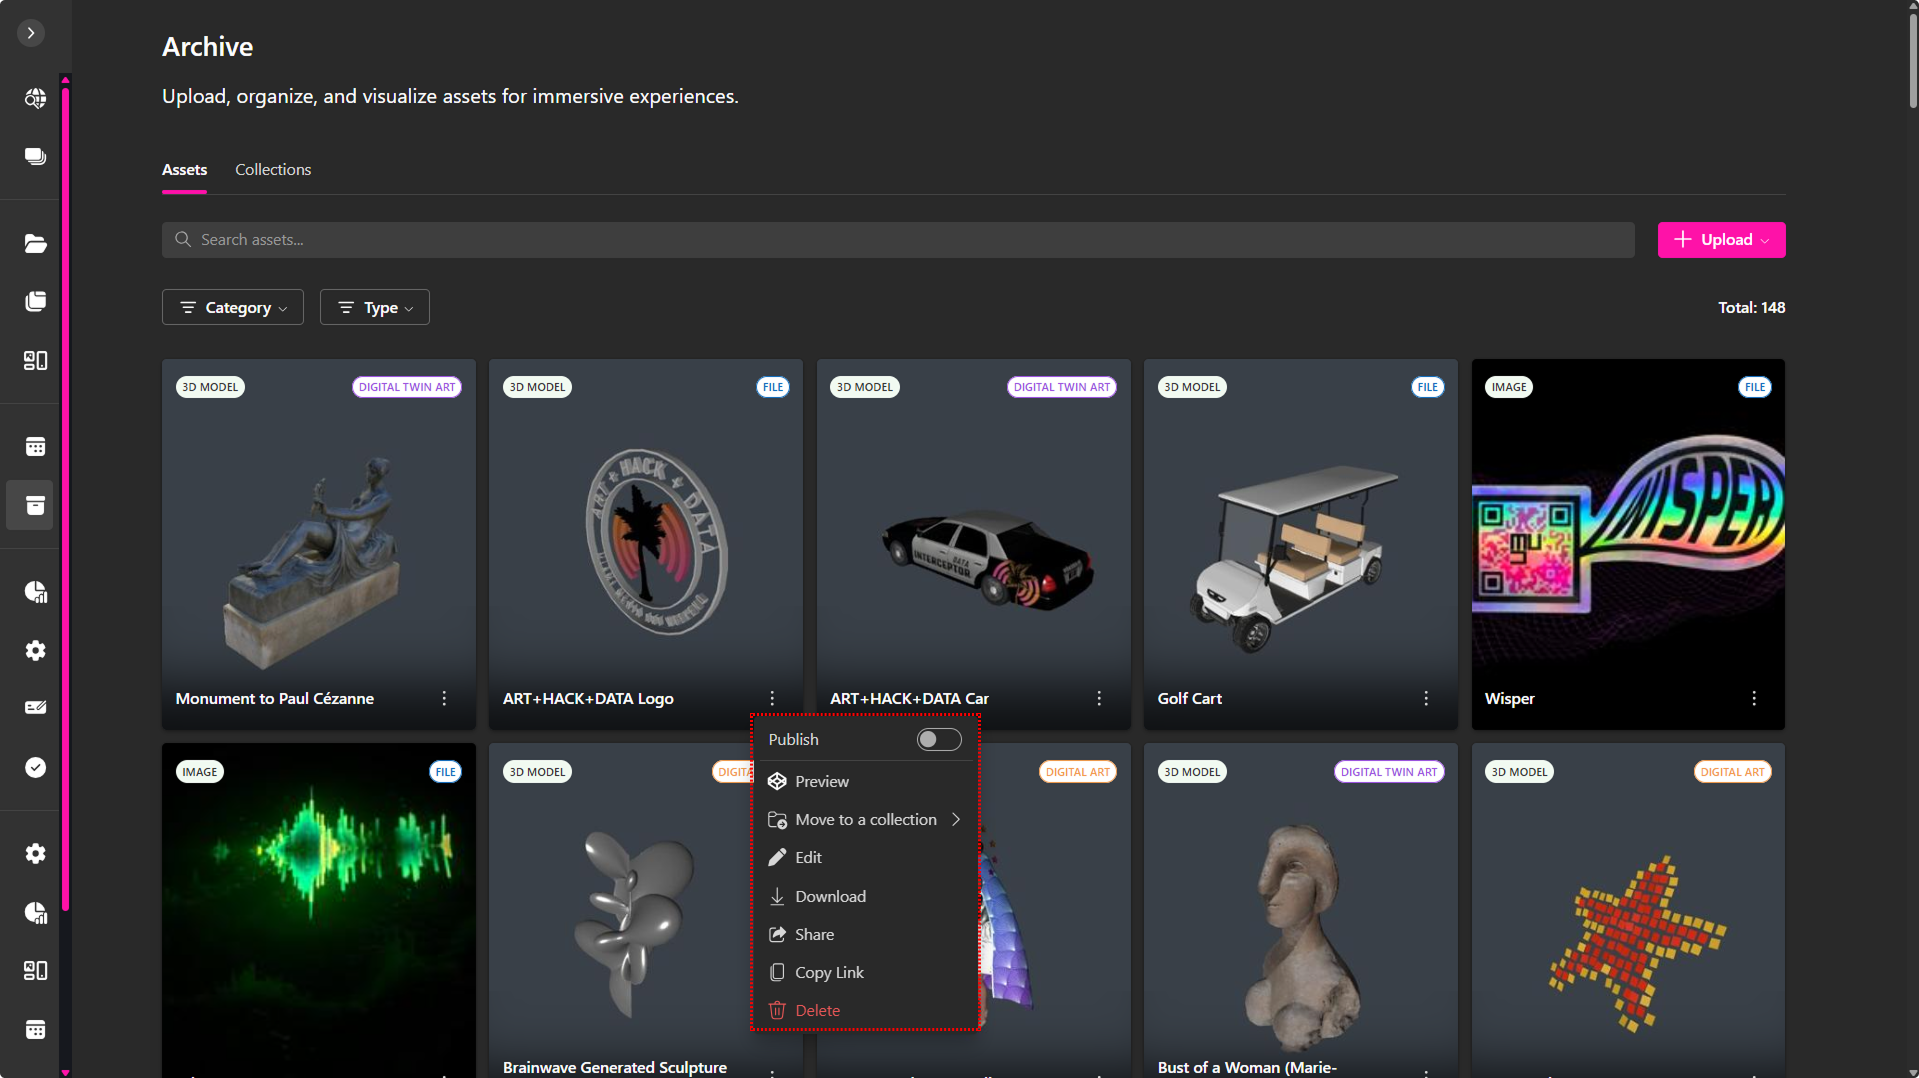
This opens the Asset Options Menu, which includes the following tools:
- Publish – Toggle visibility to make the asset publicly available to the XRHUB community, where it can be viewed, shared, and downloaded (if enabled). For detailed configuration steps, see Publishing an Asset.
- Preview – Open the file in the interactive viewer to explore its details, access metadata, and launch AR visualization.
- Move to a Collection – Assign the asset to a specific collection folder for better organization.
- Edit – Modify the file’s metadata (title, description, tags, dimensions, artist info, and rights data).
- Download – Export the asset file to your local system.
- Share – Open the sharing options panel to create a direct viewing link.
- Copy Link – Instantly copy the asset’s URL to your clipboard.
- Delete – Permanently remove the asset from your Archive.
🔹 Note: Deleting an asset cannot be undone. Always ensure your files are backed up before removal.
Previewing an Asset
Selecting Preview opens a dedicated viewing interface where you can explore the asset in full detail.
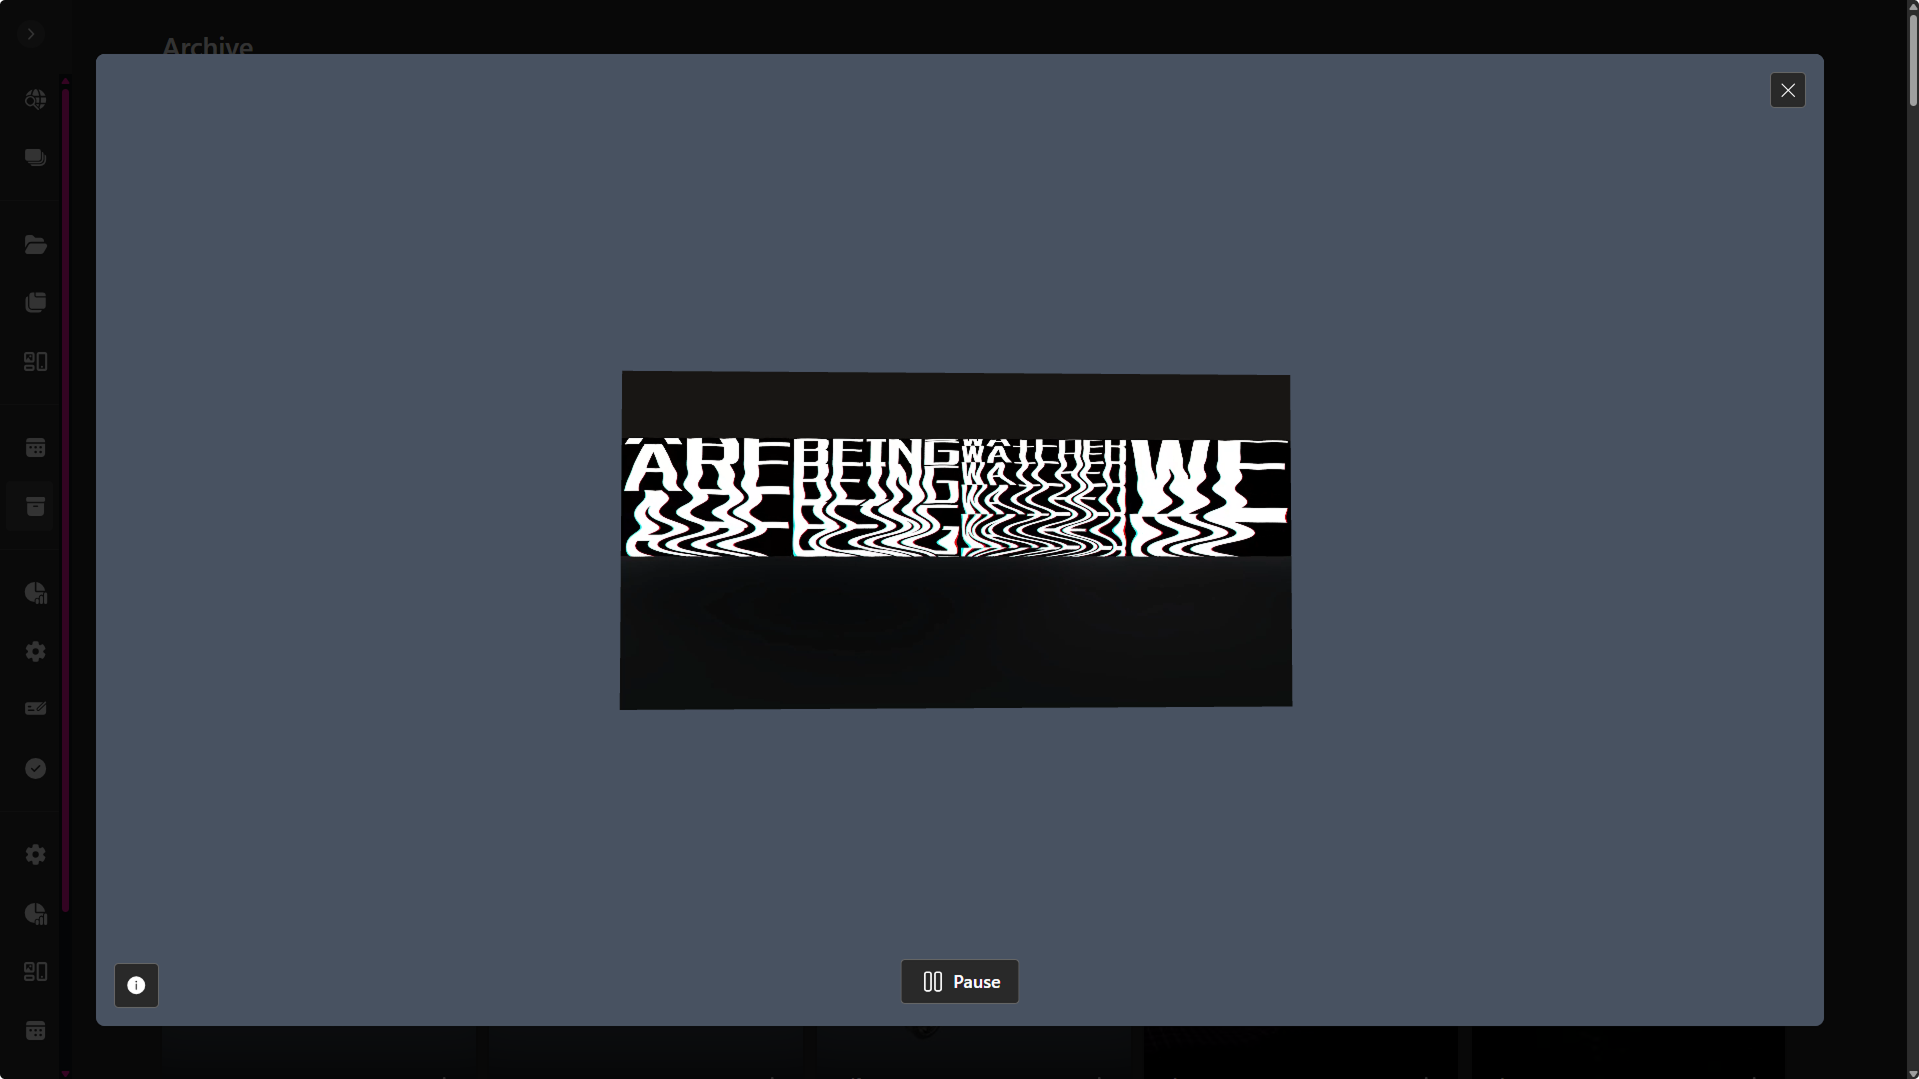
While in preview mode, you can play videos or animations directly, orbit, pan, or zoom 3D models for closer inspection, launch AR view using the icon in the bottom-right corner on compatible devices (such as phones or VR headsets), or open the asset’s information panel by clicking the Info button in the lower-left corner.
The preview interface includes:
- An Info button in the lower-left corner that opens the Metadata Sidebar (displayed on the right), providing all stored details and attributes for the selected work.
- A centered visual viewer with interactive playback and navigation controls that adapt to the asset type.
- A bottom-right AR/VR toolbar that allows you to view the asset in Augmented or Virtual Reality. (Available on compatible devices.)
Metadata Sidebar
When previewing an asset, the Metadata Panel appears on the right-hand side of the screen.
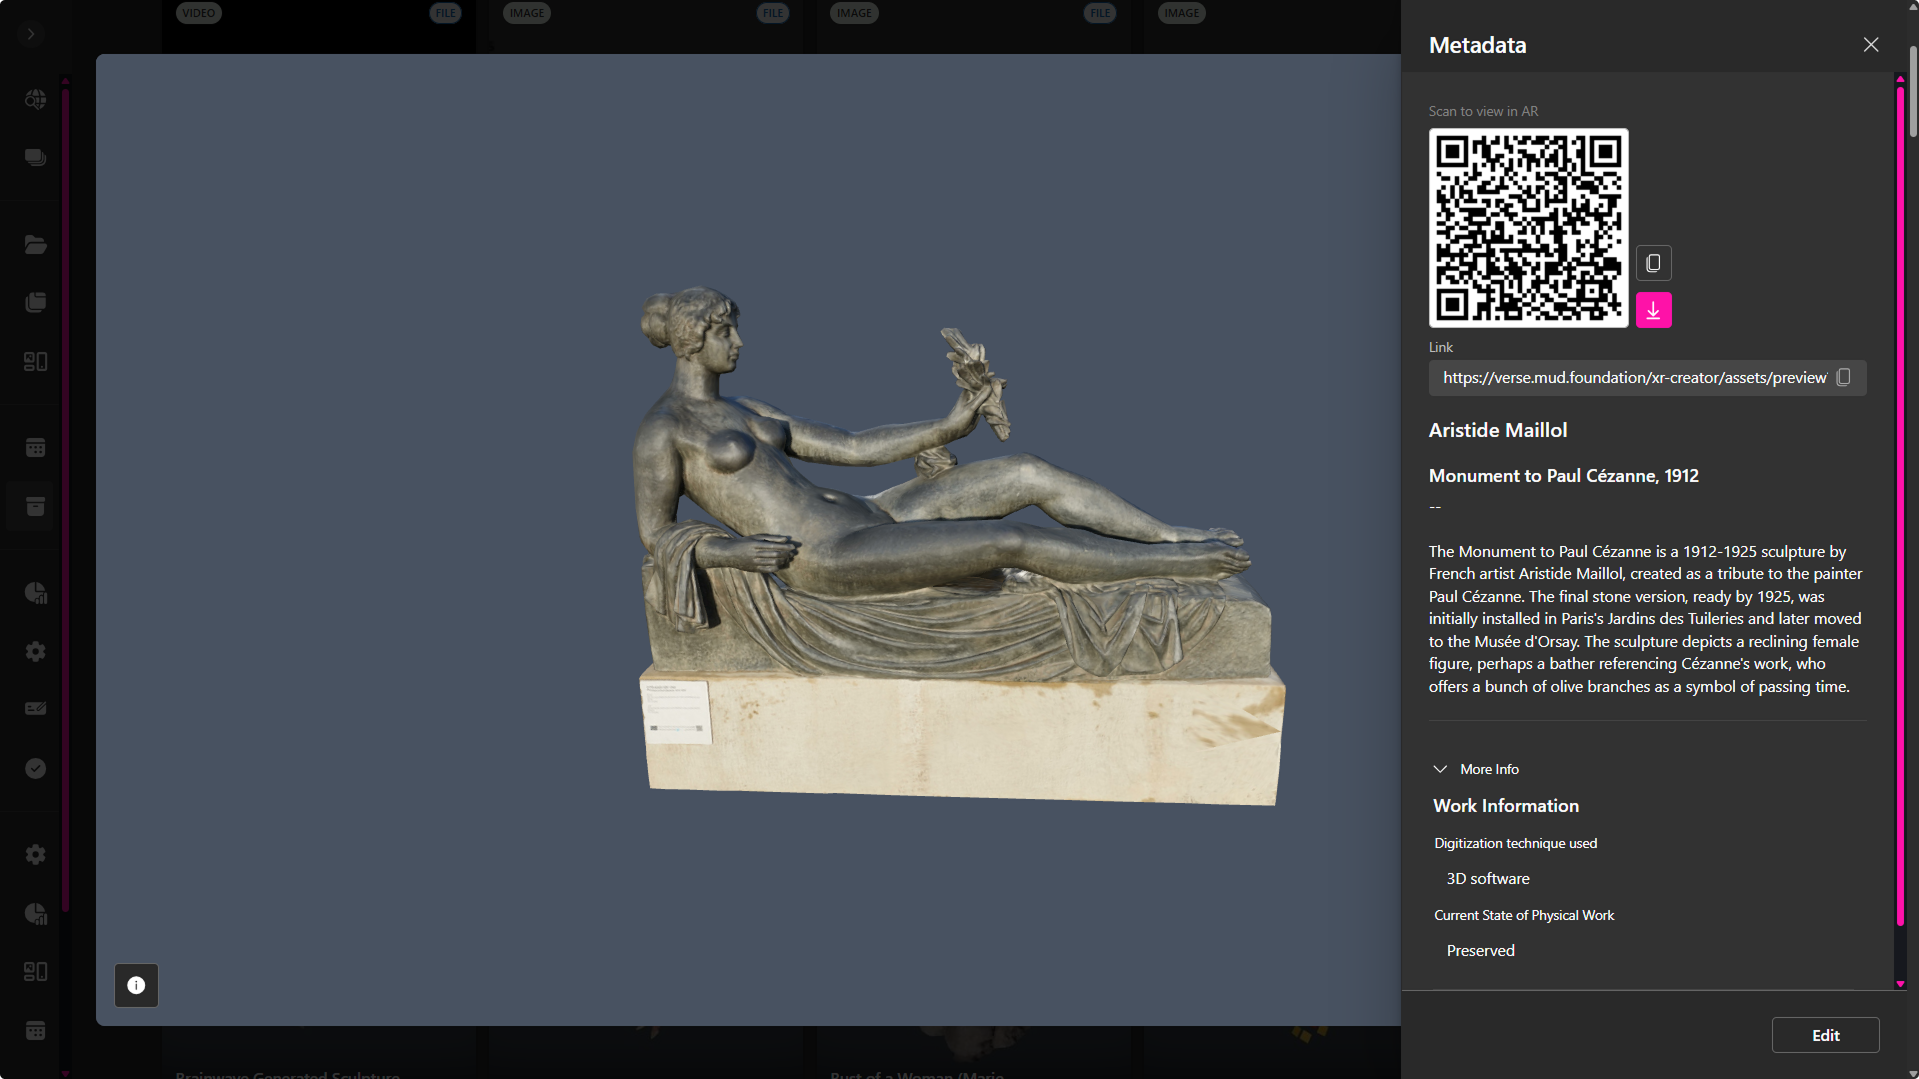
Depending on the type of asset, it can contain:
General Information
- QR Code: Scan to open in AR.
- Share Link: Copyable URL for quick access.
- Asset Title and Artist: Displayed prominently at the top.
- Location or Origin: Optional reference (e.g., Metaverse Scene, Gallery, or Archive Source).
Work Information
Includes descriptive and technical fields such as:
- Digitization Technique (e.g., 3D Scan, Photogrammetry)
- Dimensions (Height, Width, Depth for Digital Twin works)
- Creation Date
- Medium or File Type
Artist Information
Shows creator data, including:
- Name
- Biography
- Artist Statement
- Optional notes on conceptual framework or project intent.
Legal and Rights Information
Lists intellectual property and usage details:
- Originality Declaration
- AI Creation Indicator
- Terms Acceptance Record
🔹 Note: You can always update this information at any time by clicking the Edit button at the bottom of the metadata panel.
Organizing with Collections
Collections are custom folders that help you categorize and manage assets.
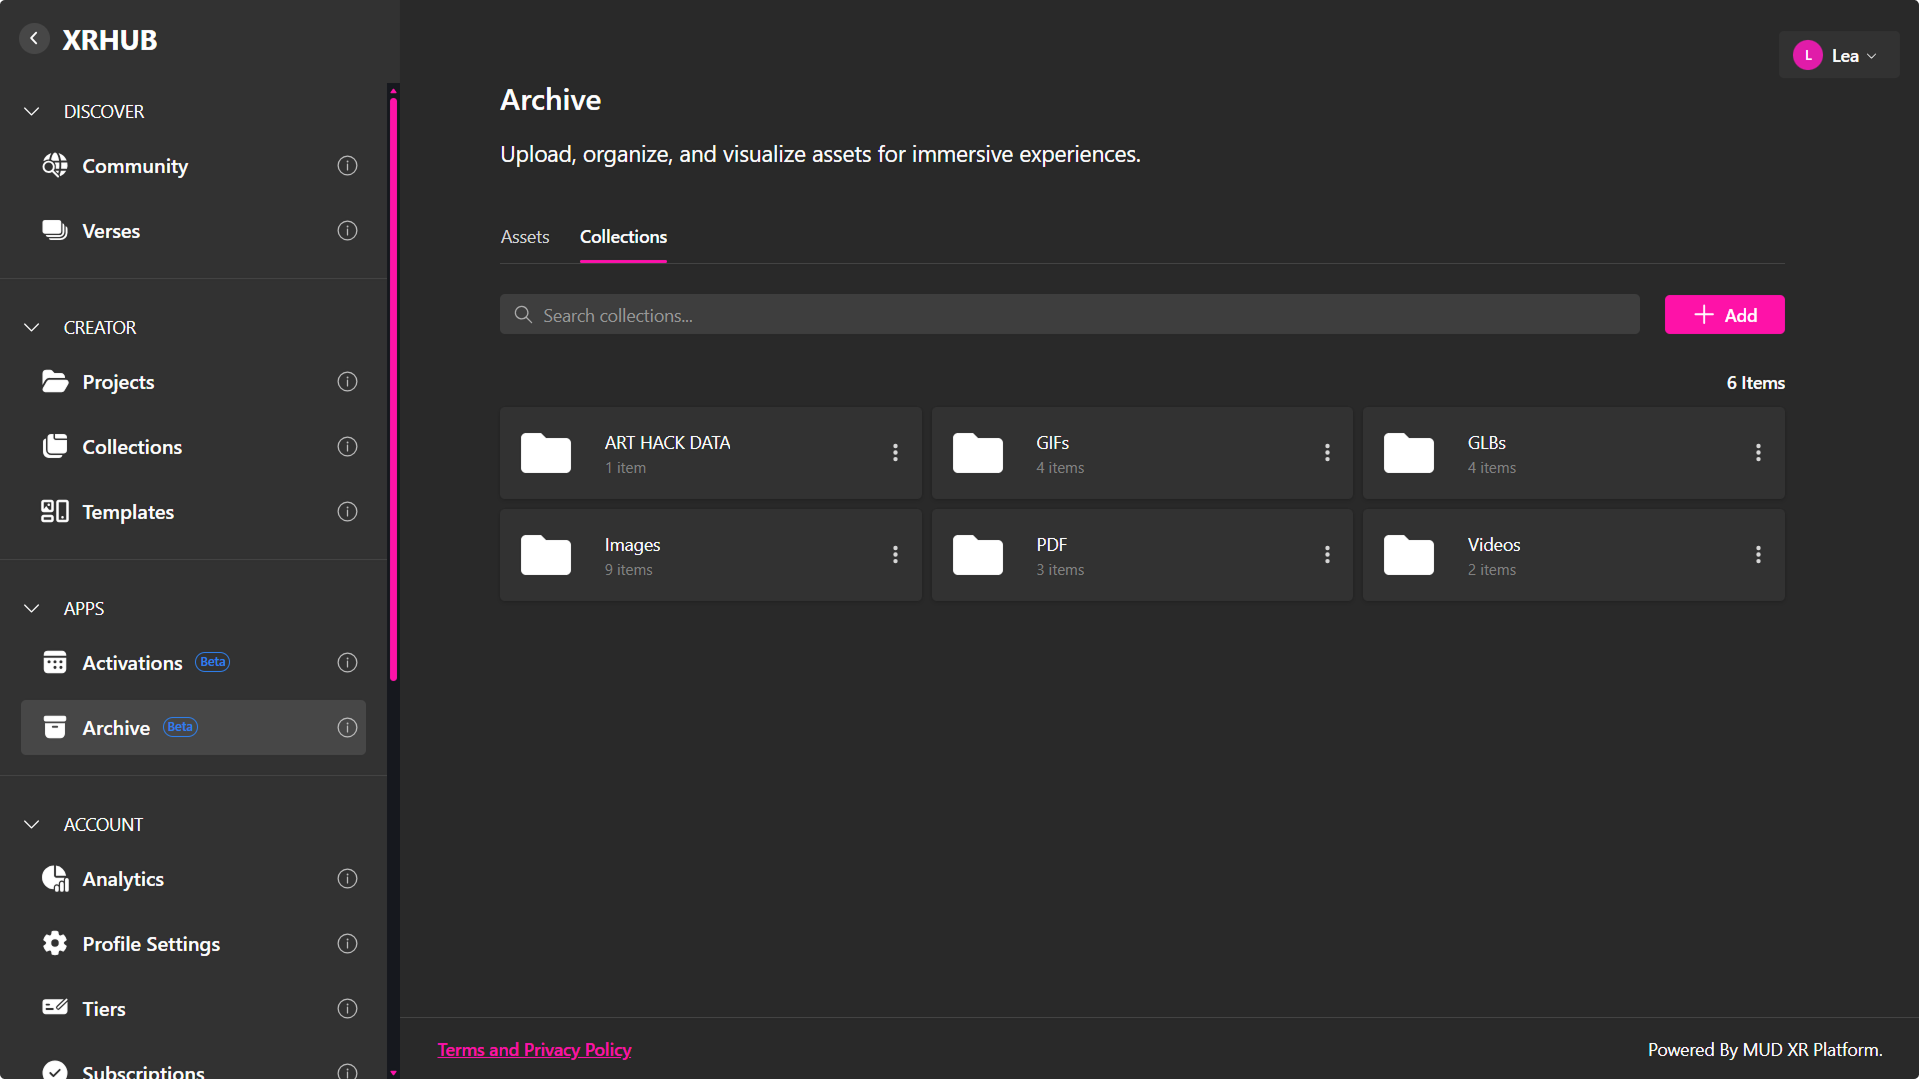
To create a new Collection:
- Open the Collections tab at the top of the Archive view.
- Click + Add.
- Enter a Name and Description.
- Click Create to save.
Once created, you can move assets into Collections or remove them as needed without deleting the original file.
🔹 Recommendation: Organize Collections by theme, media type, or project phase (e.g., 3D Assets, Client Work, Installations).
Publishing Assets and Collections
You can publish both individual assets and entire collections to the Community Archive, making your work discoverable to other XRHUB users.
Published items appear under Discover → Community → Archive, where they can be viewed, shared, and downloaded (if enabled).
Only users with Publishing permissions can make their assets public. If you believe you should have this access, please contact your administrator or reach out through the Contact page.
Publishing an Asset
- From the Archive → Assets view, click the ⋯ (More) menu on your asset card.
- Toggle Publish to begin the publishing flow.
- Confirm the publishing action when prompted.
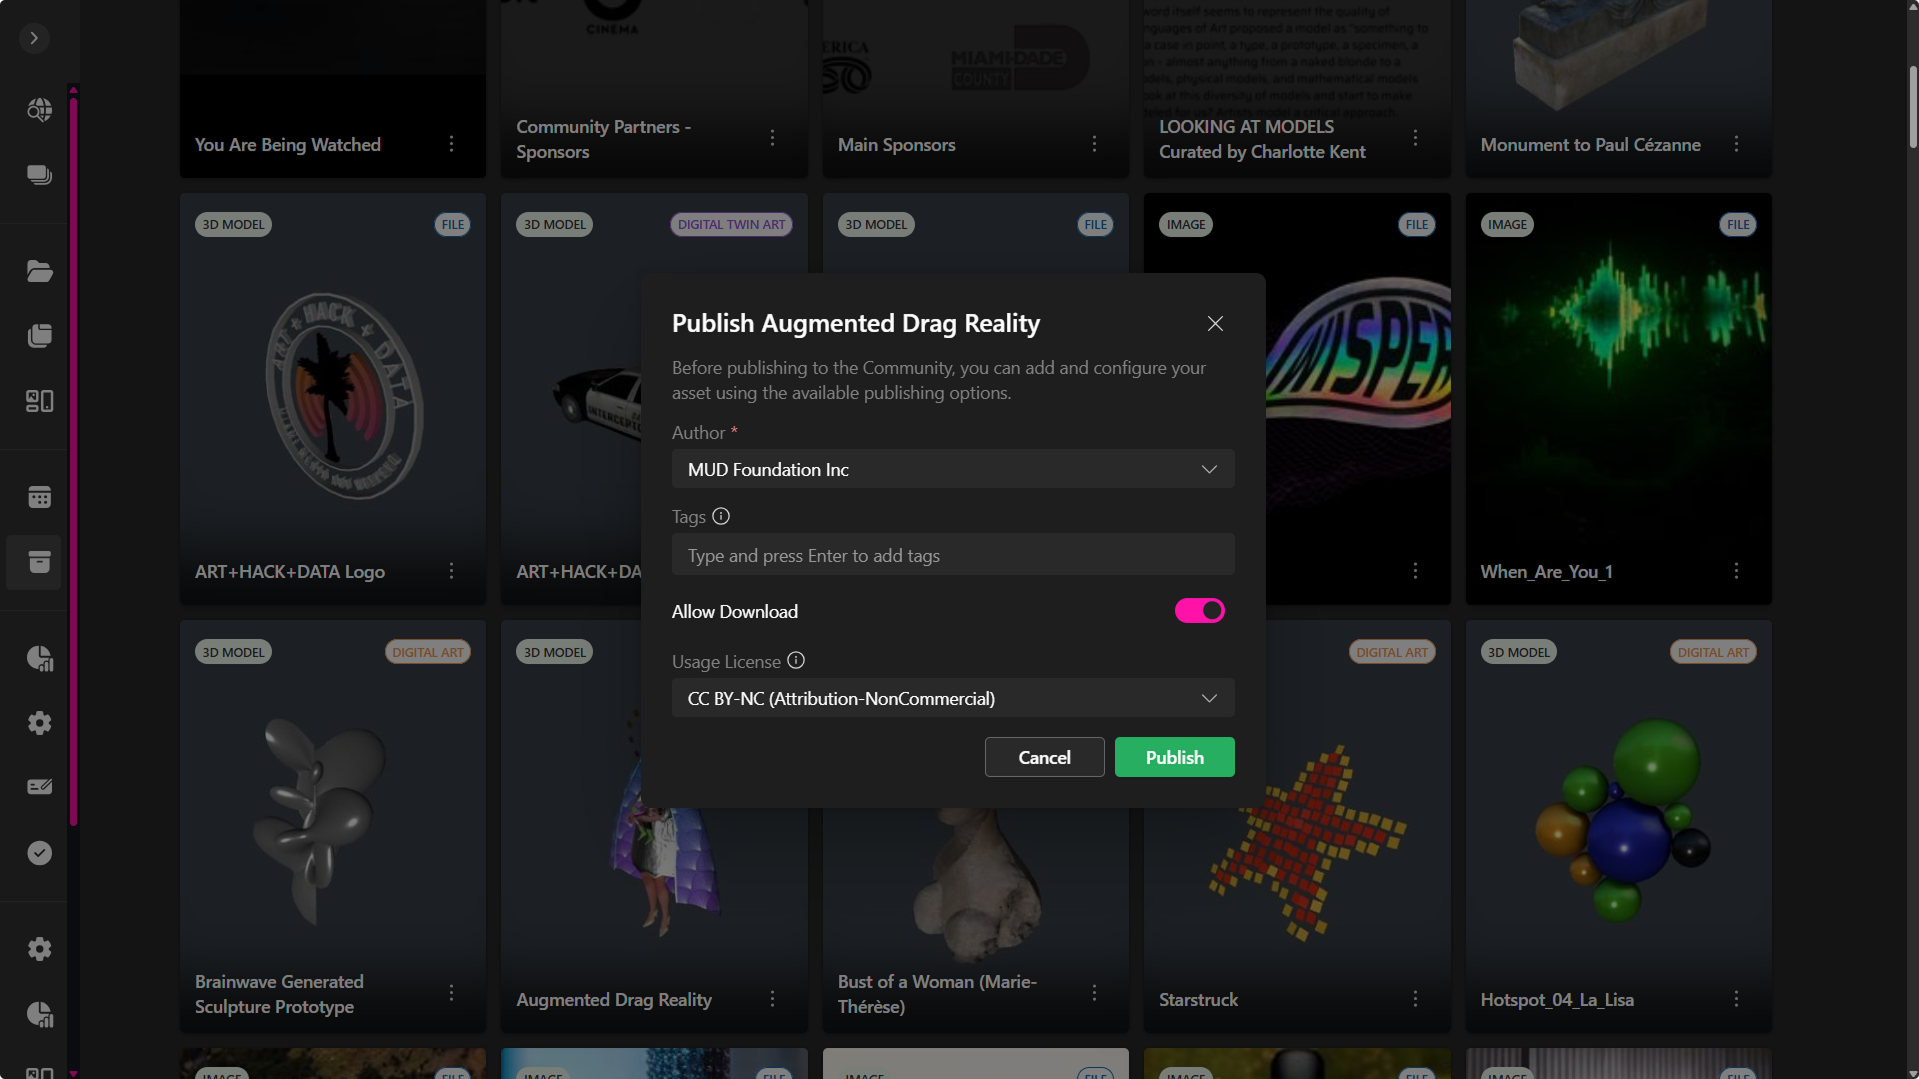
- In the Publish Asset window, configure the publishing details:
- Author – Select or confirm the creator name associated with the asset. (Required)
- Tags – Add relevant keywords to make your work easier to find. (Type and press Enter to add multiple tags.)
- Allow Download – Enable this option to let other users download your file.
- Usage License – Choose the license type defining how others may use your work:
- CC BY (Attribution) – Allows reuse and remixing with credit.
- CC BY-NC (Attribution–NonCommercial) – Allows non-commercial reuse with credit.
- CC0 (Public Domain) – No restrictions; fully open.
- All Rights Reserved – No use or modification without permission.
- Once all fields are complete, click Publish.
Your asset now appears in the Community → Archive tab, visible to all users.
Publishing a Collection
Entire collections can also be shared publicly, allowing you to showcase multiple assets as a unified group.
If a Collection is published, it appears as a grouped card containing a preview grid of its assets.
Inside, users can browse individual works, open them in preview mode, or acquire them (if downloads are permitted).
- Open the Archive → Collections tab.
- Click the ⋯ (More) menu on the desired collection.
- Toggle Publish to enable publishing.
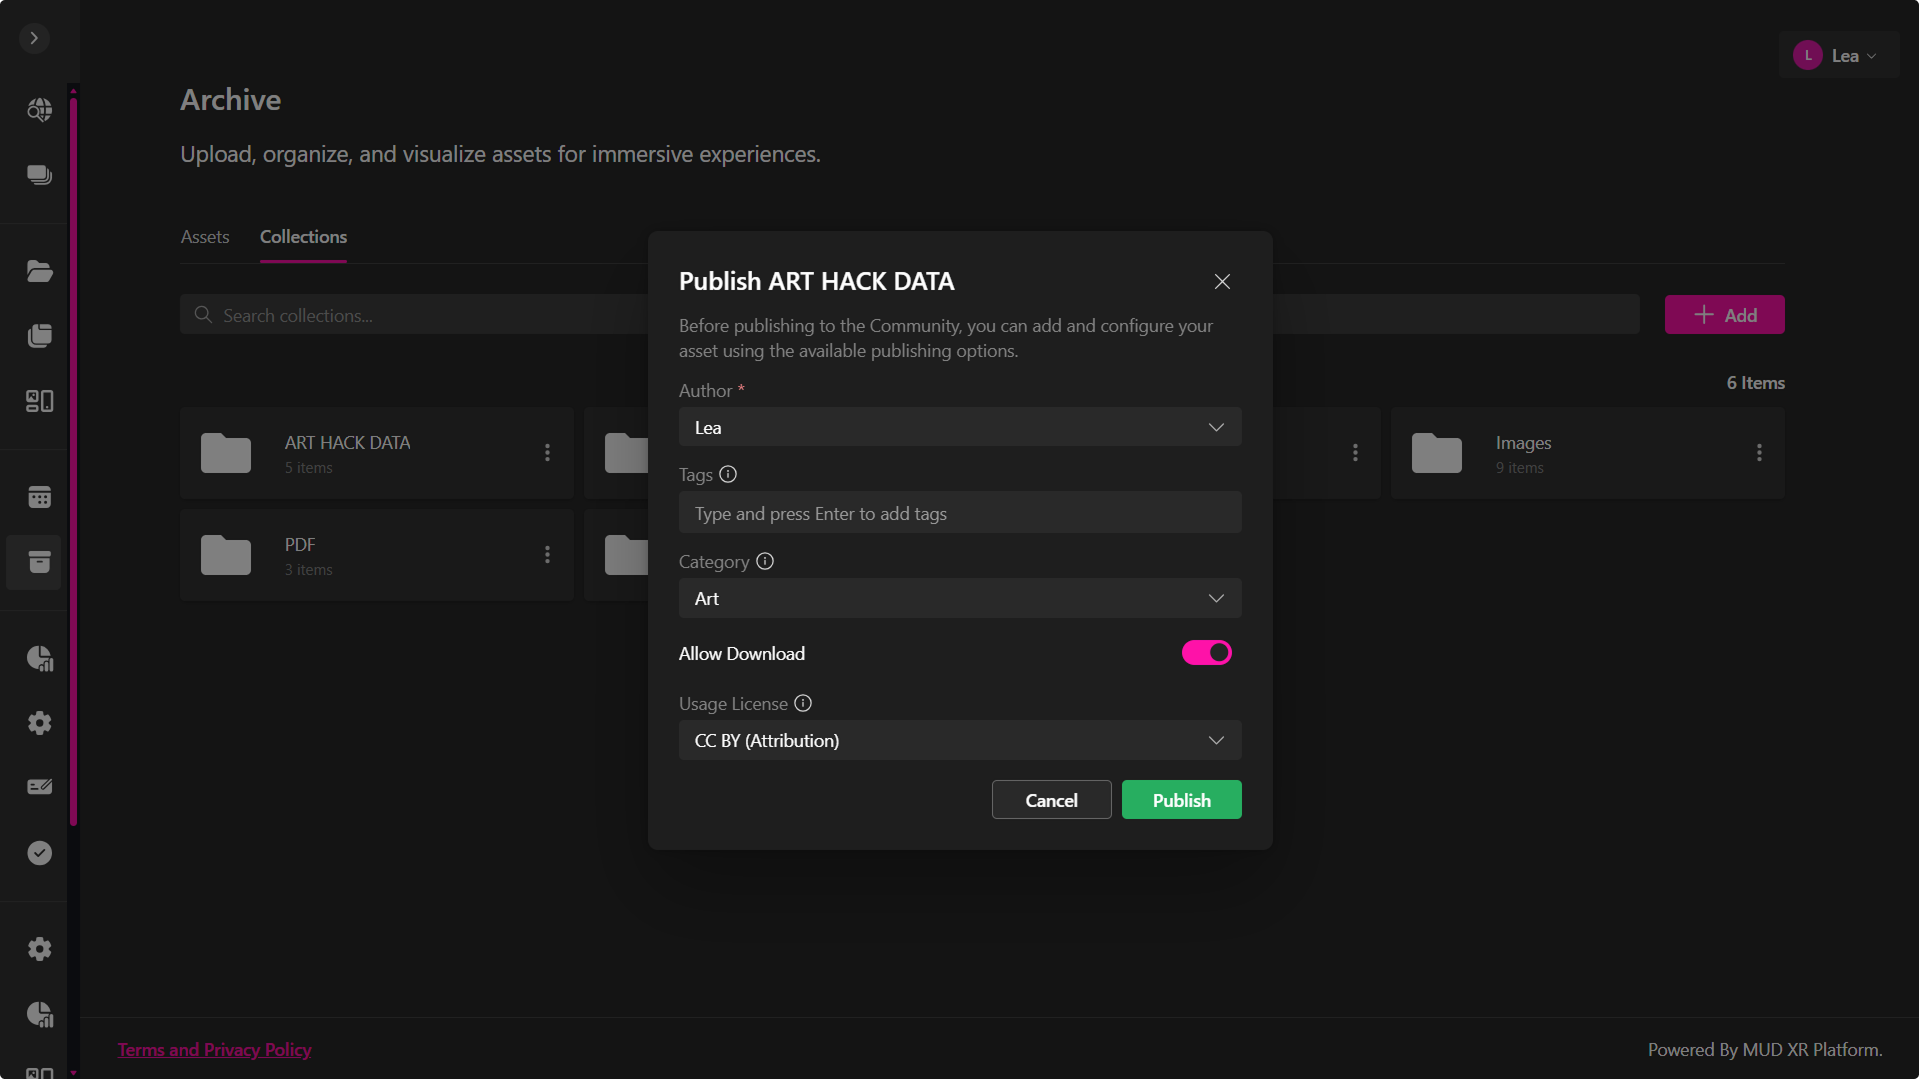
- Configure the publishing options in the Publish Collection window:
- Author – Select or confirm the collection’s author. (Required)
- Tags – Add search keywords to describe the theme or contents.
- Allow Download – Enable if you want users to download assets contained in the collection.
- Usage License – Choose one of the Creative Commons or copyright options (same as for assets).
- Click Publish to confirm.
Published collections appear in the Community Archive, showing a preview grid of contained assets.
Managing Published Items
To unpublish an asset or collection:
- Return to the Archive app.
- Open the ⋯ (More) menu on the item.
- Toggle Publish off.
This immediately removes the item from public visibility in the Community Archive, while keeping it private in your workspace.
Viewing Published Works
Once published, your assets and collections appear under Discover → Community → Archive.

If Downloads Are Disabled
Users can:
- Preview – Open the asset in full-screen view to inspect it in detail.
- Share – Copy or send the public link for others to view the work.
If Downloads Are Enabled
The dropdown adds two more actions:
- Download – Save the asset file locally.
- Acquire – Add the asset to your personal Archive for future use or remixing.
Each published card displays the author name, thumbnail preview, and — if applicable — the asset count for collections.
Integration Across XRHUB
Assets stored in the Archive can be accessed from:
- XR Editor – Import models or media into active projects.
- Verses – Use archived items inside your published immersive spaces.
Archives are linked to workspaces. If you belong to more than one workspace, you can store different assets in different spaces. Keep in mind that some assets may appear with different permissions depending on your access level.
If you believe you should have access to specific assets, please contact a workspace administrator or reach out via the Contact page.