Managing Verse Settings & Permissions
Verses are highly customizable spaces where users can interact, create, and explore.
This guide covers how to manage Verse settings, control permissions, moderate experiences, and enable advanced features.
Moderation
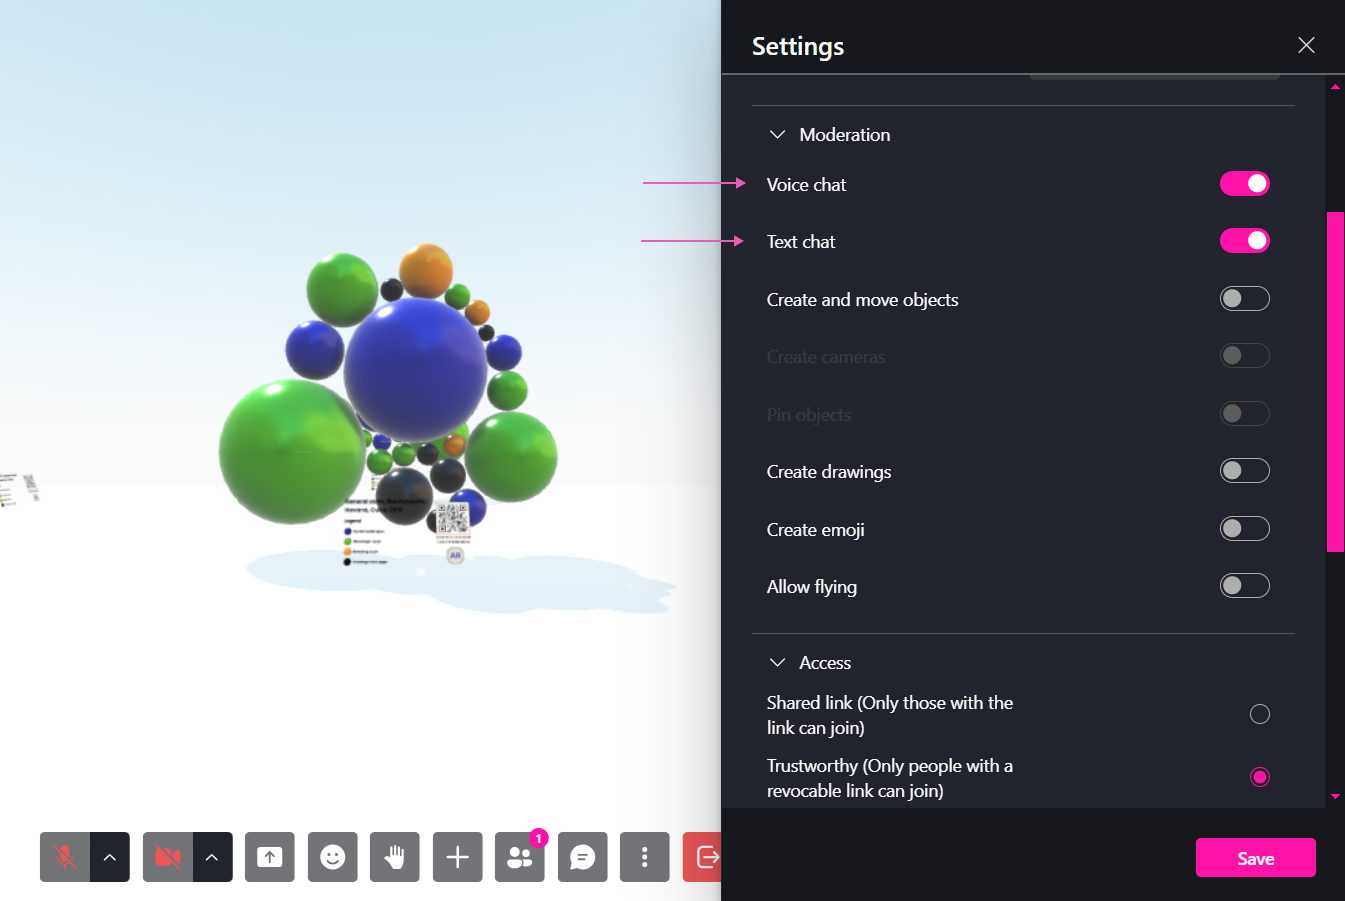
Voice & Chat Restrictions
To maintain a focused experience, moderators can limit communication.
| Option | Effect |
|---|---|
| Mute Chat | Only moderators can send messages. |
| Mute Voice | Only moderators can speak. |
🔹 Pro Tip: Enable voice restrictions for lectures, presentations, or guided tours.
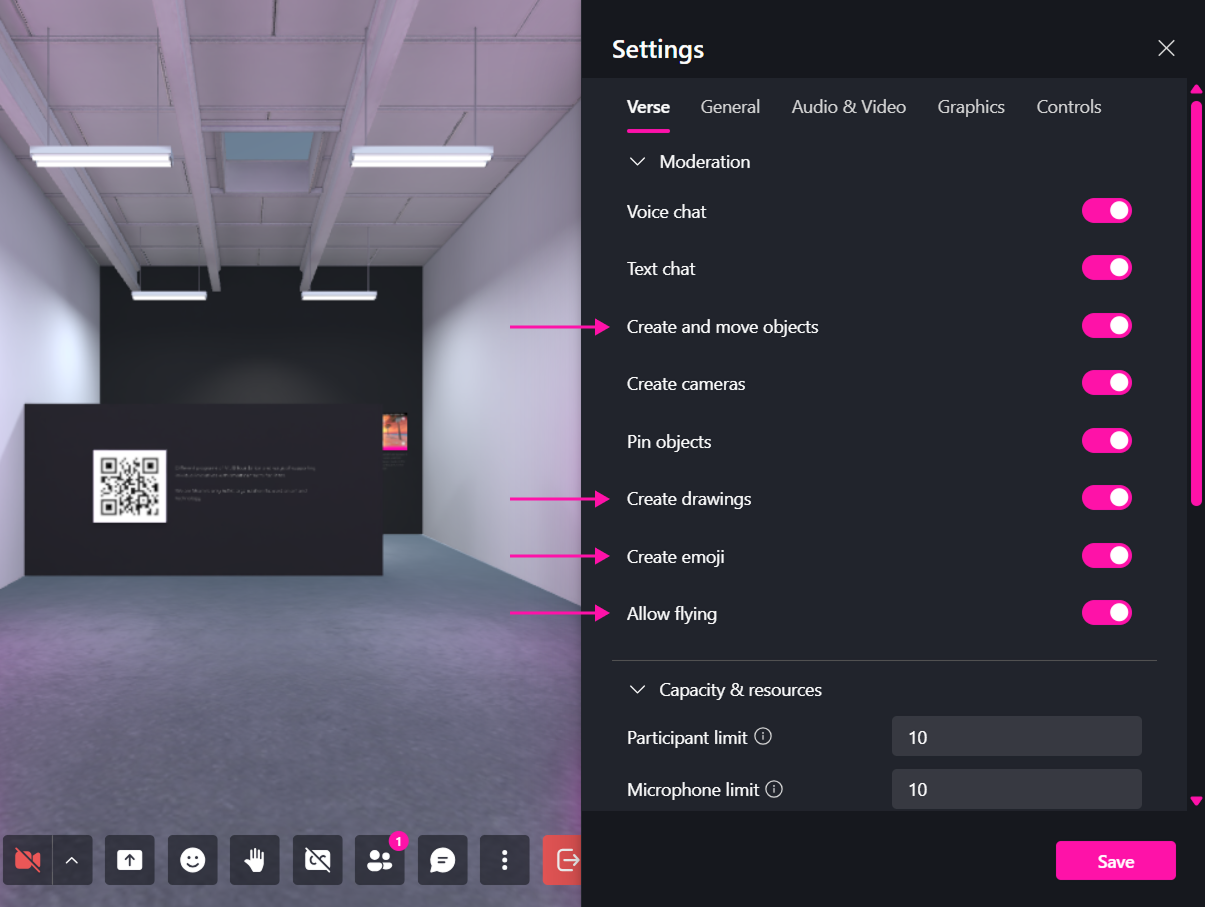
Capabilities
Moderators can adjust participant capabilities via Settings > Verse Permissions.
| Permission | Function |
|---|---|
| Object Creation & Movement | Allow/restrict users from placing and moving objects. |
| Camera Creation | Enable/disable users from spawning cameras. |
| Pinning Content | Let users pin objects so they persist. |
| Drawing & Emojis | Enable/disable 3D drawing tools and emoji spawning. |
| Flying Mode | Allow/restrict users from flying. |
🔹 Pro Tip: Adjust permissions before a public event to ensure a controlled environment.
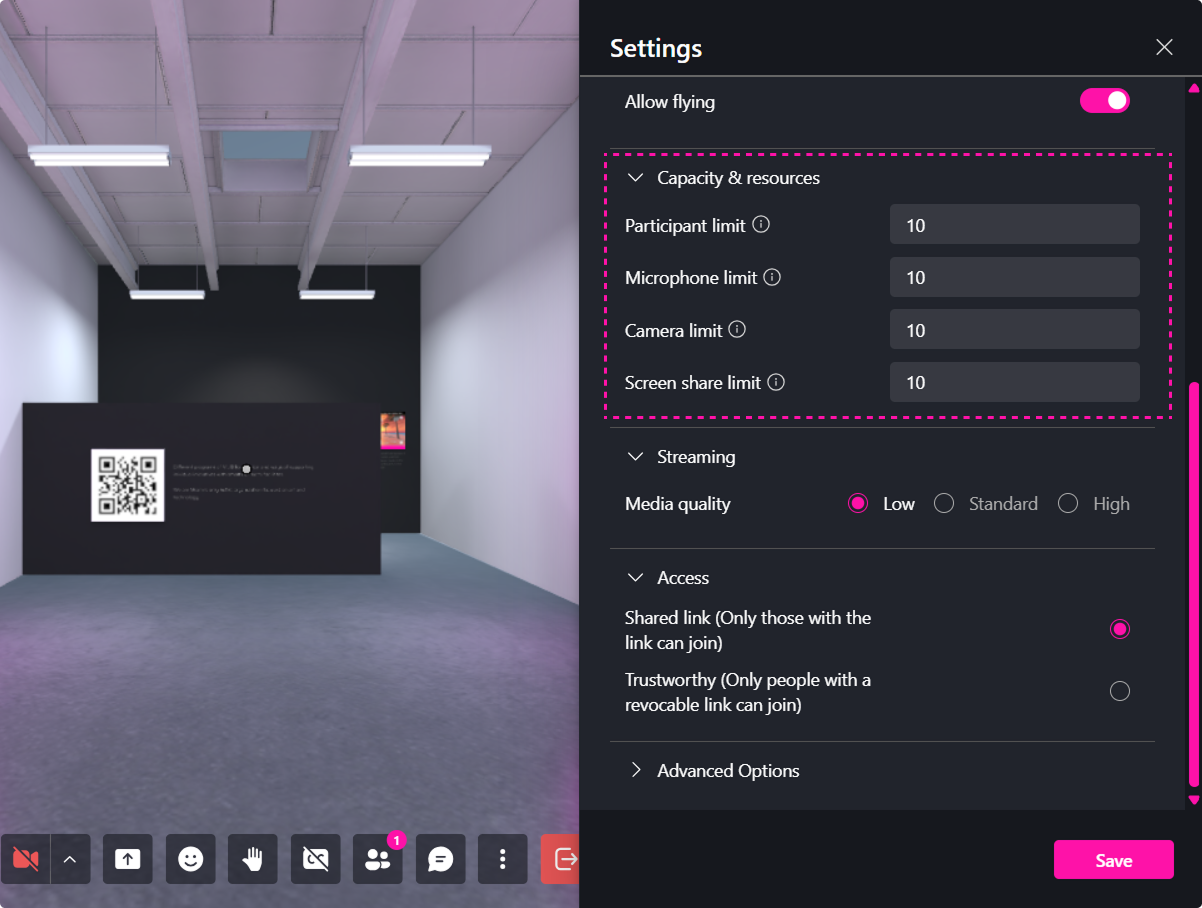
Capacity & Resources
Control how many participants can actively use voice, video, and screen sharing features within a Verse.
| Setting | Function |
|---|---|
| Participant Limit | Sets the maximum number of users who can join the Verse simultaneously. The maximum available value depends on your subscription plan. |
| Microphone Limit | Limits how many participants can have their microphones enabled at the same time. Available limits depend on your subscription plan. |
| Camera Limit | Limits how many participants can have their cameras enabled simultaneously. Available limits depend on your subscription plan. |
| Screen Share Limit | Limits how many participants can share their screen at the same time. Available limits depend on your subscription plan. |
🎯 Pro Tip: Reduce microphone, camera, or screen share limits during large events to improve performance and reduce bandwidth usage.
Streaming
Adjust the quality of media streams within the Verse.
| Setting | Function |
|---|---|
| Low | Prioritizes performance and lower bandwidth consumption. Recommended for users with limited internet connectivity. |
| Standard | Provides a balanced experience between visual quality and performance. |
| High | Delivers the best audio and video quality but requires more bandwidth and system resources. |
🎯 Pro Tip: Use Standard quality for most meetings and events. Switch to High only when presentation quality is a priority and participants have stable internet connections.
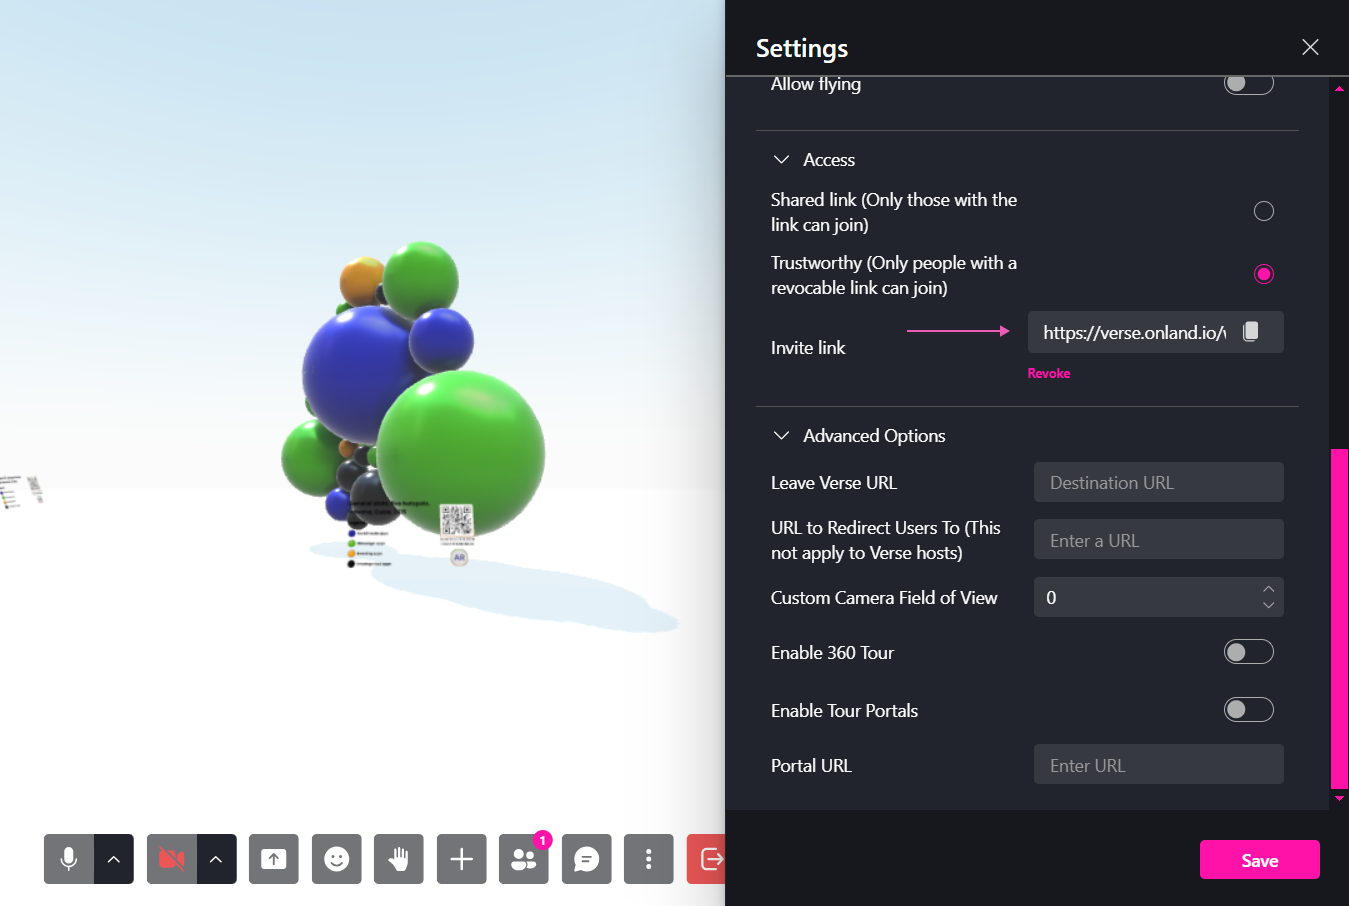
Verse Access & Privacy
By default, Verses are set to Shared Link mode, but you can restrict access using Trustworthy mode.
| Mode | Function |
|---|---|
| Shared Link | Anyone with the link can join. |
| Trustworthy | Only users with a specific invite link generated by enabling this option can enter. |
🔹 Pro Tip: If you switch back to Shared Link Mode, previously revoked users may regain access.
Advanced Settings
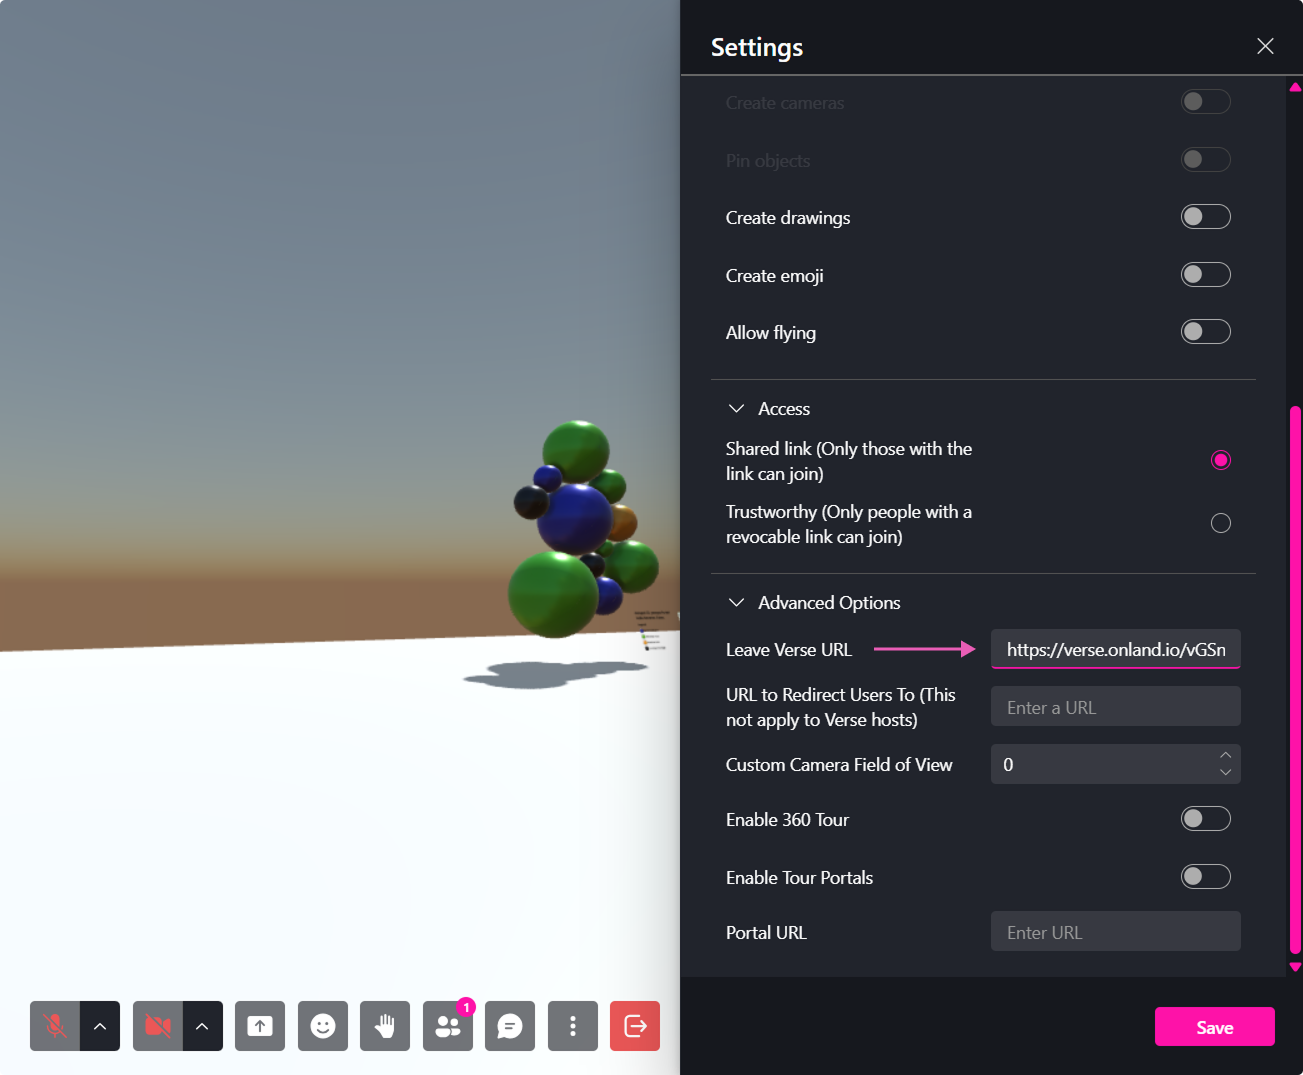
Change Redirection for the Leave Button
Automatically redirect users to a different URL upon leaving the Verse via the Leave button.
- Go to Settings > Leave Verse URL.
- Paste the destination link.
- Click Save.
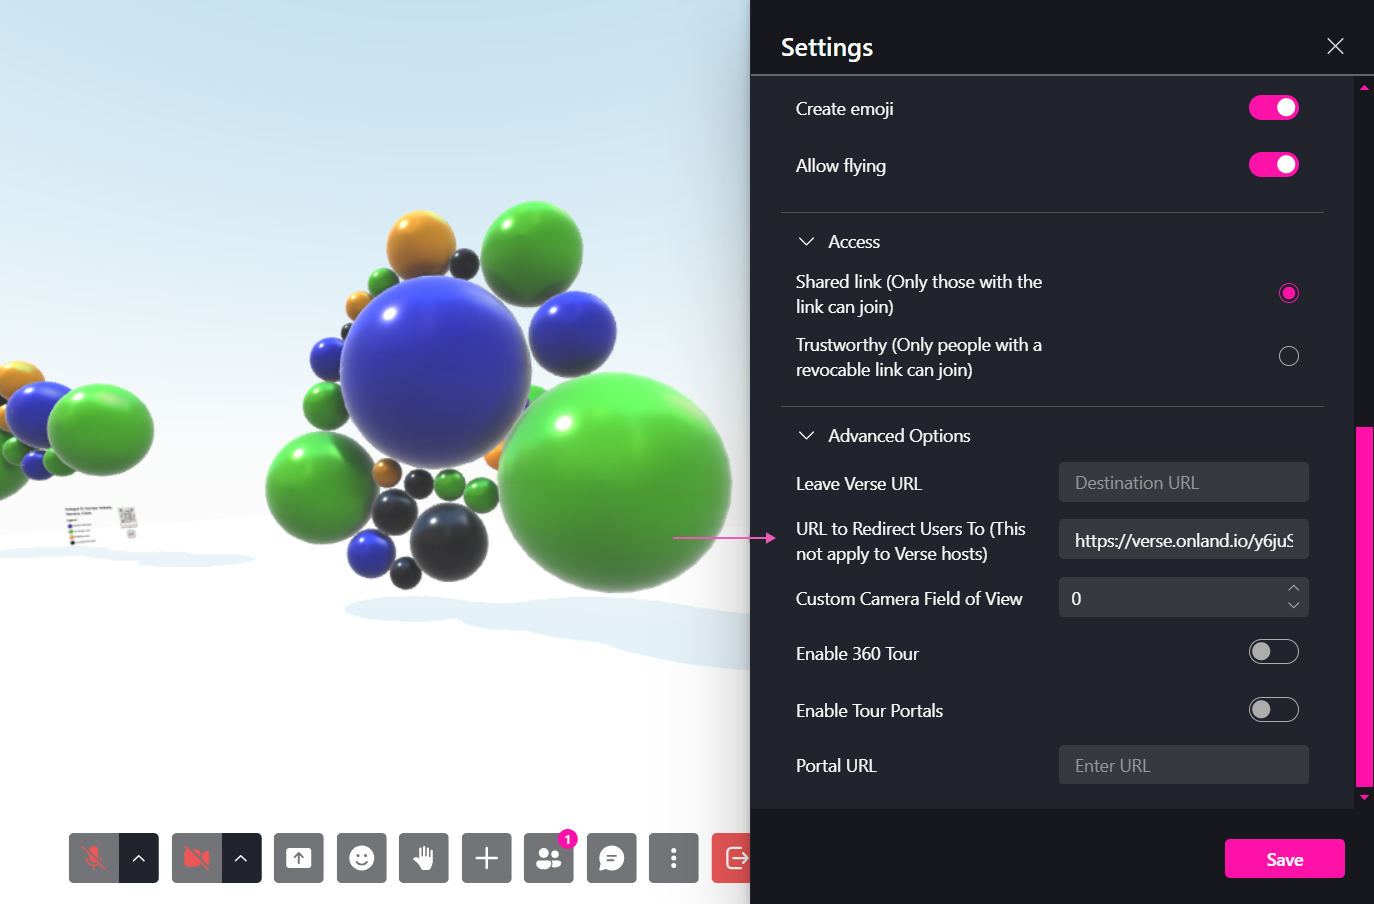
Redirect Users to Another Verse
Automatically redirect users to a different Verse upon entry.
- Go to Settings > URL to Redirect Users To.
- Paste the destination Verse link.
- Click Save.
🔹 Pro Tip: Use redirects for guided tours, onboarding areas, or teleport hubs.
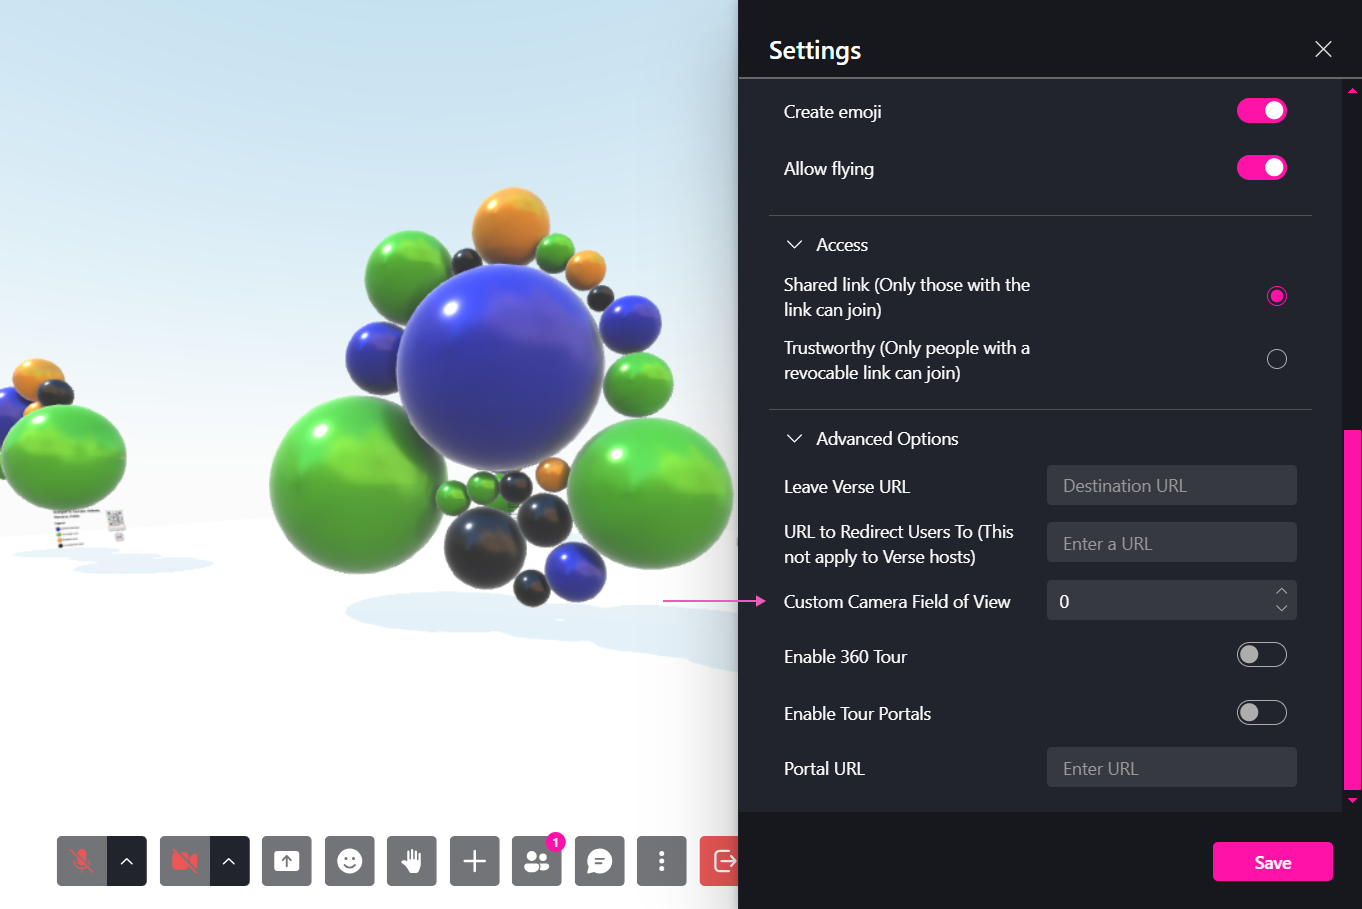
Custom Camera Field of View (FOV)
Modify how users view the Verse by adjusting the Field of View (FOV).
- Open Settings > Advanced Settings.
- Adjust the FOV degree.
- Save changes.
🔹 Pro Tip: Lower FOV for a cinematic view, higher FOV for a wider perspective.
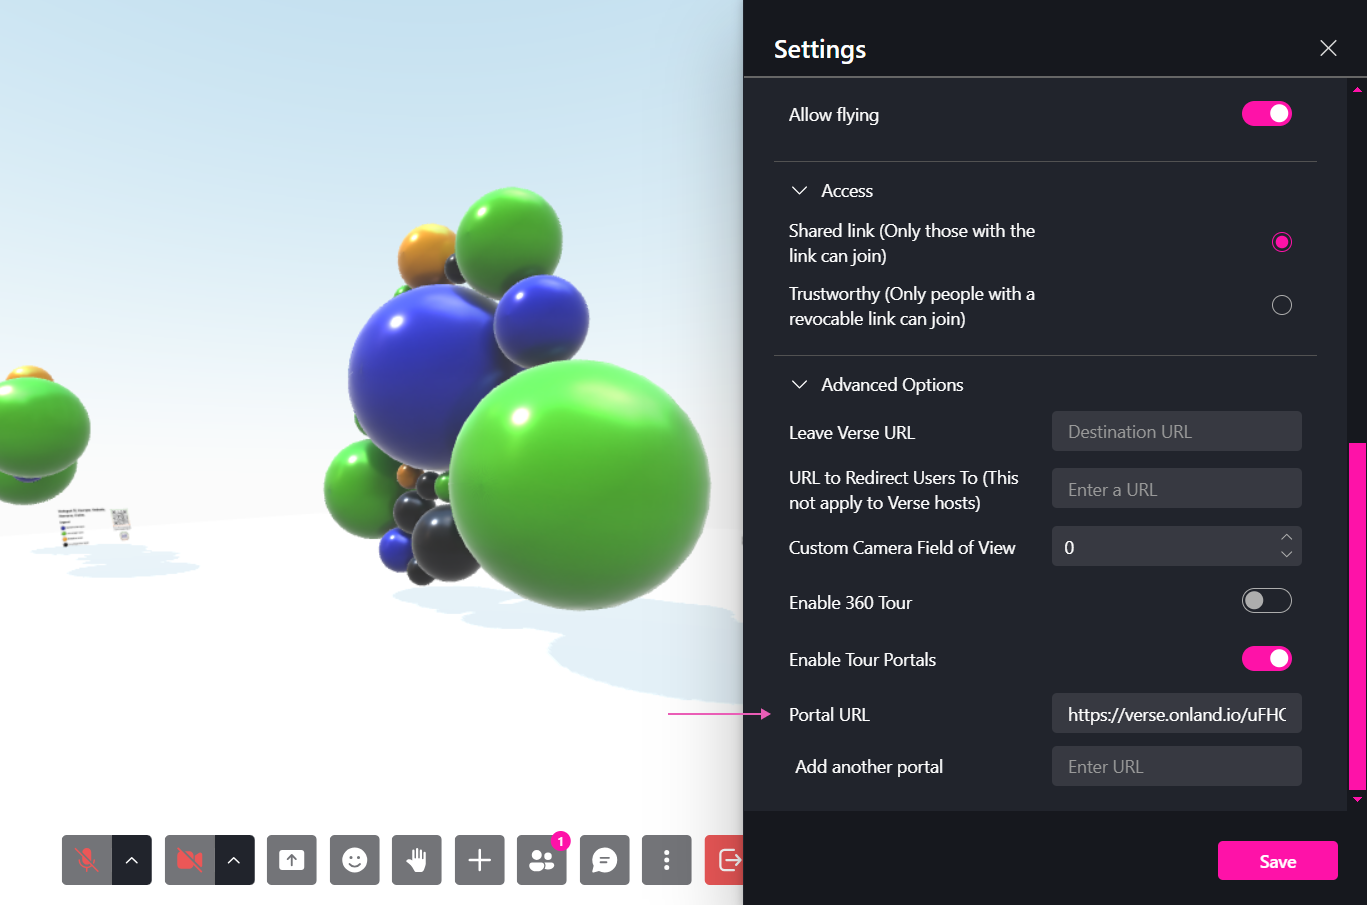
Enabling Tour Portals
Tour Portals allow seamless movement between connected Verses.
- Open Settings > Advanced Settings.
- Enable Tour Portals.
- Add a portal link to another Verse.
- Ensure the destination Verse has Tour Portals enabled.
🔹 Pro Tip: Use Tour Portals to create connected galleries, exhibitions, or game levels.
Adding a Portal
- Open Settings > Add Portal.
- Paste the Verse URL.
- A 2D sidebar will display interactive portals.
🔹 Pro Tip: Use portals for interactive teleport hubs inside your Metaverse world.