Resources Panel Overview
The Resources Panel is where you can find, upload, organize, filter, and manage assets for your XR scene. It includes folder creation for custom organization, filtering tools for faster navigation, and dedicated sources like Sketchfab and Bundles.

Asset Sources
The sidebar provides access to the following asset categories:
| Source | Description |
|---|---|
| Assets | Upload and manage your own 3D models, images, PDFs, videos, and audio. You can also create folders to organize assets by type or purpose. |
| Integrations | External sources that enhance scene functionality. Includes dedicated tabs for browsing and importing 3D models from Sketchfab and artworks from Public Domain Art collections, all directly within the Resources Panel. |
| Bundles | Curated asset collections organized by theme. Currently available bundles include the Architecture Kit (buildings, furniture, structural components) and the Sound Pack (ambient loops and sound effects for immersive audio design). |
Assets & Archive
Uploading Custom Assets
From the Assets tab, files are grouped by project ID—each project has its own isolated asset scope.
To upload custom assets:
- Open the Resources Panel
- Go to the Assets tab
- Click Add to upload a file or paste a link
- Drag and drop assets into the Viewport
Supported File Types
- 3D Models:
.glb - Images & Video:
.jpg,.png,.mp4 - Audio:
.mp3
Archive
For projects requiring detailed metadata, authorship information, or version tracking, you can upload assets through the Archive.
When uploading, choose from:
| Category | Purpose |
|---|---|
| File | General media and 3D assets |
| Digital Art | Artistic works with creative and legal metadata |
| Digital Twin Art | Physical artworks with measurements and digitization details |
Uploading a File
- Navigate to Apps → Archive in the XRHUB sidebar.
- Click + Upload.
- Select File as the upload type.
- Drag and drop your file or browse manually.
- Fill in required fields:
- Title*
- Description
- Click Upload.
Supported File Types: GLB, PNG, JPG, GIF, PDF, MP4, MP3
Maximum File Size: 50 MB
Tip: Use descriptive titles and tags to improve discoverability.
Uploading Digital Art
- Click + Upload → Digital Art
- Drag & drop your file or paste a URL
- Under Work Information, fill in:
- Title*
- Description
- Date of Creation*
- Under Artist Information:
- Artist Name*
- Bio
- Artist Statement
- Under Legal and Rights Information:
- Declaration of originality
- Optional AI creation indication
- Acceptance of terms
- Click Upload
Note: Metadata remains accessible when viewing or sharing in AR or the Metaverse.
Uploading Digital Twin Art
- Click + Upload → Digital Twin Art
- Drag & drop your 3D model
- Complete Work Information:
- Title*
- Description
- Date*
- Dimensions (Height, Width, Depth)
- Digitization Technique
- Current State
- Complete Artist Information
- Complete Legal and Rights Information
- Click Upload
Recommendation: Use this type for sculptures, installations, or mixed-media works with physical counterparts.
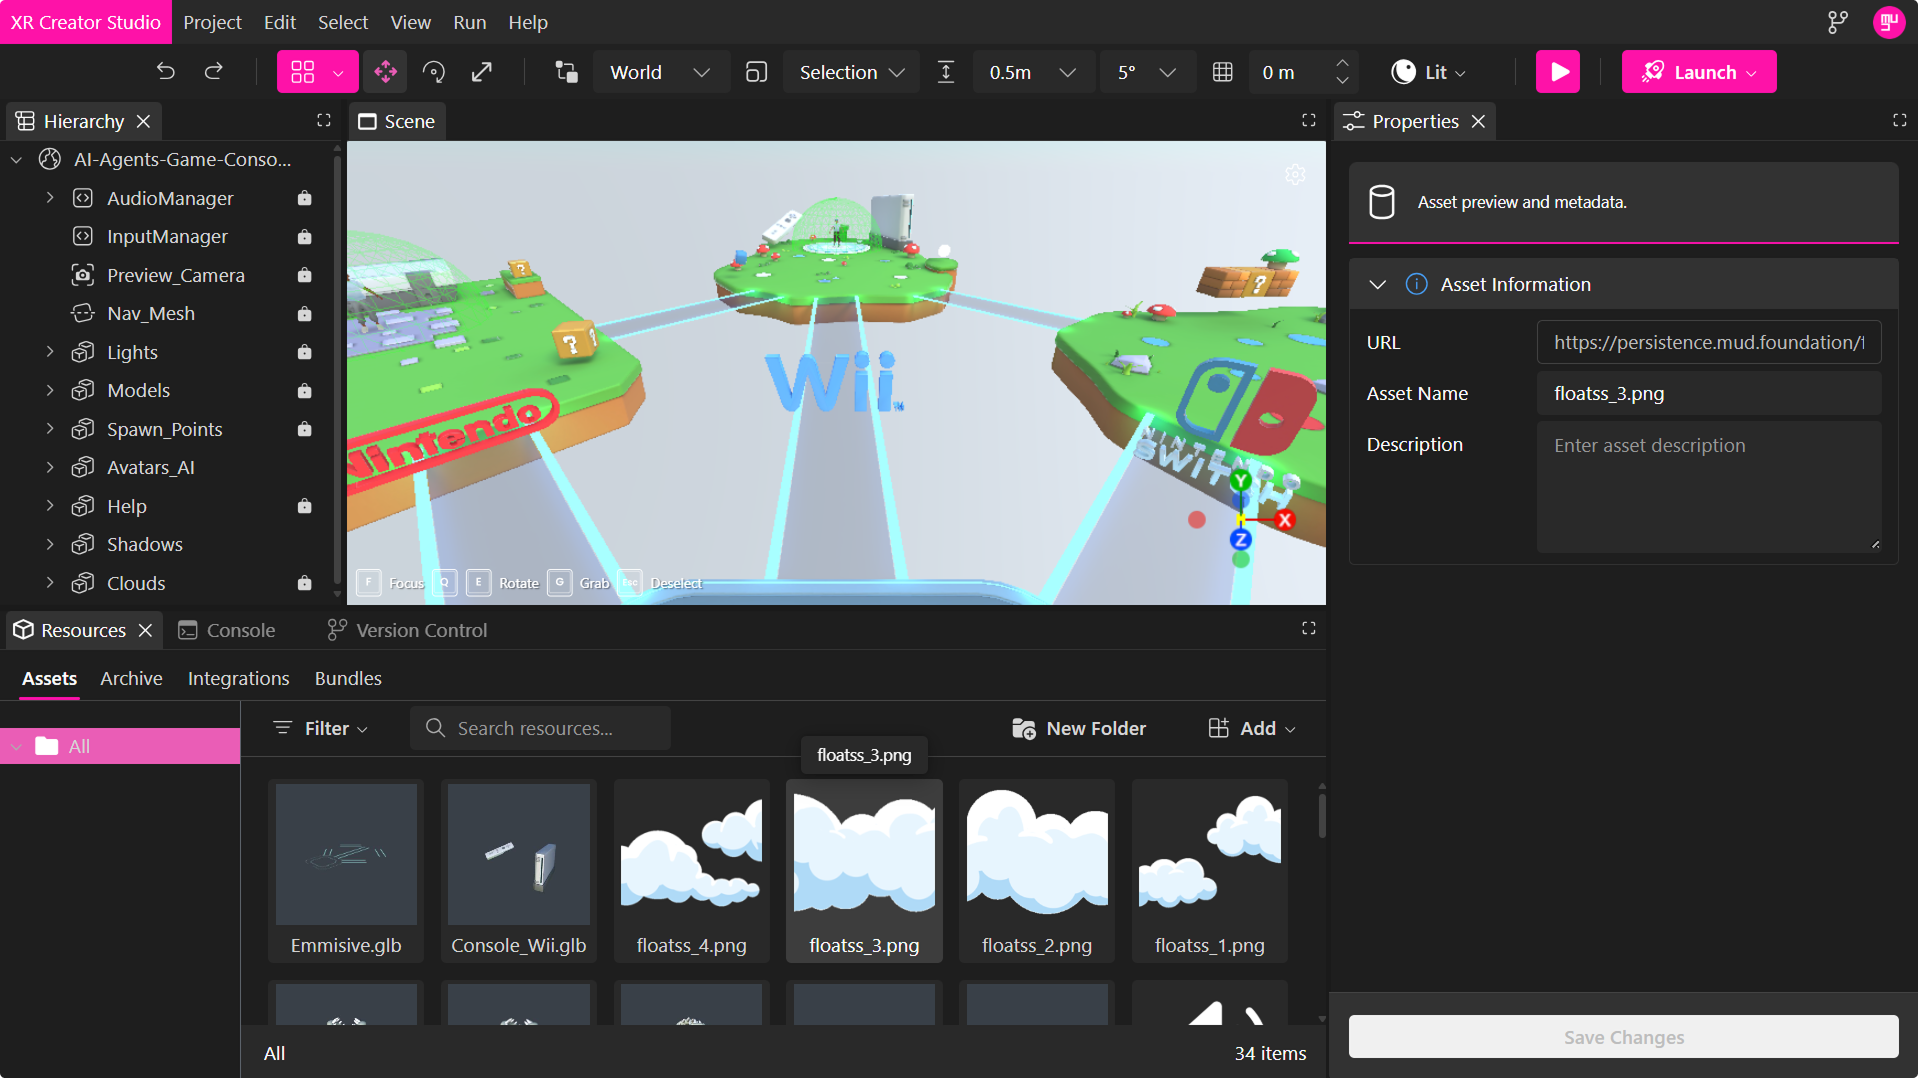
Asset Properties
Selecting an asset from the Assets or Archive tabs automatically opens the Properties panel, where you can view and edit its metadata.
Depending on the asset type, the panel may include the following sections:
Asset Information
Basic information about the selected asset.
- URL – Displays the asset's source URL.
- Asset Name – Rename the asset.
- Description – Add an optional description to help identify the asset.
Managing Assets
Right-click any asset in the Assets or Archive tabs to open the context menu.
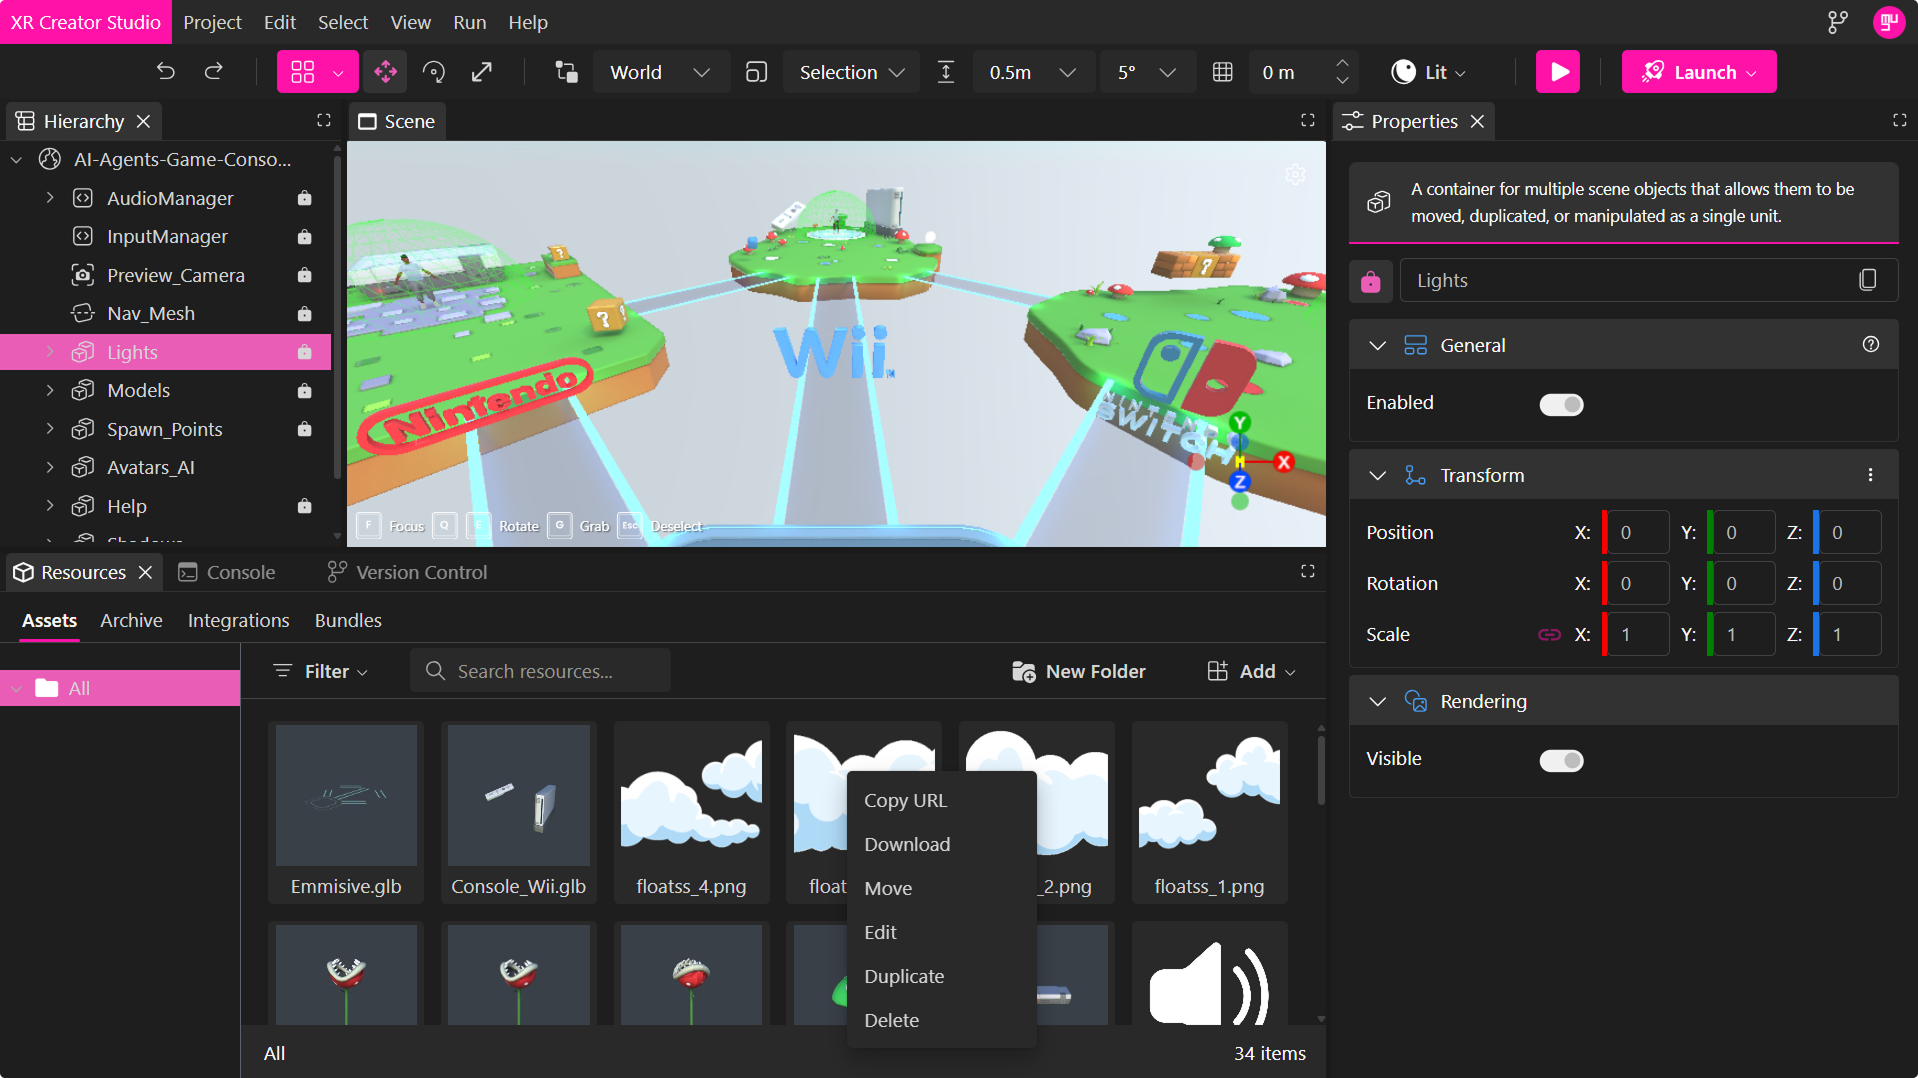
The available actions include:
- Copy URL – Copies the asset's direct URL to your clipboard for use within your project or external applications.
- Edit – Opens the Properties panel, allowing you to update the asset's metadata.
- Duplicate – Creates a copy of the selected asset within the current project.
- Delete – Permanently removes the asset from the current project or archive.
🔹 Note: Deleting an asset cannot be undone. Make sure it is no longer needed before removing it.
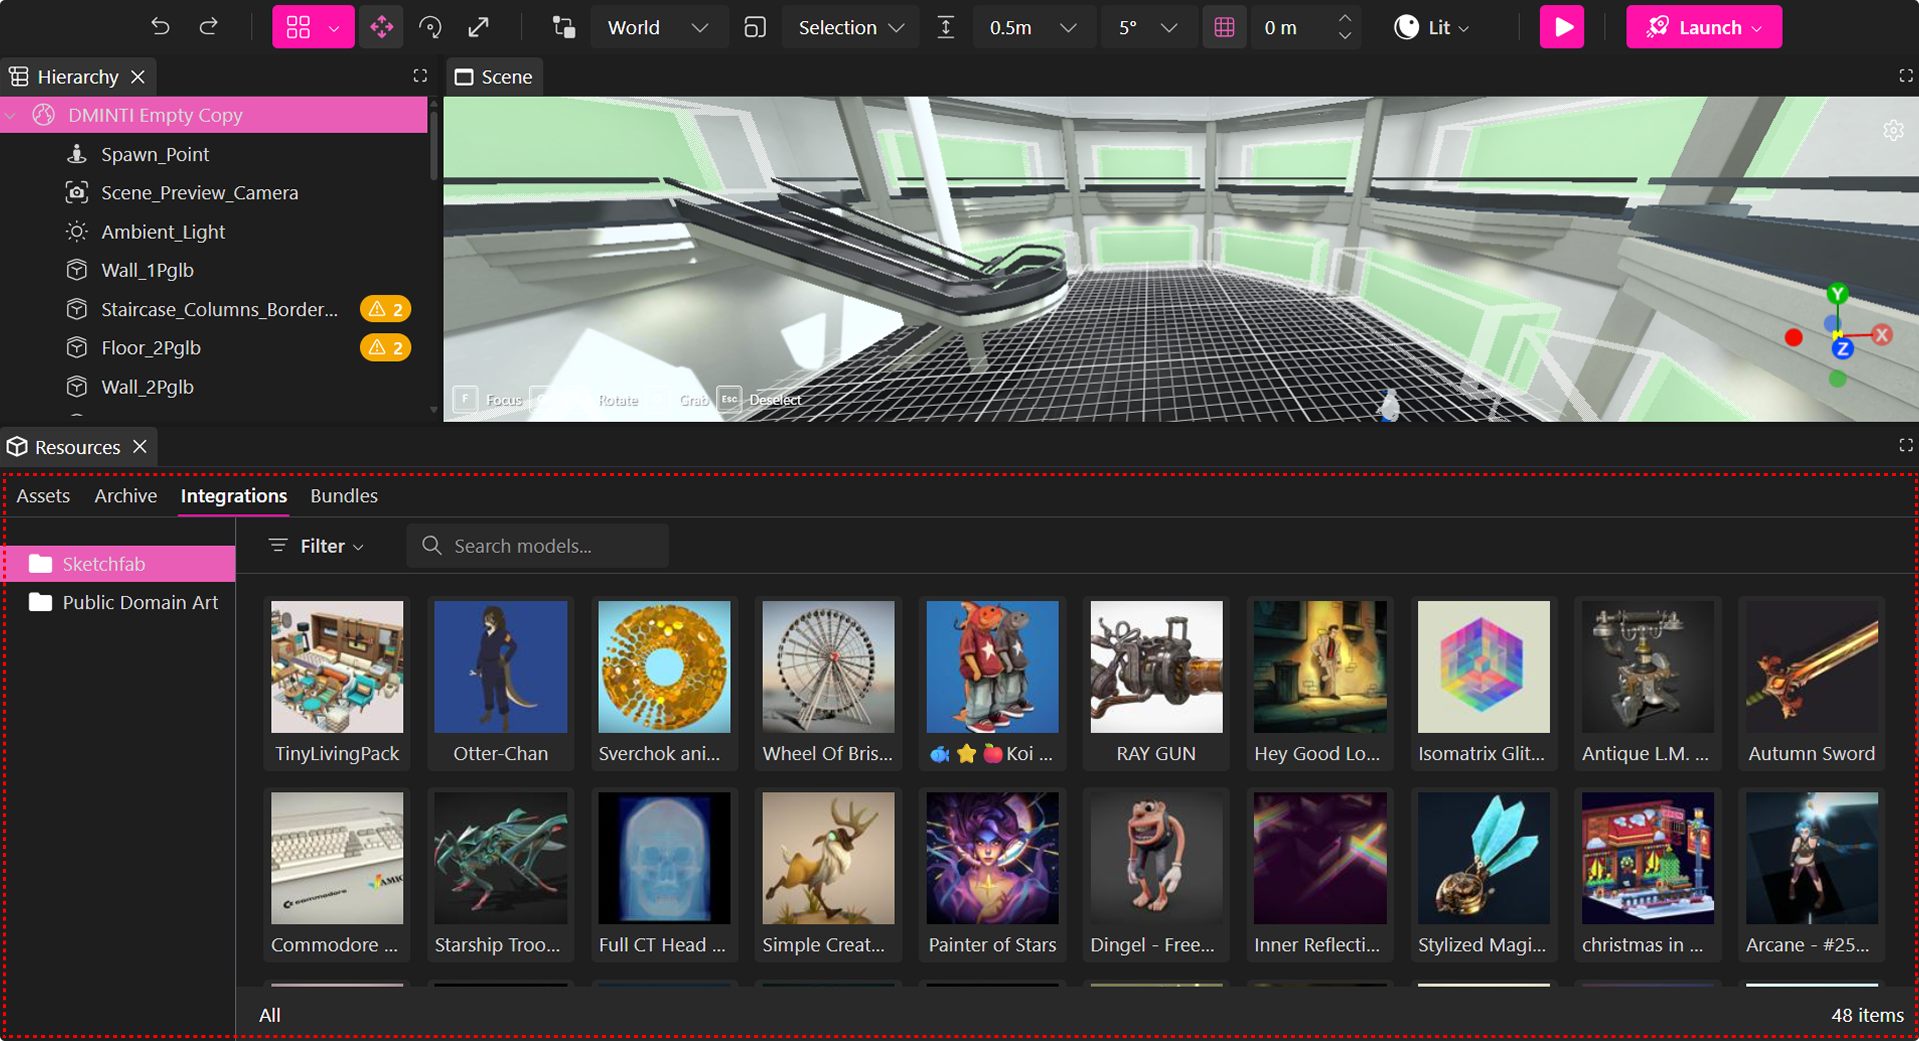
Integrations
The Integrations tab provides direct access to curated external content sources, allowing you to enhance your XR projects with high-quality, ready-to-use assets. You can browse and import 3D models and artworks from trusted libraries like Sketchfab, the National Gallery of Art, and The Metropolitan Museum of Art—all without leaving XR Creator Studio.
Sketchfab Integration
The Sketchfab Integration allows you to explore and import thousands of high-quality 3D models directly within the Resources Panel.
Key Features:
- Search and filter using keywords or categories
- Preview models before importing
- One-click import
Why Use It:
Populate your XR environments with professionally crafted 3D models while maintaining workflow efficiency.
Public Domain Art Integration
The Public Domain Art Integration gives you access to thousands of open-access artworks from institutions such as the National Gallery of Art and The Metropolitan Museum of Art.
Key Features:
- Search and filter by category or keyword
- Preview artwork details
- Drag and import directly into your scene
Why Use It:
Quickly build immersive art experiences, galleries, or cultural showcases with museum-quality visuals.
AR Integration:
View artworks in Augmented Reality (AR) by scanning a generated QR code once published.
Bundles
The Bundles tab offers curated asset collections grouped by theme or purpose to help speed up your creation process.
Architecture Kit
A ready-to-use package containing:
- Core Pieces: Walls, columns, arches, beams.
- Roofing: Sloped tiles, flat ceilings, trim details.
- Details: Doors, windows, railings, ornaments.
- Extras: Plants, fences, pathways.
- Utility: Stairs, foundations, connector.
Perfect for crafting immersive architectural environments.
To explore a detailed breakdown of how to use the architecture kit, please refer to the dedicated section.
Sound Pack
A collection of ambient and interactive audio elements, including:
- Loopable background sounds
- Environmental effects
- Scene transitions and sound cues
Use these assets to enhance atmosphere and immersion in your XR experiences.
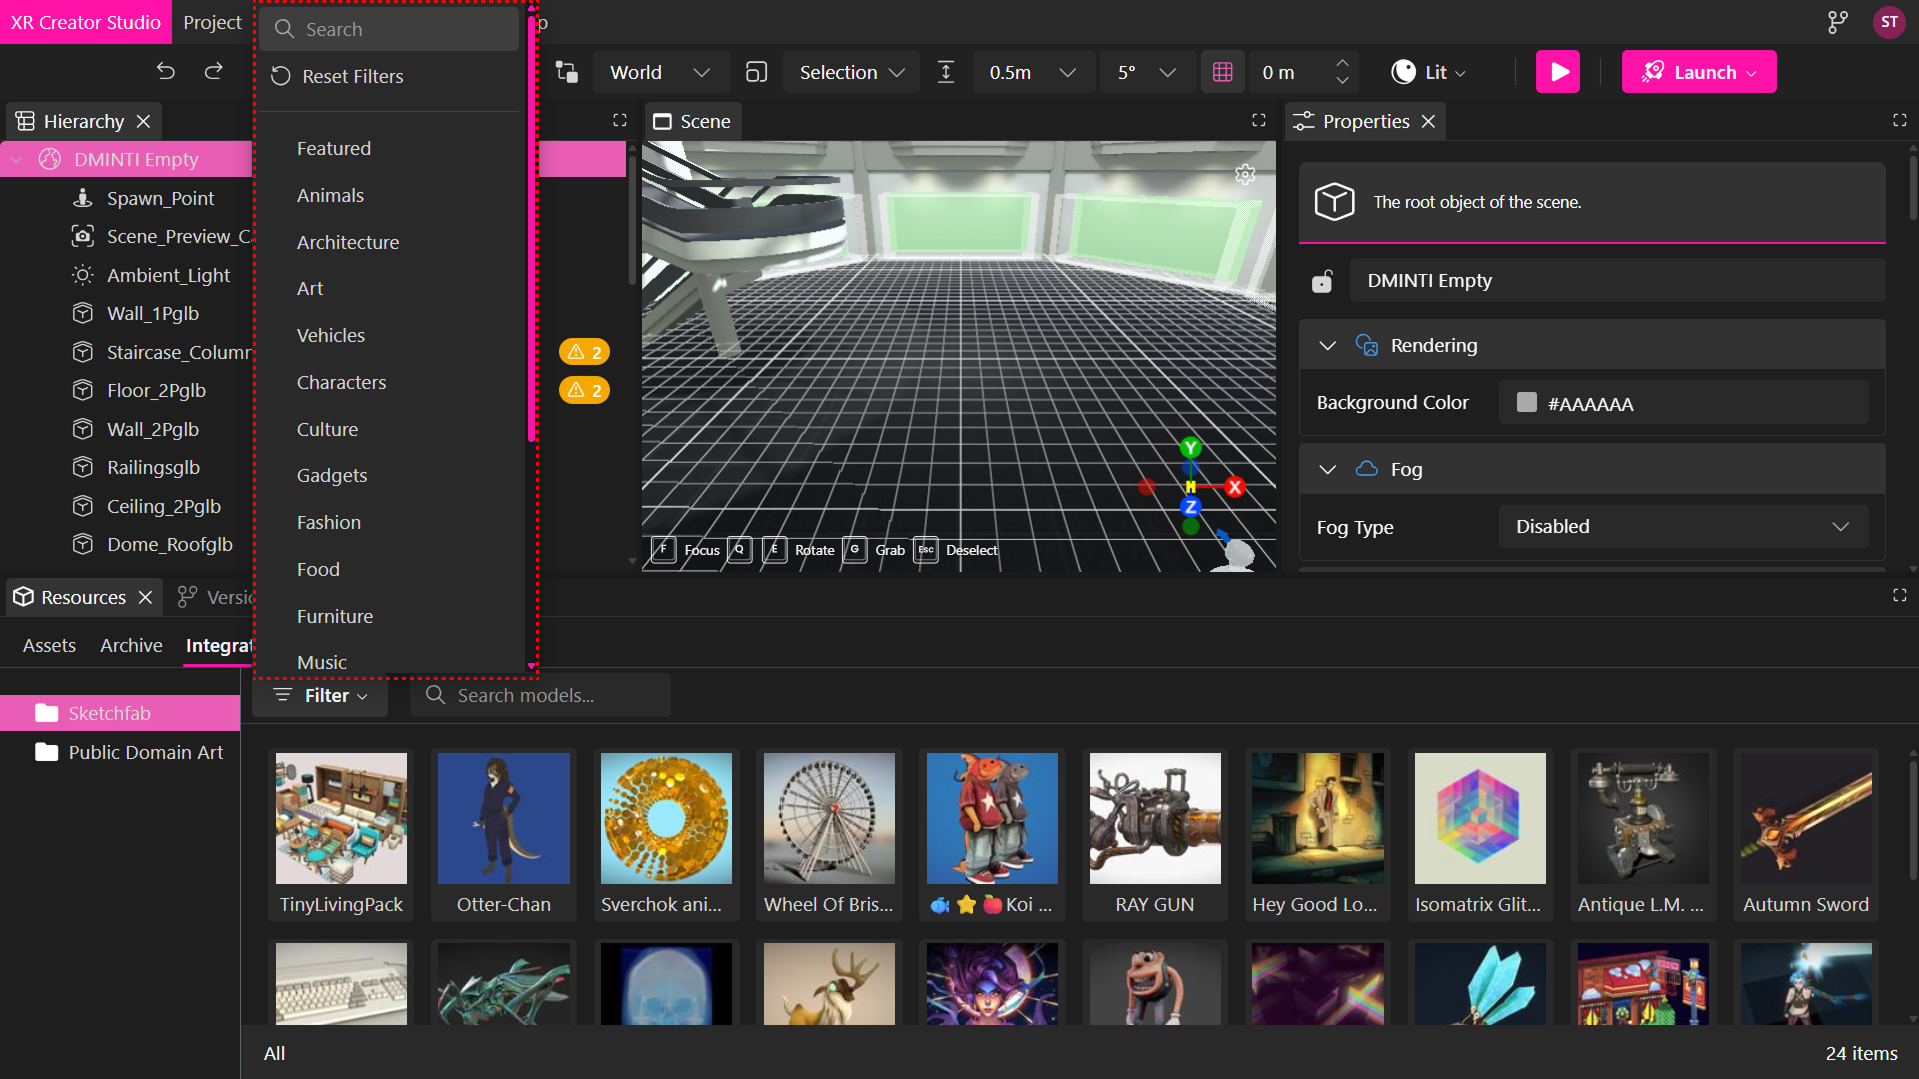
Filtering Resources
Use the filter bar at the top of the Resources Panel to quickly locate assets:
- Filter by type: 3D models, images, audio, video, text, PDF
- Filter by source: Assets, Sketchfab, Bundles, Integrations
- Combine filters to refine results
- Use the search field to find assets by name or category
Using Assets
To place an asset:
- Drag and drop your assets into the Viewport, Hierarchy Panel, or Properties Panel.
- Create folders to organize your assets within a project.
Supported File Types:
- 3D Models:
.glb,.gltf - Images and Video:
.jpg,.png,.mp4 - Audio:
.mp3
Folder Management
You can organize your project assets efficiently by creating folders directly within XR Creator Studio.
How to Create Asset Folders
- Open the Resources Panel in XR Creator Studio.
- Go to the Assets tab.
- Click New Folder to create a folder.
- Name the folder, then drag and drop assets into the Viewport to use them in your scene.
Managing Your Folders and Assets
- Reorganize assets by moving them between folders.
- Rename assets or folders by right-clicking and selecting these options in the Edit modal.
- Delete folders when they're no longer needed by using the right-click menu.