Managing Your User Account and Files
While an account is not required to explore the metaverse, creating an account unlocks additional features such as:
Uploading custom avatars
Saving avatars to "My Avatars"
Uploading custom projects
Preserving objects in a Verse
Using Verse moderation tools
Storing files
Creating an Account
To create an account, click on the Login button on the left side of the screen.
Go to the sign up section and provide an email address and a password. After account creation, in the login button you'll have access to a user dropdown menu where you can:
Change your avatar
Change your name.
Changing Name and Avatar
Upon entering a Verse for the first time, you can choose a name and avatar in the lobby. You can update this information at any time by selecting the "Avatar" menu in the top left corner and choosing the editing option.
After opening the avatar sidebar, you can use one of our featured avatars or create your own.
Custom avatars will be saved under the "My Avatars" tab and linked to your account.
![]()
Tools
The Tools Menu is available to logged-in users and allows for the management of assets, creation of QR codes, and art labels for your artworks.
Upload Tools
File Upload
To upload an asset, follow these steps:
Open the Tools menu and find the "Upload" section.
Click the 'File' option.
A sidebar will open where you can:
Upload an asset by clicking the upload box or pasting the URL.
Add a name, description, and label (optional).
Save the asset.
The asset will be added to your Files storage and positioned in the Verse.
Asset Properties
Once uploaded, you can adjust your asset's properties in the Verse. Depending on the asset type, these properties can vary, but they usually include:
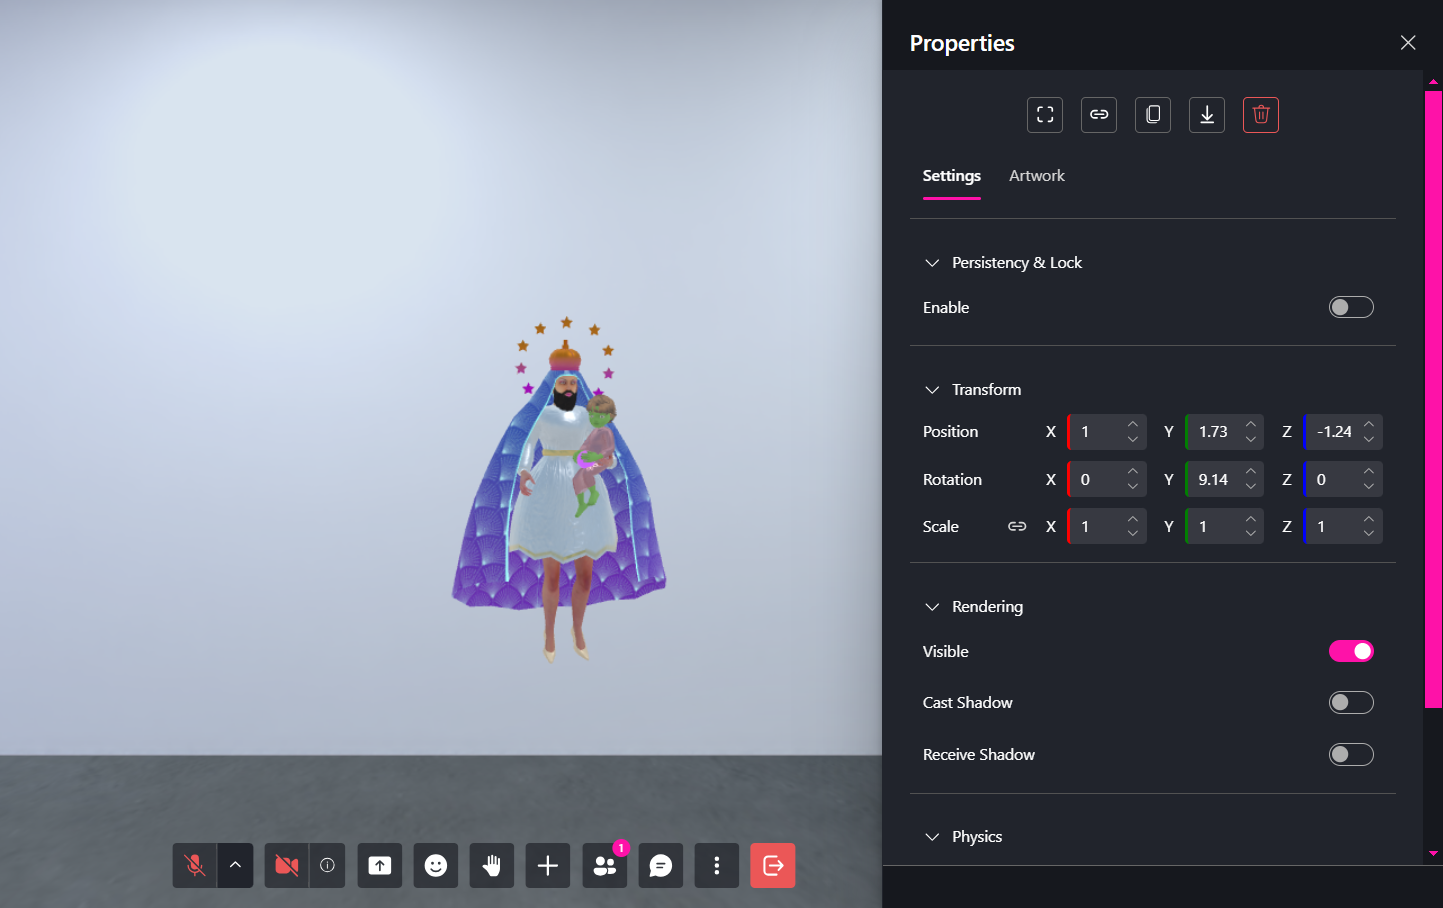
- Persistency and Locking
Locking: Prevent others from moving the asset.
Persistency: Ensures the asset remains in the Verse even after you leave.
- Transformation Tools
Position: Move the object along the X, Y, or Z axis.
Rotate (R): Rotate the object along the X, Y, or Z axis.
Scale (Y): Scale the object along the X, Y, or Z axis.
- Rendering Options
Visible: Toggle visibility.
Cast Shadow: Enable shadows for the object.
Receive Shadow: Enable shadow reception.
- Media Options
Frame: Add a frame to images.
Medium: Change the material used for artwork.
Artwork Upload
You can upload artworks to create virtual galleries and share your work with the community. Each artwork will have a digital label and a QR code for AR viewing.
To get started, simply head to the "My Media" section, there click the "+" button to initiate the upload process.
Upload the asset of your choice and provide a name and description to easily identify it later. Once completed, your media will be saved within the metaverse, accessible from your dashboard, editor, or any other MUD instance.
Digital Twin Art
A digital twin is a virtual representation of a physical artwork. You’ll need to provide details to create a label and a QR code for users to view the artwork in AR.
Required Files for Digital Twin Art
Title: Name of the artwork.
Date: Date of creation.
Artist Name: The creator of the artwork.
Use License: Select the appropriate license.
Optional Fields
Description: Details about the artwork.
Medium: Materials used to create the artwork.
Frame: Select a frame for images.
Dimensions: Physical dimensions of the artwork.
Digitization Technique: How the artwork was digitized.
Current State: Condition of the physical artwork.
Labels: Tags or categories for the artwork.
Bio: Artist's biography.
Artist Statement: A statement from the artist about their work.
Digital Art
Upload your digital artwork for display in the Verse. This process is similar to uploading Digital Twin Art but applies to purely digital pieces.
Required Files for Digital Art
- Title, Date, Artist Name, and Use License are required fields.
Optional Fields
- Description, Medium, Labels, Bio, Artist Statement, and AI Creation Indication can be filled out.
You can modify artwork details at any time by right-clicking on the artwork and selecting Properties. All changes will be reflected in the info panel.
Information Displayed in the Art Label and Info Panel
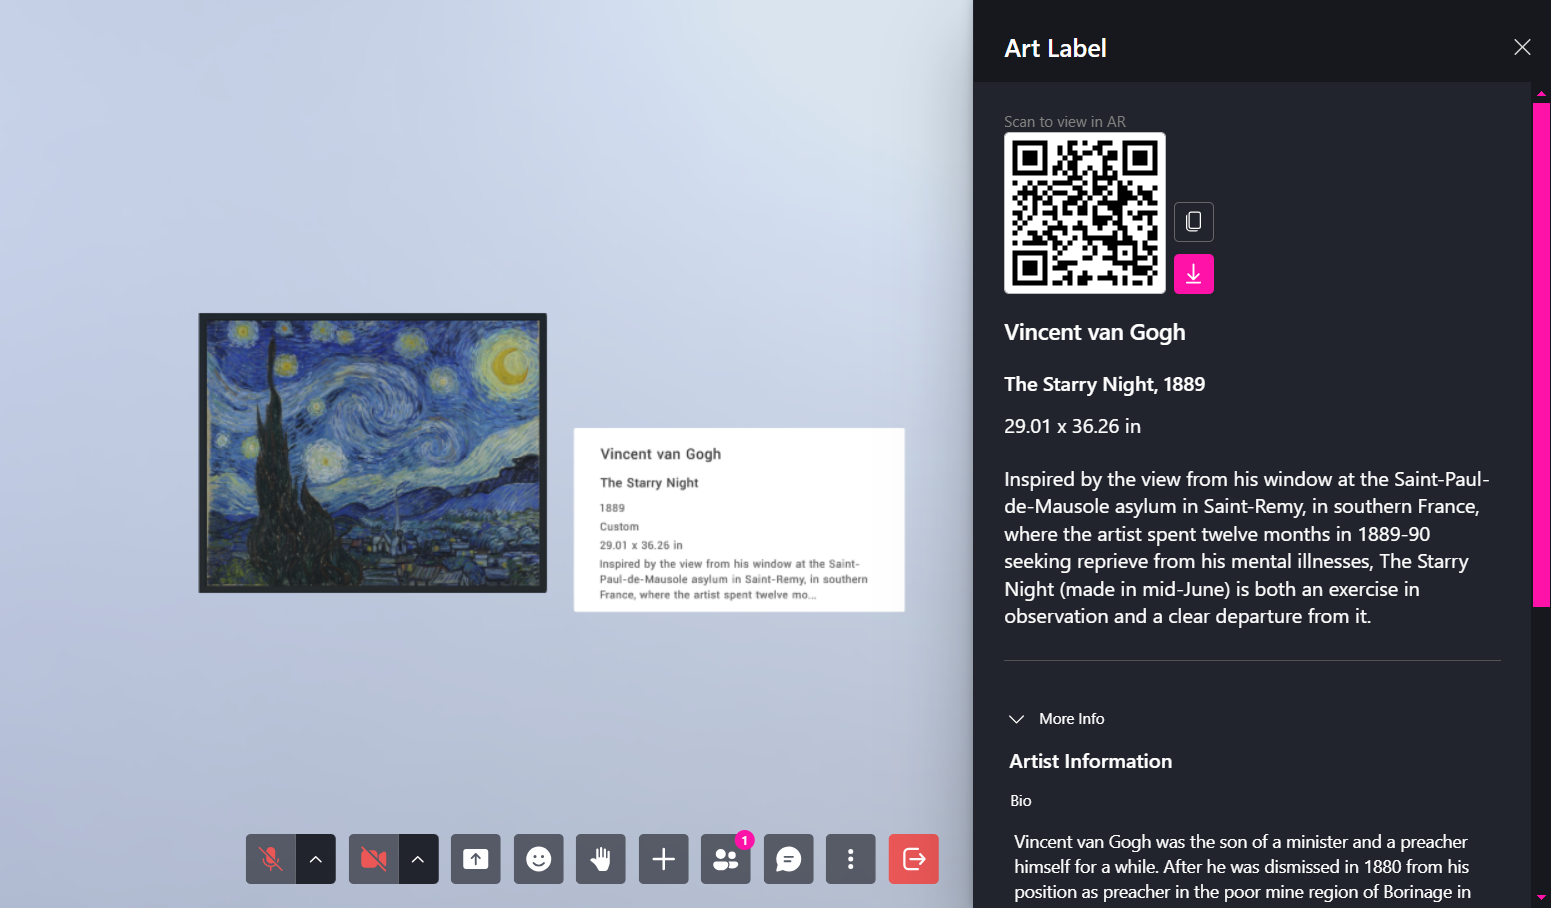
Art Label Information
The art label will display the following information about the artwork:
Title: Name of the artwork.
Date: Date of creation.
Artist Name: The creator of the artwork.
Description (if provided): A brief description of the artwork.
Medium (if provided): The materials or medium used in the creation of the artwork.
Dimensions (if provided): Physical size of the artwork (for Digital Twin Art).
Info Panel Information
The info panel provides more detailed information, including:
Artist Bio: A brief biography of the artist.
Artist Statement: A statement from the artist about their work, aspirations, or process.
Labels: Tags or categories associated with the artwork.
Current State (for Digital Twin Art): The condition of the physical artwork.
Digitization Technique (for Digital Twin Art): How the artwork was digitized.
AI Creation Indication: Whether AI was used in the creation of the artwork.
Date of Birth (if provided): The birthdate of the artist.
Dimensions (if provided): Size details of the physical artwork (for Digital Twin Art).
To view all the information in the info panel, simply hover over the artwork and left-click to open it.
Adding Frames and Mediums
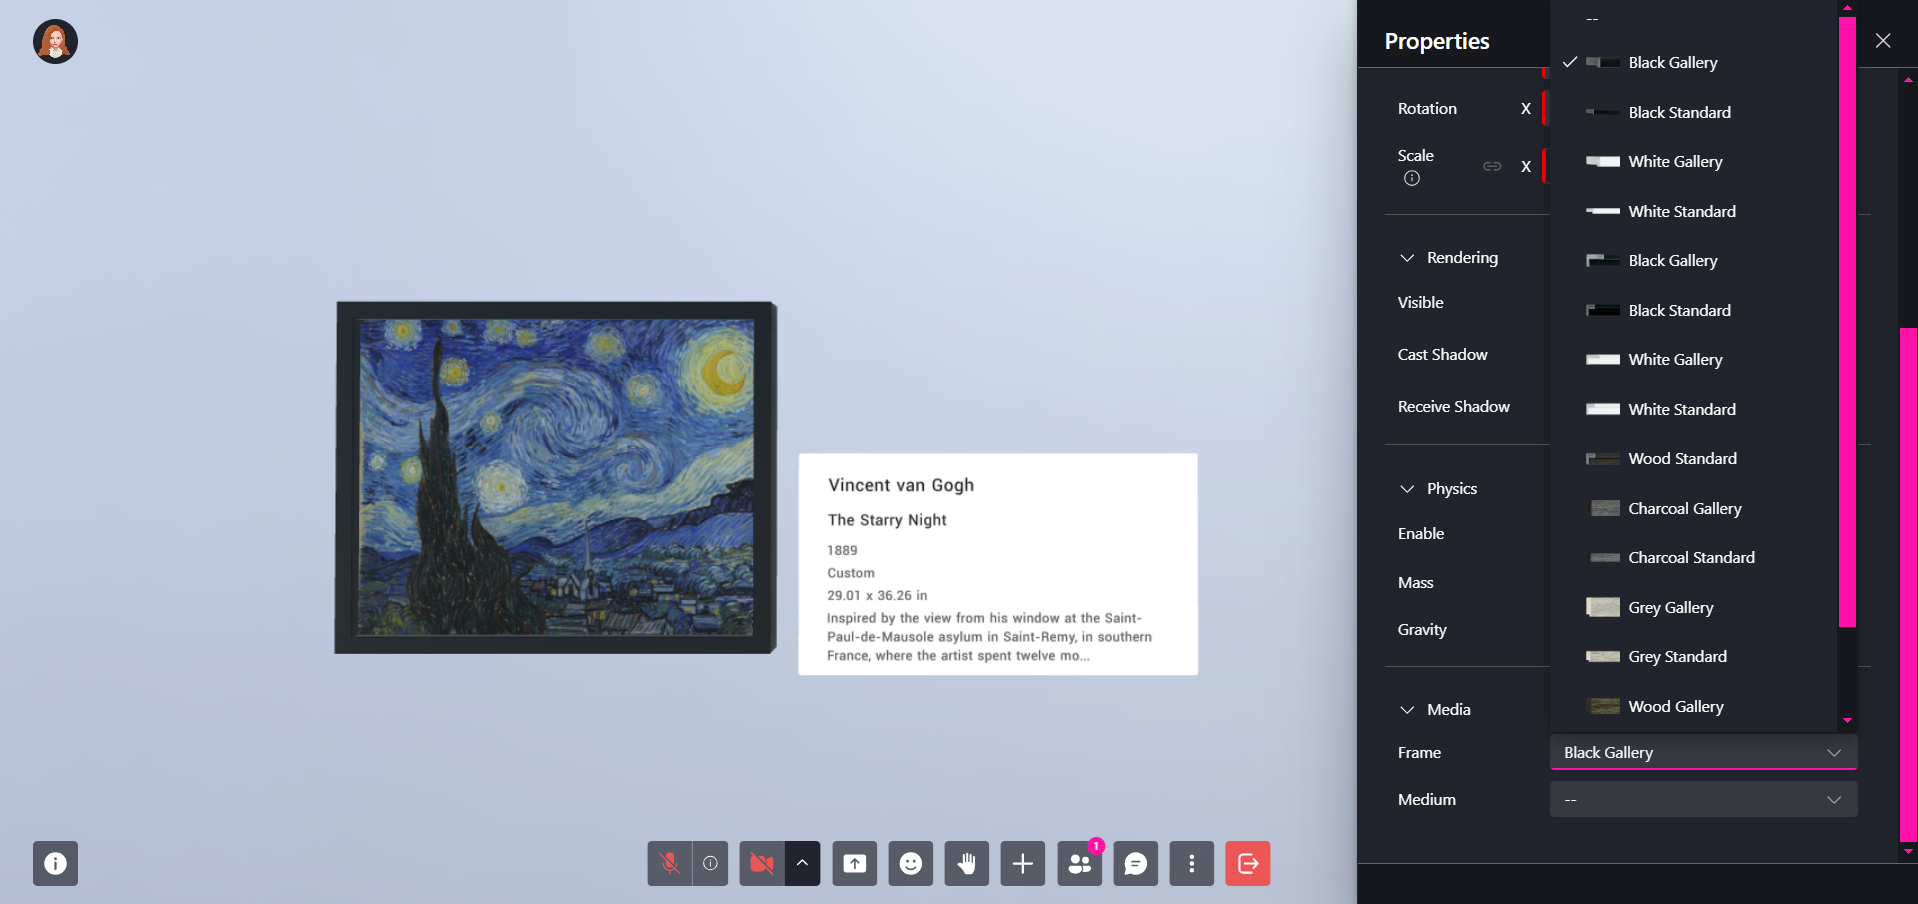
Frames and mediums personalize your artwork and can be viewed in AR by scanning the QR code. To add or modify them:
Right-click on the artwork.
In the properties panel, scroll to the Media section.
Choose from available frames and mediums.
Changes will appear in the AR world when you scan the QR code.
External Assets
Explore and incorporate public domain artworks into your scene using the External Assets tab.
Public Domain Art
In the Public Domain Art section, you can find fine art prints from the best of Public Domain Museum Art pieces around the world. To add an artwork to your scene:
- Select the desired artwork.
- Click 'Upload'.
- It will be automatically added to your scene.
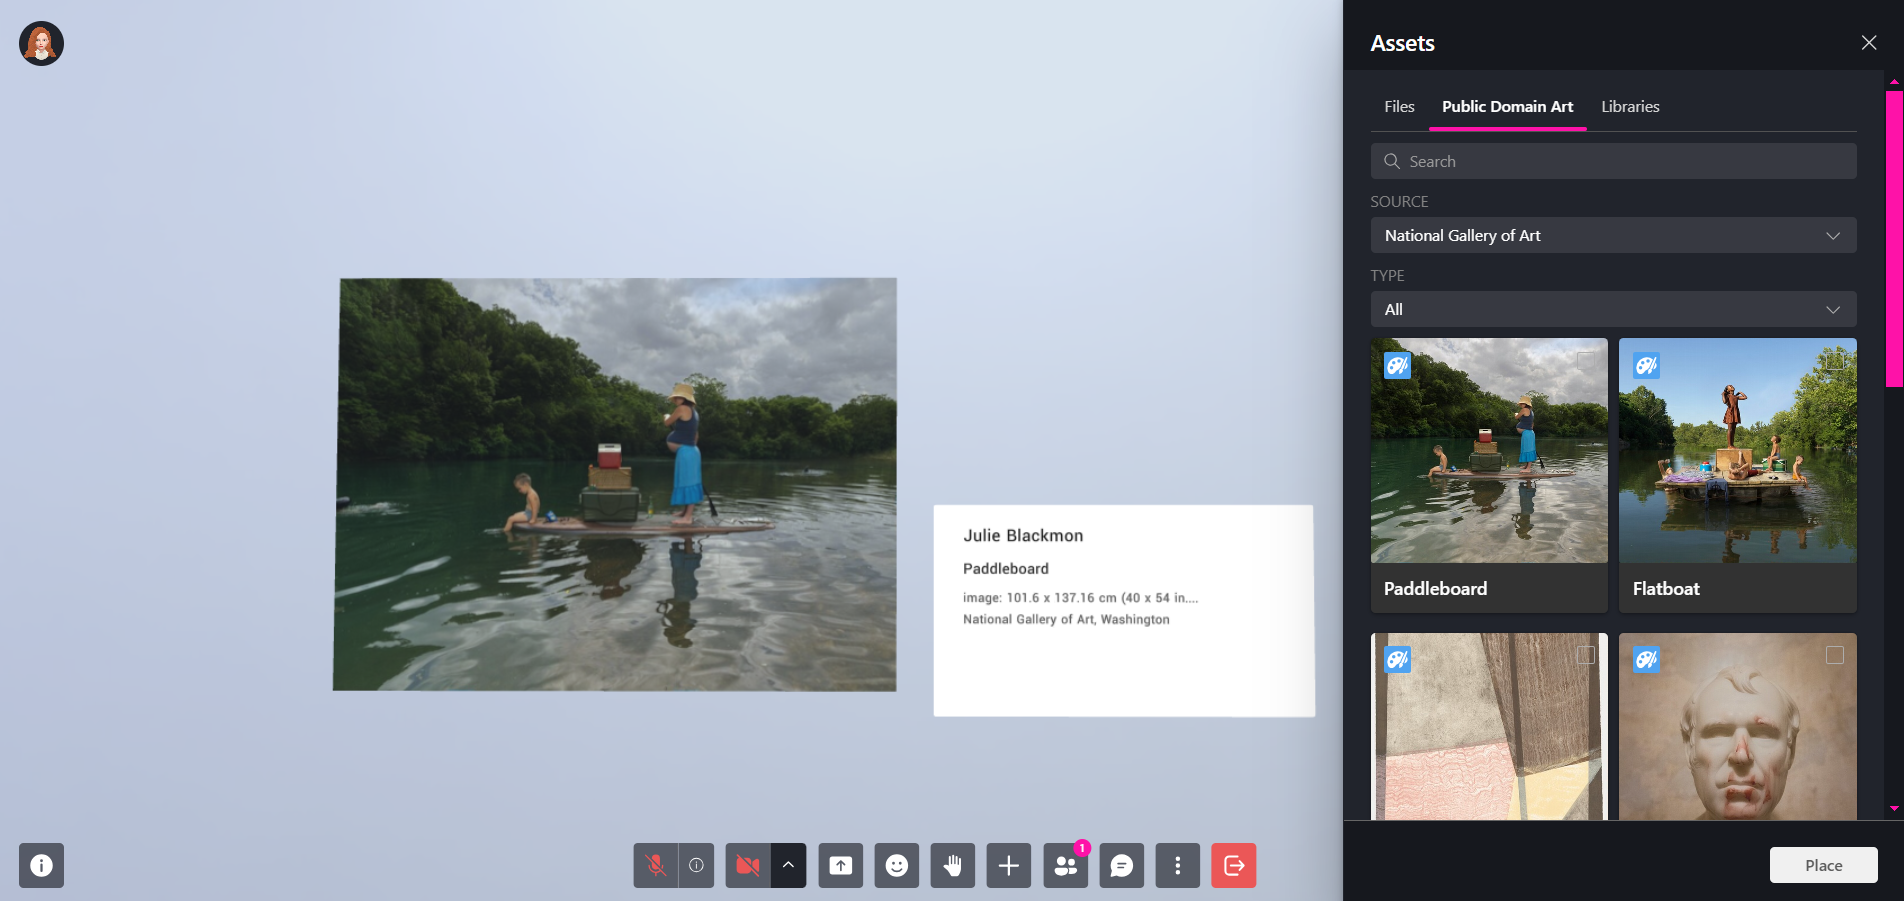
You can also scan the QR code for AR viewing or edit the artwork as needed.
QR Code
Every artwork has a QR code generated to reflect any changes made to it. Scanning the QR code will redirect you to an AR editor where you can view the artwork in augmented reality.
After scanning the provided QR code, you will be redirected to our AR editor. Simply click the position icon on your phone to initiate an augmented reality viewing experience on the real world.
Advance User Settings
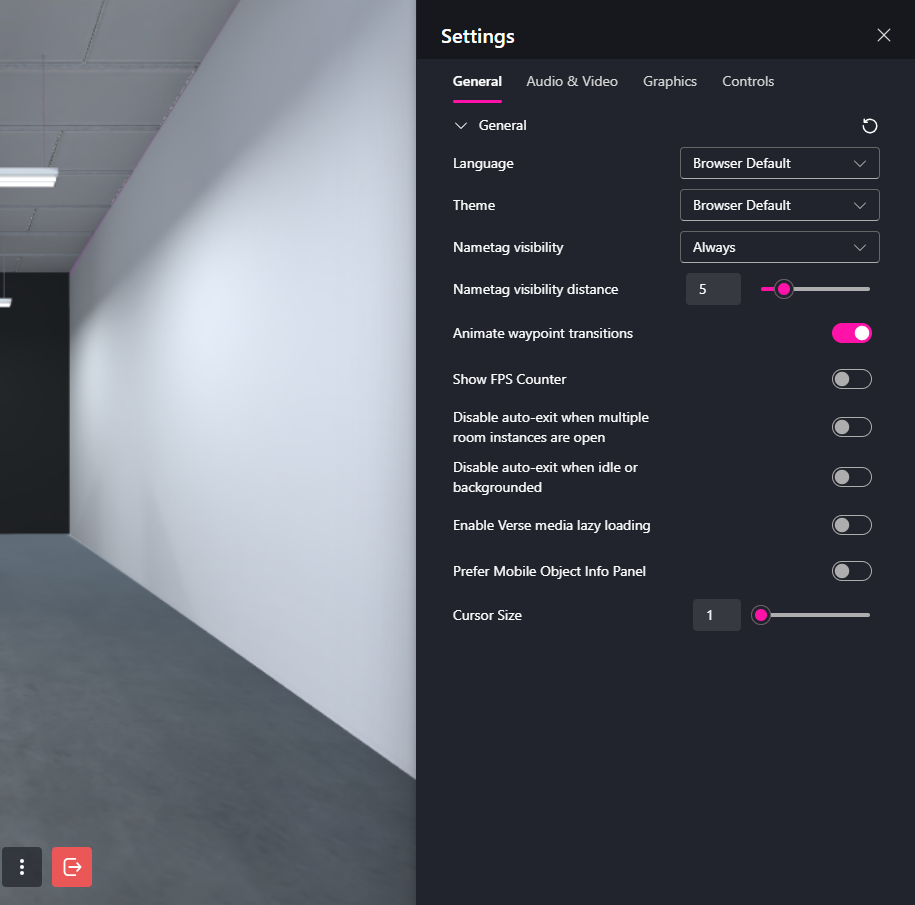
Advanced user settings (e.g., media volume, movement controls, graphics resolution, etc), can be found in the settings section of the more dropdown menu.
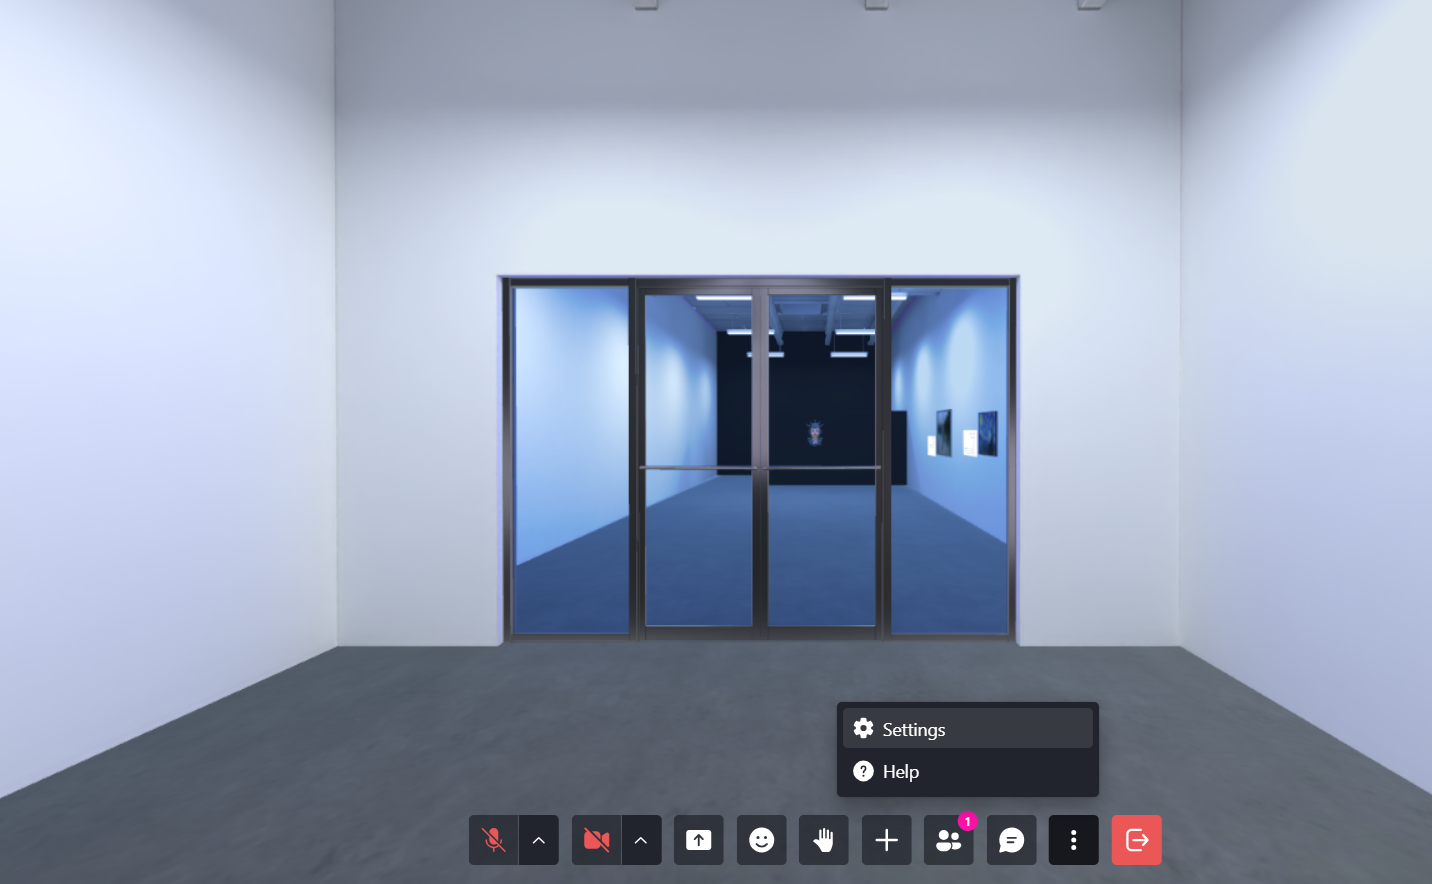
Here you can edit the audio settings (selected mic, speakers), and other advance settings like language, cursor size, FPS counter, etc.
