Adding 3D Objects
3D objects are the foundation of immersive environments in the Metaverse. Whether you're building a simple gallery or a complex interactive experience, adding 3D models gives your Verses depth and realism.
You can use pre-built models, import external assets, or even create custom objects to bring your vision to life.
Important: File Size Recommendations
🔹 To publish projects to the Metaverse, ensure your projects stay within the 128MB size limit.
🔹 Individual files used in the project must not exceed this limit to maintain performance and accessibility.
Uploading Your Own 3D Models
XR Creator Studio supports .GLB and file formats, allowing for flexible integration of custom 3D assets into your scene.
How to Upload Assets to the Resources Panel
- Navigate to the Resources panel in XR Creator Studio.
- Go to the Assets tab.
- Click Add and select the desired 3D model from your computer.
- Drag & drop the model into the viewport to place it in your scene.
- The model will automatically upload and appear in the Assets panel.
- Position and adjust the object using the Transform Gizmo.
Uploading an Asset via the Archive
For projects requiring detailed metadata, authorship information, or version tracking, you can upload assets through the Archive located under the Resources panel.
These assets will be accessible across the entire XRHUB platform.
Archive Categories
| Category | Purpose |
|---|---|
| File | For general media and 3D assets. |
| Digital Art | For original artistic works that include creative and legal metadata. |
| Digital Twin Art | For digital representations of physical artworks, including measurements and digitization details. |
Uploading a File
- Navigate to Apps → Archive in the XRHUB sidebar.
- Click + Upload in the top-right corner.
- Select File from the upload type menu.
- Drag and drop your file or click to browse.
- Fill in the required fields:
- Title*
- Description
- Click Upload to complete.
Supported File Types: GLB, PNG, JPG, GIF, PDF, MP4, MP3
Maximum File Size: 50 MB
Tip: Use descriptive titles and tags to improve asset discoverability.
Uploading Digital Art
- Click + Upload → Digital Art
- Drag & drop your file or paste a URL
- Under Work Information, fill in:
- Title*
- Description
- Date of Creation*
- Under Artist Information, add:
- Artist Name*
- Bio
- Artist Statement
- Under Legal and Rights Information, specify:
- Declaration of originality
- Optional AI creation indication
- Acceptance of terms and conditions
- Click Upload to finalize.
Note: Metadata is embedded and remains accessible when viewing or sharing the artwork in AR or within the Metaverse.
Uploading Digital Twin Art
- Click + Upload → Digital Twin Art
- Drag & drop your model or select it from your files
- Complete Work Information:
- Title*
- Description
- Date*
- Dimensions (Height, Width, Depth — cm or in)
- Digitization Technique (photogrammetry, LiDAR, 2D scanning, etc.)
- Current State (e.g., on display, in restoration)
- Add Artist Information (Name, Bio, Statement)
- Complete Legal and Rights Information:
- Declaration of originality
- Optional AI creation indication
- Acceptance of terms
- Click Upload to complete.
Recommendation: Use this type for physical installations, sculptures, or mixed-media works that exist both digitally and physically.
Importing 3D Models from Sketchfab
XR Creator Studio allows you to search and import 3D content directly from Sketchfab.
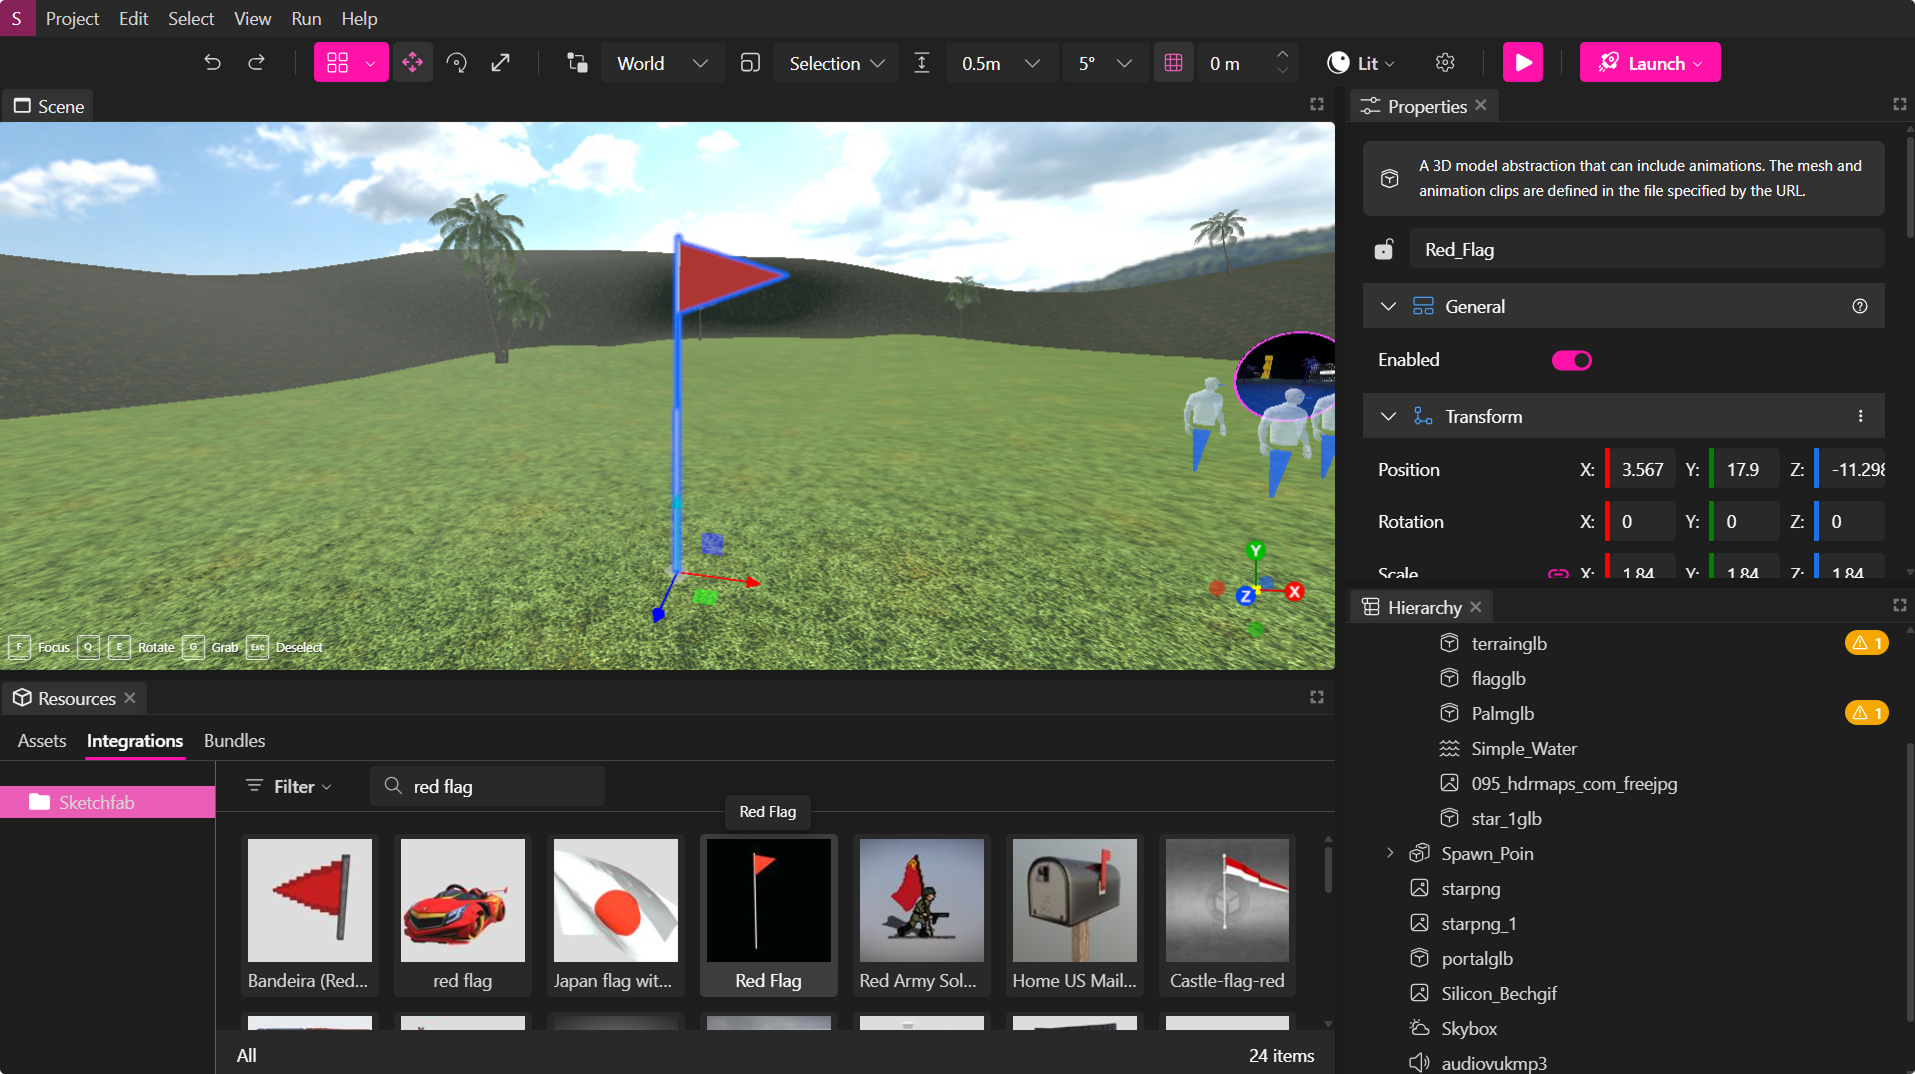
You can browse curated Sketchfab collections inside the Resources → Integrations panel and import assets directly into your project.
We recommend filtering by Low Poly assets to optimize your Verse’s performance.
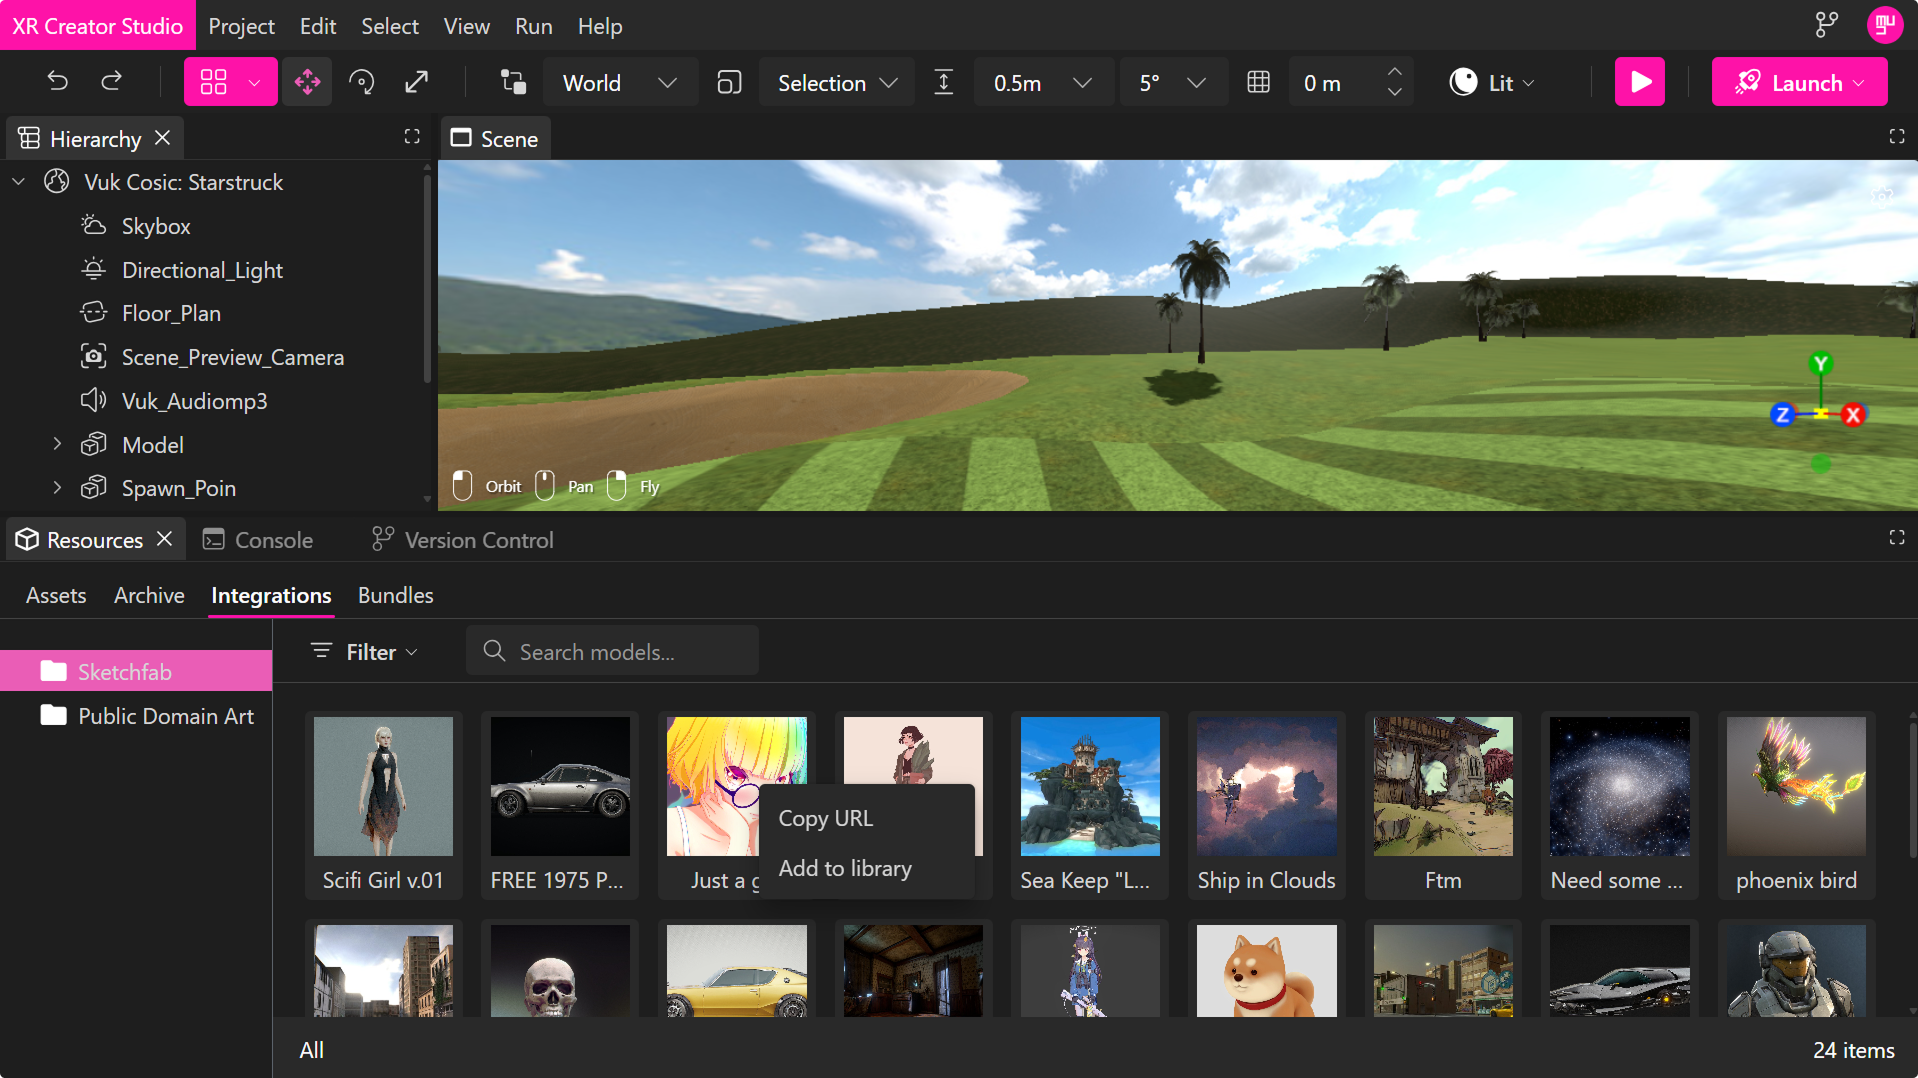
Sketchfab Asset Options
When hovering over a Sketchfab item, and clicking the right click, a context menu provides two options:
-
Copy URL
Copies the direct Sketchfab link to your clipboard. Use this when you want to reference the model externally or store the link for documentation. -
Add to Library
Adds the selected Sketchfab asset to your Archive, making it part of your personal asset library.
Once added, the asset becomes available across all XRHUB environments via the Archive tab, just like any other uploaded asset.
These options allow you to quickly preview models, organize them into your library, and streamline your workflow when building scenes.
Optimizing 3D Models
After uploading a 3D model to the Resources Panel, XR Creator Studio automatically analyzes the file’s size and complexity.
If the model exceeds recommended limits, you’ll be prompted to optimize it for better performance.
How Optimization Works
The optimization tool reduces polygon density and texture resolution to improve load times while maintaining visual quality.
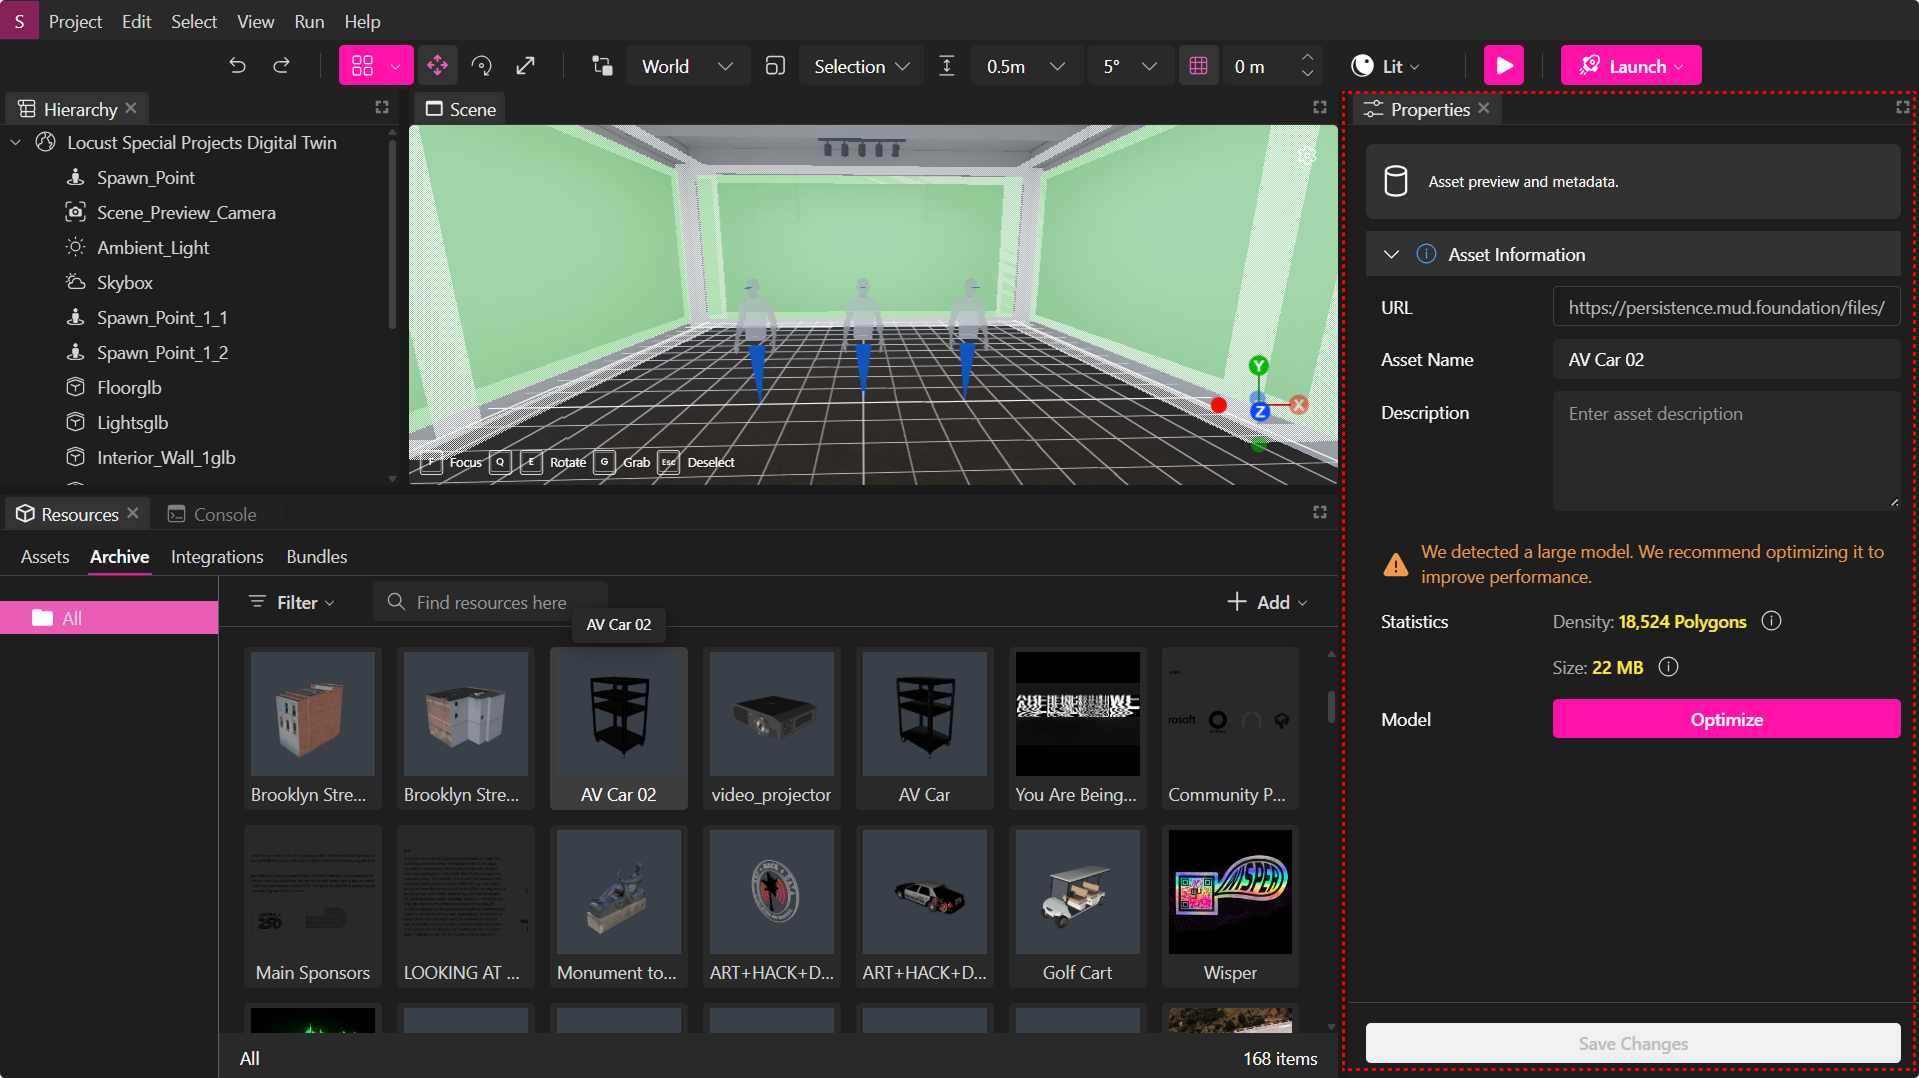
When optimization is available, open the Properties Panel by left-clicking the asset in the Resources panel, then select Optimize to start the optimization workflow.
Optimization Workflow
Step 1: Adjust Optimization Level
A dialog appears with a performance–quality slider:
- Move the slider left for higher performance (smaller file, fewer polygons).
- Move the slider right for higher quality (larger file, more detail).
A live preview displays:
- Current polygon density
- Current file size
Step 2: Preview the Result
After running optimization, the preview window shows a side-by-side comparison of the original and optimized model:
- View changes in size and polygon count.
- Confirm the visual quality before saving.
Step 3: Confirm Optimization
Choose one of the following:
- Create a Copy – Save the optimized file as a new version while keeping the original intact.
- Optimize Original – Replace the existing file with the optimized version.
Pro Tip: Regularly optimize imported assets from external sources like Sketchfab to maintain high performance and smooth rendering across all devices.
Object Properties: Customizing 3D Objects
The Properties Panel in XR Creator Studio provides a variety of settings to help you customize 3D objects in your scene.
These properties control how objects look, interact, and behave.
Accessing Object Properties
- Select an object in the Viewport or Hierarchy Panel.
- If the Properties Panel is open, all available settings will appear.
- Navigate through different property categories to customize the object.
Rendering Properties
| Property Name | Description & Functionality |
|---|---|
| Visible | Toggles object visibility in the scene. Useful for hidden objects that appear under conditions. |
| Collidable | Enables physics interactions; objects cannot pass through it. Useful for boundaries or walls. |
| Cast Shadow | Enables the object to cast shadows. Requires the receiving surface to have Receive Shadow enabled. |
| Receive Shadow | Allows the object to display shadows cast by other objects. |
Model Properties
| Property Name | Description & Functionality |
|---|---|
| Model URL | Specifies the URL of the current 3D model (.GLB). Can be replaced or linked externally. |
| Billboard | Forces the object to always face the camera (useful for sprites and signs). |
| Enable Animation with Proximity | Triggers object animation when a user approaches within a defined proximity. |
| Proximity Radius | Defines the distance at which proximity-based animations or interactions activate. |
| Add Model Sequence | Links multiple models in a sequence, enabling dynamic animations or object transitions. |
| Destroy on Finish | Removes the object from the scene once its animation completes. |
| Loop Animation | Displays available animations for the object. If enabled, animations will continuously loop (ideal for background animations). |
NavMesh Properties
| Property Name | Description & Functionality |
|---|---|
| Walkable | Marks the object as a walkable surface in the navigation mesh. |
Material Properties
| Property Name | Description & Functionality |
|---|---|
| Enable Material Color | Enables customization of the object's material/emissive color. |
Attribution Properties
| Property Name | Description & Functionality |
|---|---|
| Title | Displays the asset’s title in the info panel when interacted with. Useful for artworks or product displays. |
| URL | Links to external resources, documents, or product details. |
| Author | Credits the asset creator (important for showcasing digital art). |
Dynamic Material & Emissive Colors for 3D Models
XR Creator Studio allows real-time color adjustments for certain 3D models.
How to Change an Object’s Material/Emissive Color
- Select the 3D model whose color you wish to adjust.
- Open the Properties Panel.
- Enable "Material Color" by checking the corresponding box.
- Adjust the dynamic material or emissive color as needed.
🔹 Emissive colors allow objects to glow, making them perfect for lighting effects or futuristic elements in a scene.