Projects
A project is the file that contains your entire scene, assets, objects, and settings. Think of it as the container that holds everything you build, whether that’s a gallery, a virtual event space, or any game-like interactive world.
You use projects to design, edit, preview, save, and publish your immersive experiences in the Metaverse. Each project is self-contained with its own assets and settings.
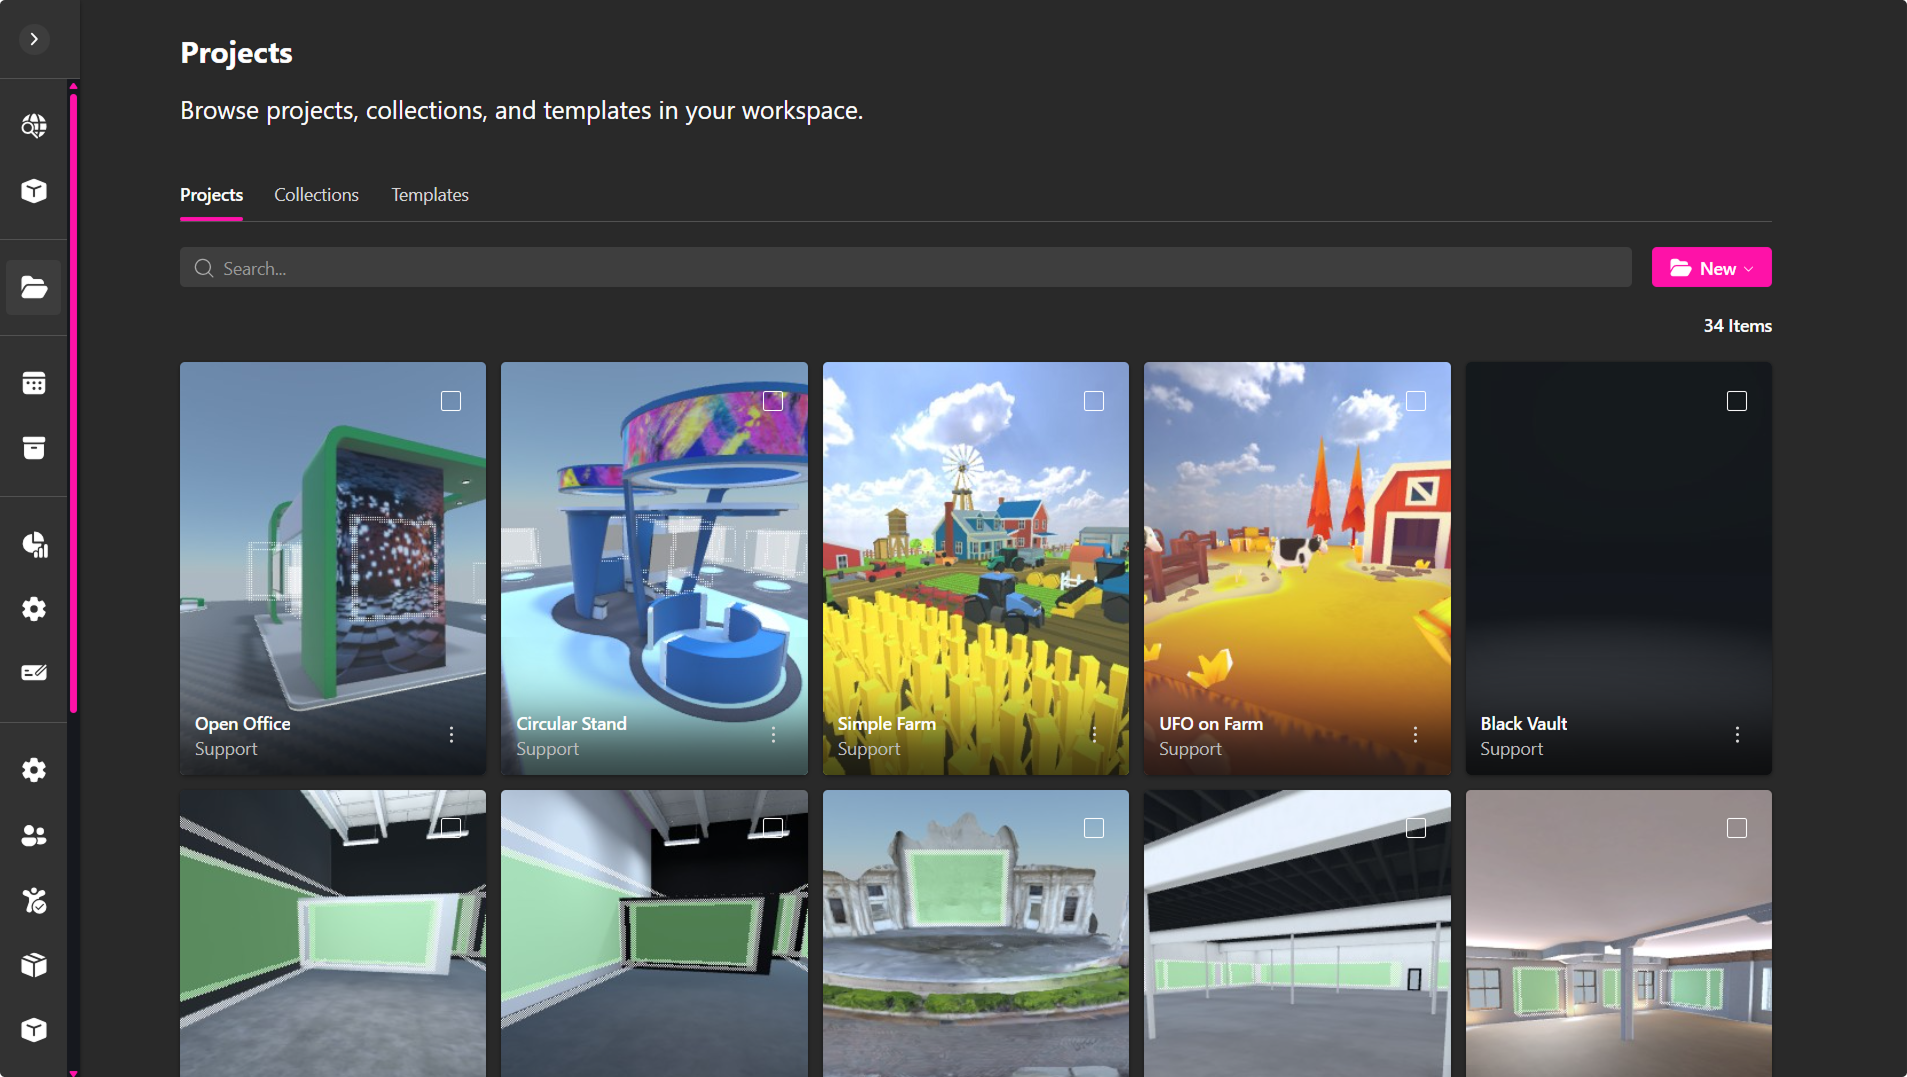
Creating a Project
If this is your first time in the XRHUB, you can either create a new project from scratch, import a project or use one of our templates. If you’ve previously created projects in the platform and are signed in, your past projects will be displayed here.
-
Open the Projects tab under the Creator section.
-
Click “New” to choose from:
- Empty – A completely blank project, perfect for custom builds.
- Template – A ready-made project for quick setup. Choose from our list of available templates.
- Import – Select Import, then choose the .xrproj file you want to upload.
- Enter a name and click “Create” to enter the editor
🔹 Pro Tip: If you’re a beginner, start with a template to learn how elements interact.
Managing Projects
Once you've created a project, click the dropdown menu to access key management tools.
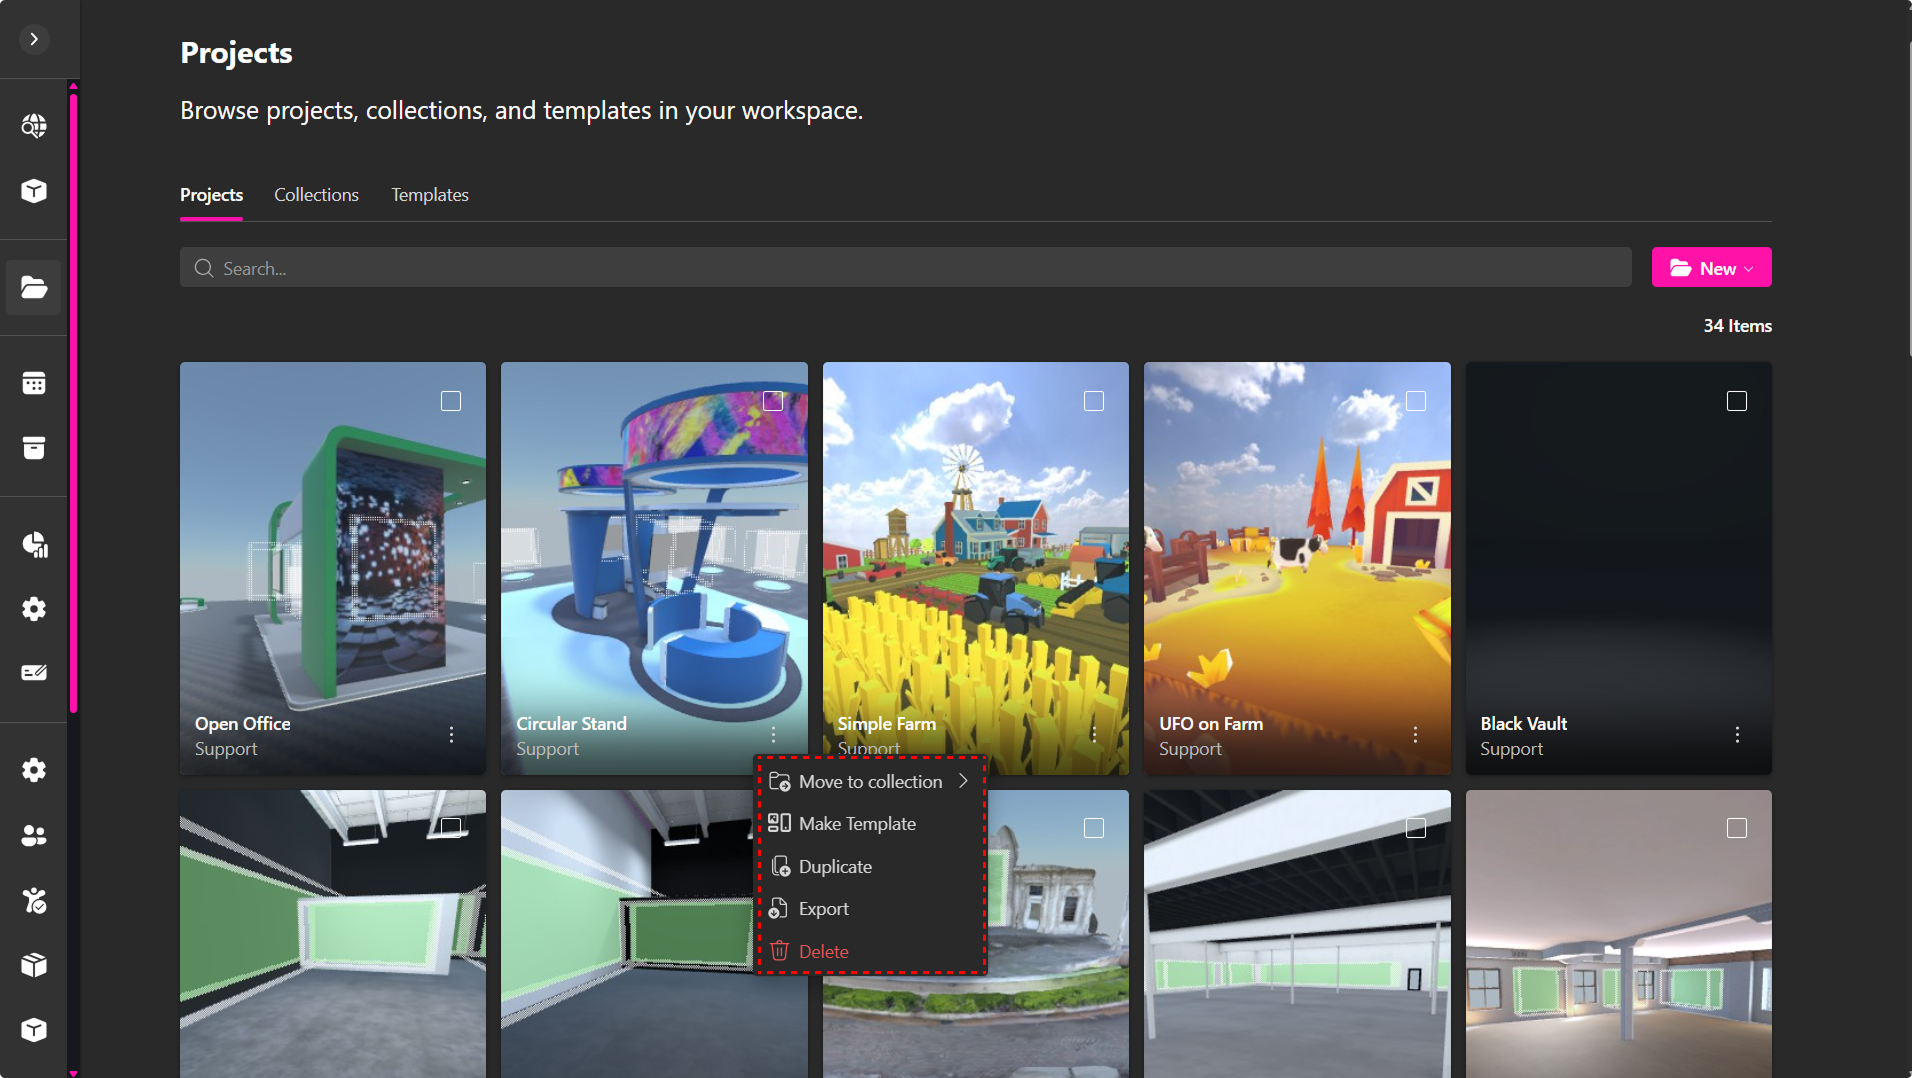
Here's what each option lets you do:
- Move to a Collection – Organize your project by placing it into a specific collection. Great for keeping related builds grouped together. Learn more about creating and organizing assets here.
- Make Template – Turn your current project into a reusable template. Ideal for sharing setups or starting new builds with the same structure. Learn how to manage templates here.
- Duplicate – Create a copy of your project.
- Export – Download your project as a .xrproj file. Useful for backups or transferring to another workspace.
- Delete – Permanently remove the project. Be careful—this action can’t be undone.
Collections
As your workspace grows, Collections help you organize related projects into folders, making them easier to find and manage.
Creating a Collection
- Open the Collections tab.
- Click Add.
- Enter a name for your collection.
- Click Create.
The new collection will appear in your Collections list.
🔹 Pro Tip: Organize collections by client, department, event, or project type.
Opening a Collection
Opening a collection displays all projects stored within it. From there you can manage existing projects or create new ones inside the collection.
Managing Collections
Click the ⋯ (More) icon on a collection to access the available actions.
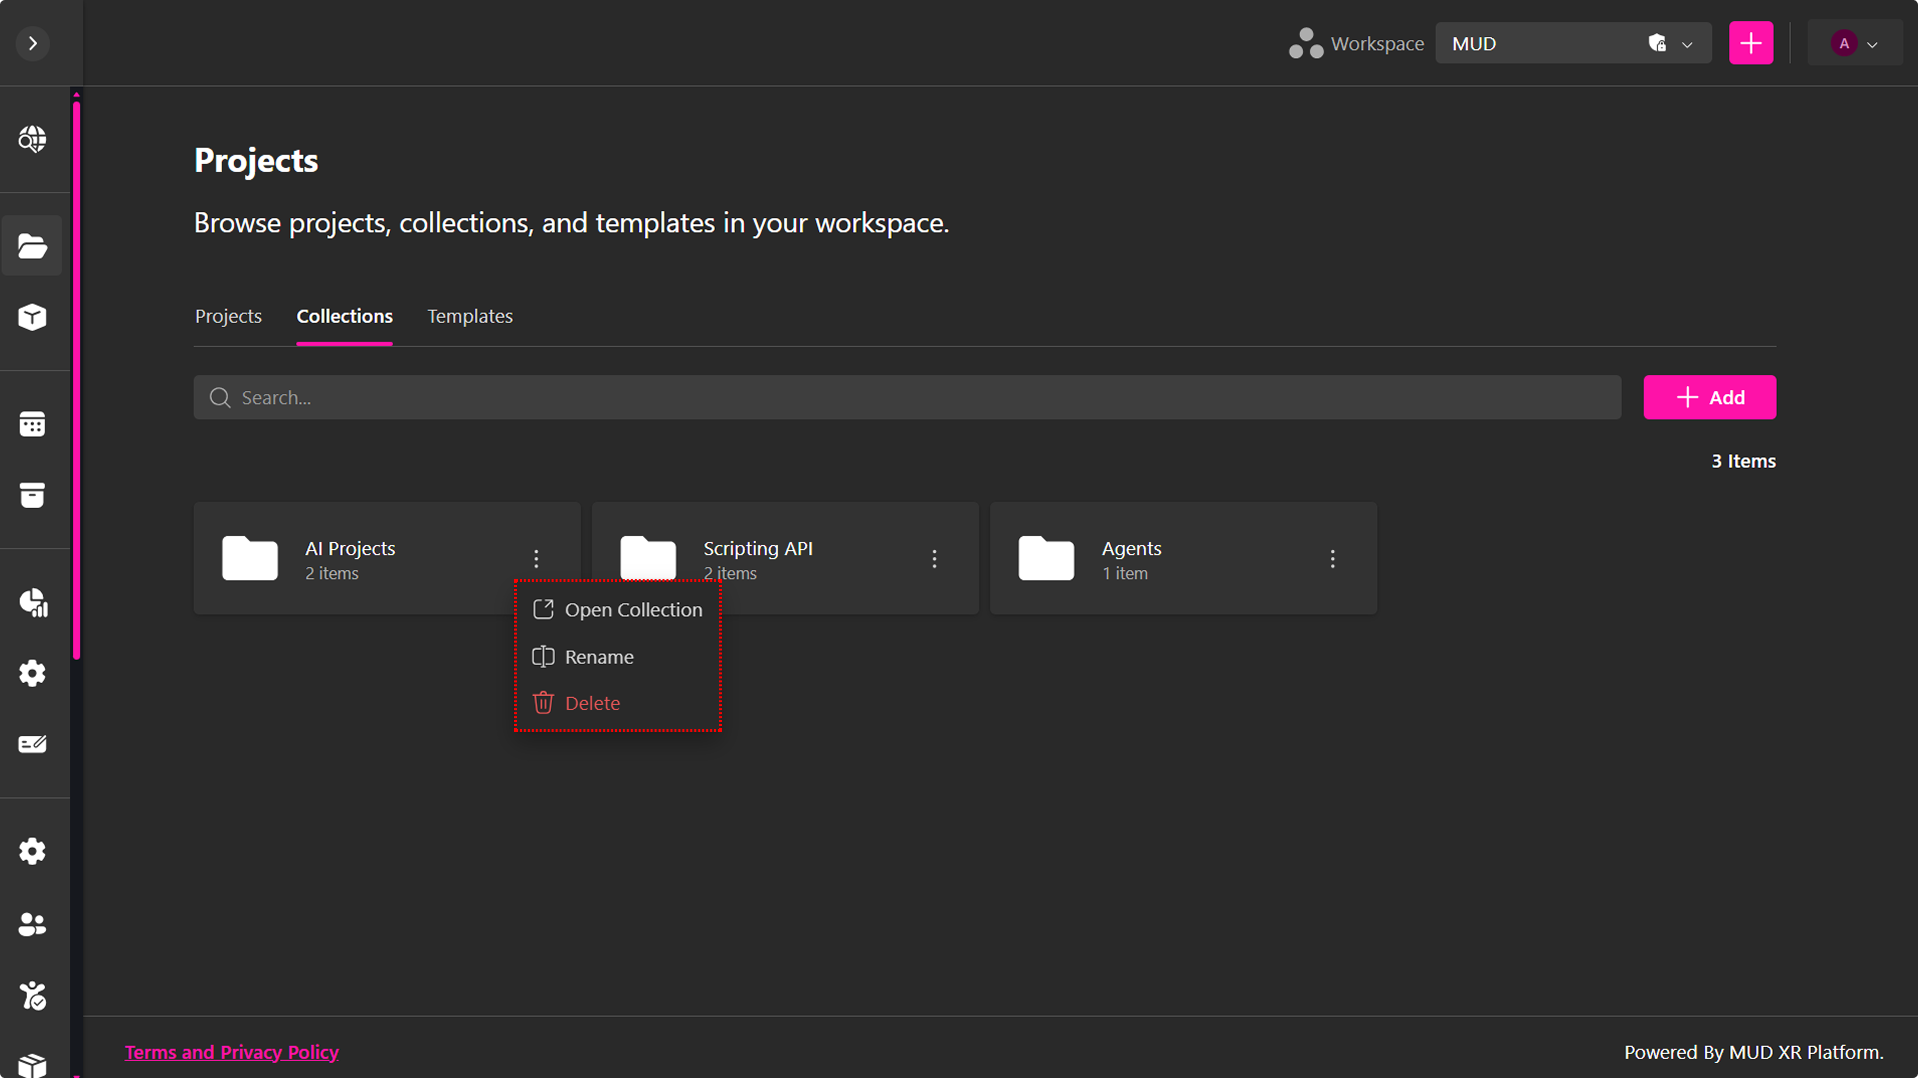
Available actions include:
- Open Collection – View the projects contained in the collection.
- Rename – Change the collection name.
- Delete – Permanently remove the collection.
🔹 Note: Deleting a collection removes the folder but does not delete the projects stored within it.
Templates
Templates are reusable project blueprints that help you quickly create new experiences using predefined scenes and configurations.
Only users with the appropriate permissions can publish and manage templates.
Creating a Template
Templates are created directly from existing projects.
- Open the Projects tab.
- Locate the project you want to reuse.
- Click the ⋯ (More) menu.
- Select Make Template.
The project will now appear in the Templates tab.
Using a Template
To start a project from an existing template:
- Click New from the Projects tab.
- Select Template.
- Choose the template you want to use.
- Enter a project name.
- Click Create.
A new project is created while the original template remains unchanged.
Managing Templates
Open the Templates tab and click the ⋯ (More) icon on any template.
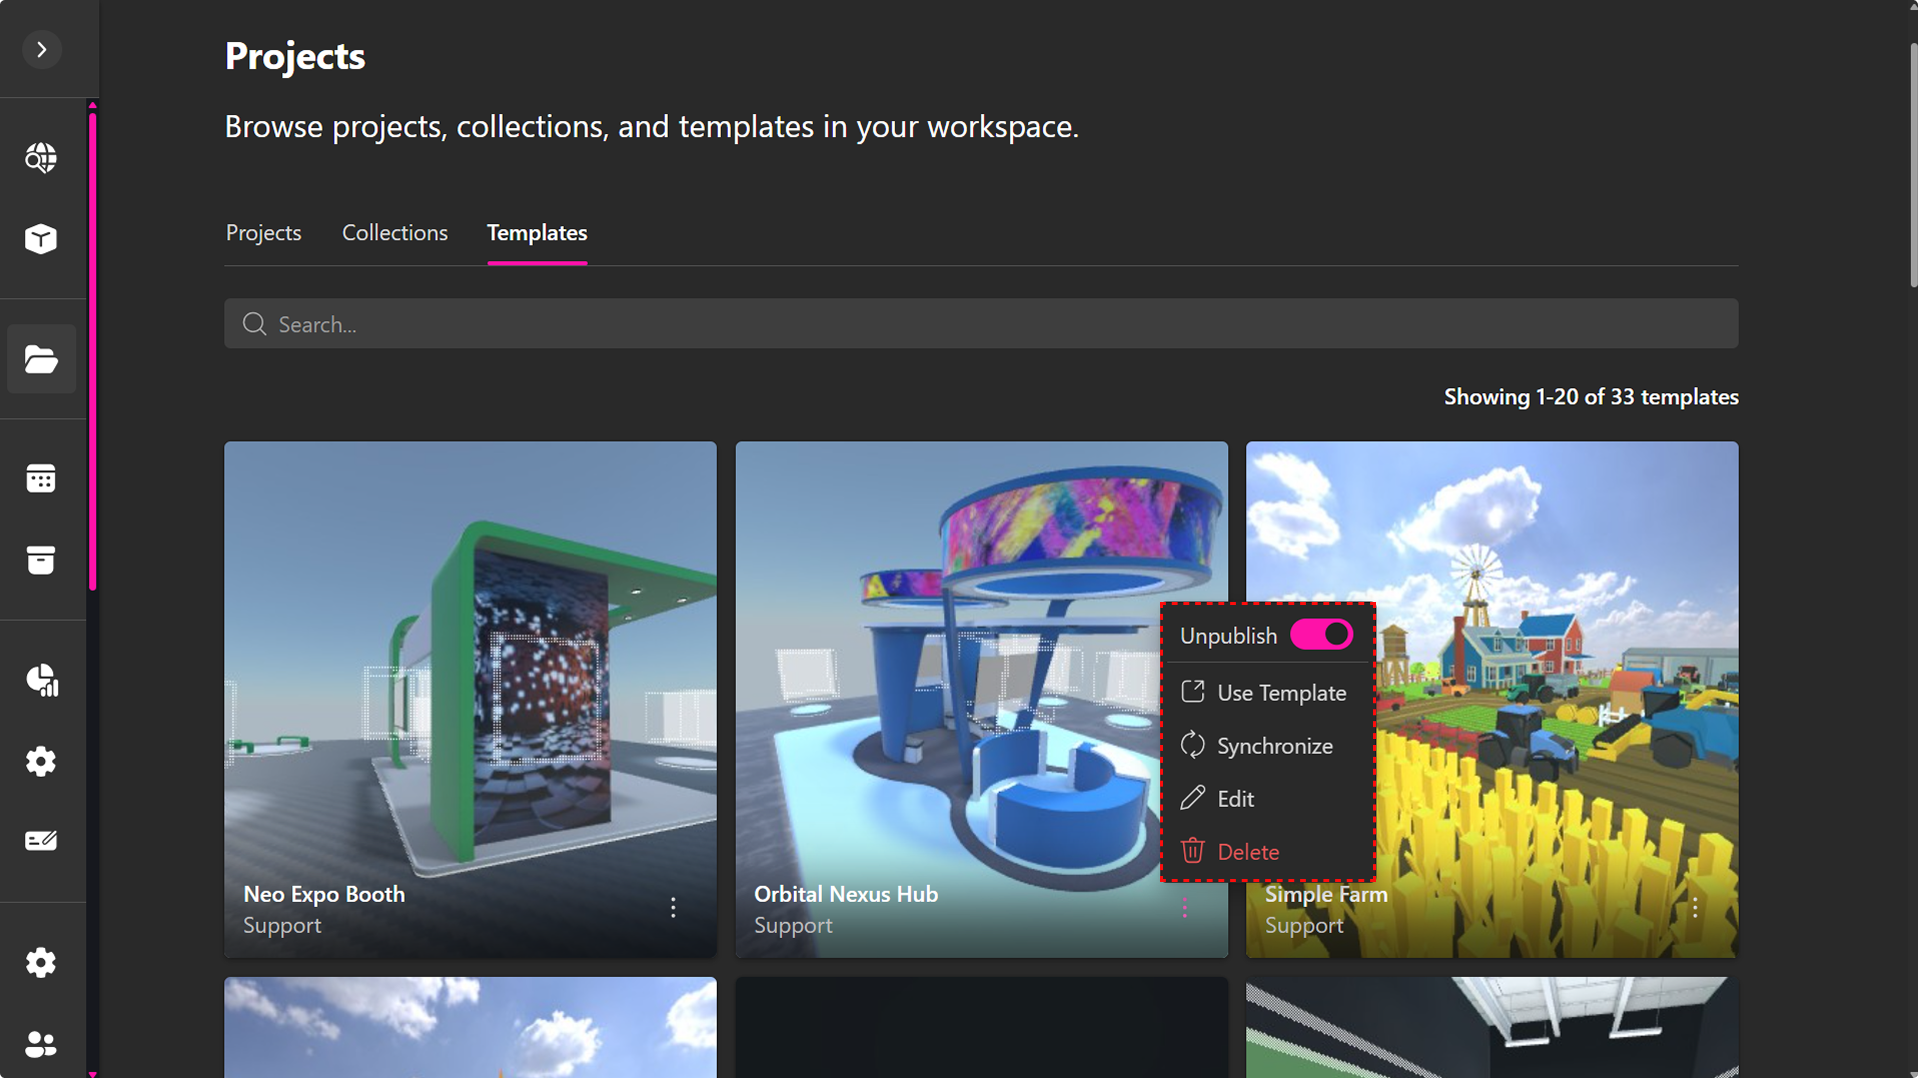
The available actions are:
- Publish – Toggle whether the template is publicly available.
- Use Template – Create a new project using the selected template.
- Synchronize – Update the template with the latest changes from its source project.
- Edit – Modify the template's name and description.
- Delete – Permanently remove the template.
🔹 Note: Deleting a template does not affect the original project from which it was created.