Users
The User Management page lets you manage users, groups, and invitations across the XRHUB platform. This area centralizes all account-level administration and gives you precise control over access, roles, and subscriptions.
The User Management is divided into three tabs:
-
Users: View and manage individual user accounts.
-
Groups: Organize users into structured groups and assign shared roles or subscriptions.
-
Invitations: Invite new users individually or in bulk.
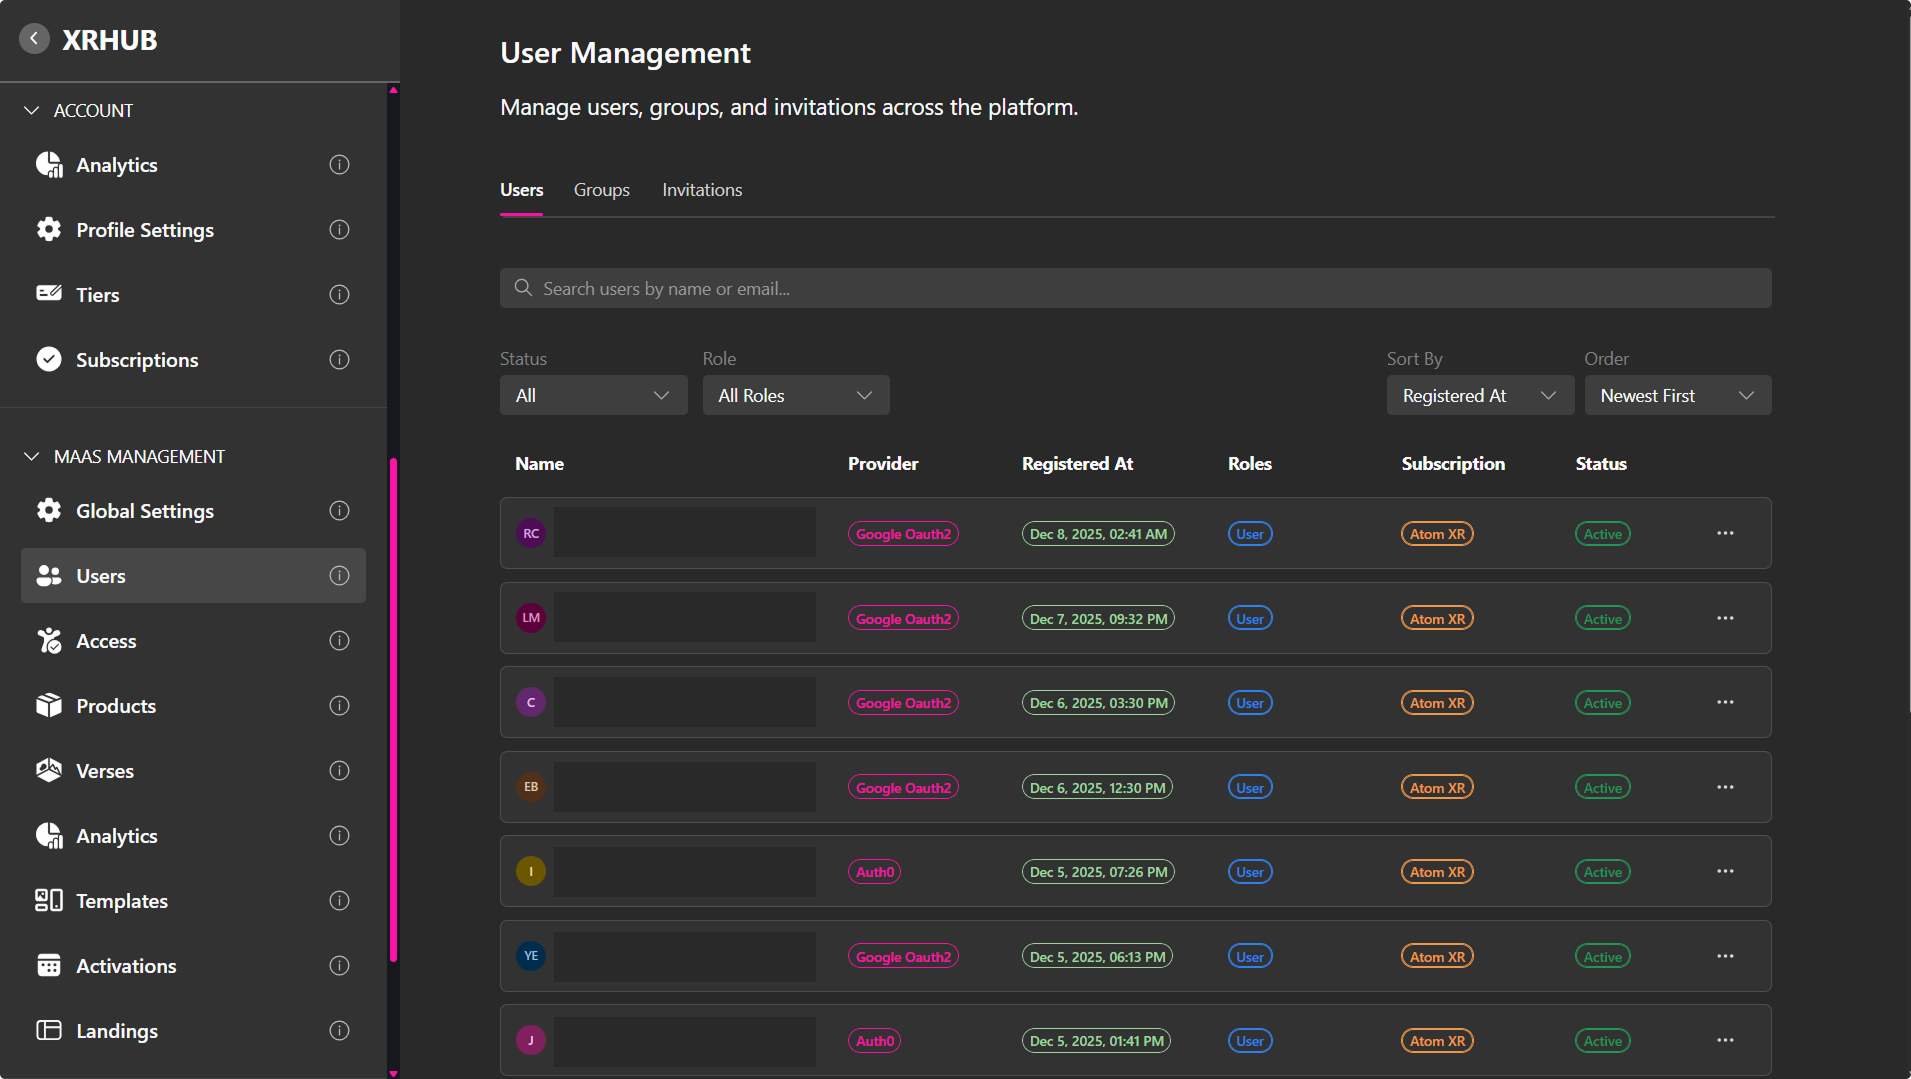
Users Tab
The Users tab lists every user in your MAAS environment and provides a full overview of their account details. Each user entry includes:
- Registration Date – When the user joined the platform.
- Roles – The permissions or access level assigned to them.
- Subscription – Their current subscription and its limits.
- Status – Whether the user is Active or Banned.
- Provider – The authentication method used during sign-up (Auth0/password, Google OAuth2/Login with gmail, etc.).
User Management Options
Each user row includes a three-dot menu (⋯) that gives you complete control.

- Active – Toggle the user's status between Active and Banned. Users are active by default; banned users cannot access the platform.
- Limits Enabled – Enable or disable platform usage limits based on the existing platform subscriptions. If disabled, users may exceed the limits defined by their base tier or subscription in your MaaS configuration.
- Update Role – Change or assign an existing role. Roles are determined by permission sets, which you configure in the Access Management.
- Update Subscription – Assign or update storage, verses, and concurrent user limits. If they hold more than one subscription, the system automatically applies the highest available limit.
- View Profile – Review the user’s profile details.
- Delete – Permanently remove the user from the MAAS environment.
Updating a User Role
Use Update Role to change what a user can do on the platform.
- Go to User Management → Users.
- Find the user and click the ⋯ menu.
- Select Update Role.
- In the dialog, open the Role dropdown.
- Select a role (e.g., Admin, Landing Manager, Analytics, Artist, or any custom role). To review the permissions associated with each role, see Access Management. You can edit existing roles or create new ones as needed.
- Click Update.
Note: The selected role defines the user’s platform-wide permissions and access to differents sections of the platform.
Updating a User Subscription (Assign Template to User)
Use Update Subscription to manage user limits such as storage, concurrent users, and verses.
- Go to User Management → Users.
- Open the user’s ⋯ menu.
- Click Update Subscription.
- Choose a Template (e.g., XR Permissions). You can create new subscription templates or edit existing ones in the Access Management. page.
- Review the template limits:
- Max CCU – Maximum concurrent users allowed inside the user's verses.
- Storage (MB) – Total asset storage available to the user.
- Verses – Number of verses the user can publish.
- (Optional) Set Starts At to schedule activation timing.
- (Optional) Set Ends At to define expiration.
- Click Assign.
You can update or replace the subscription template anytime. If the suscription template sets higher limits than the base subscription, it will override the user’s current storage, user, and verse limits on the platform.
Groups Tab
Groups allow administrators to manage multiple users under a shared configuration. Groups are ideal for teams, departments, classrooms, or any structured set of users requiring consistent settings.
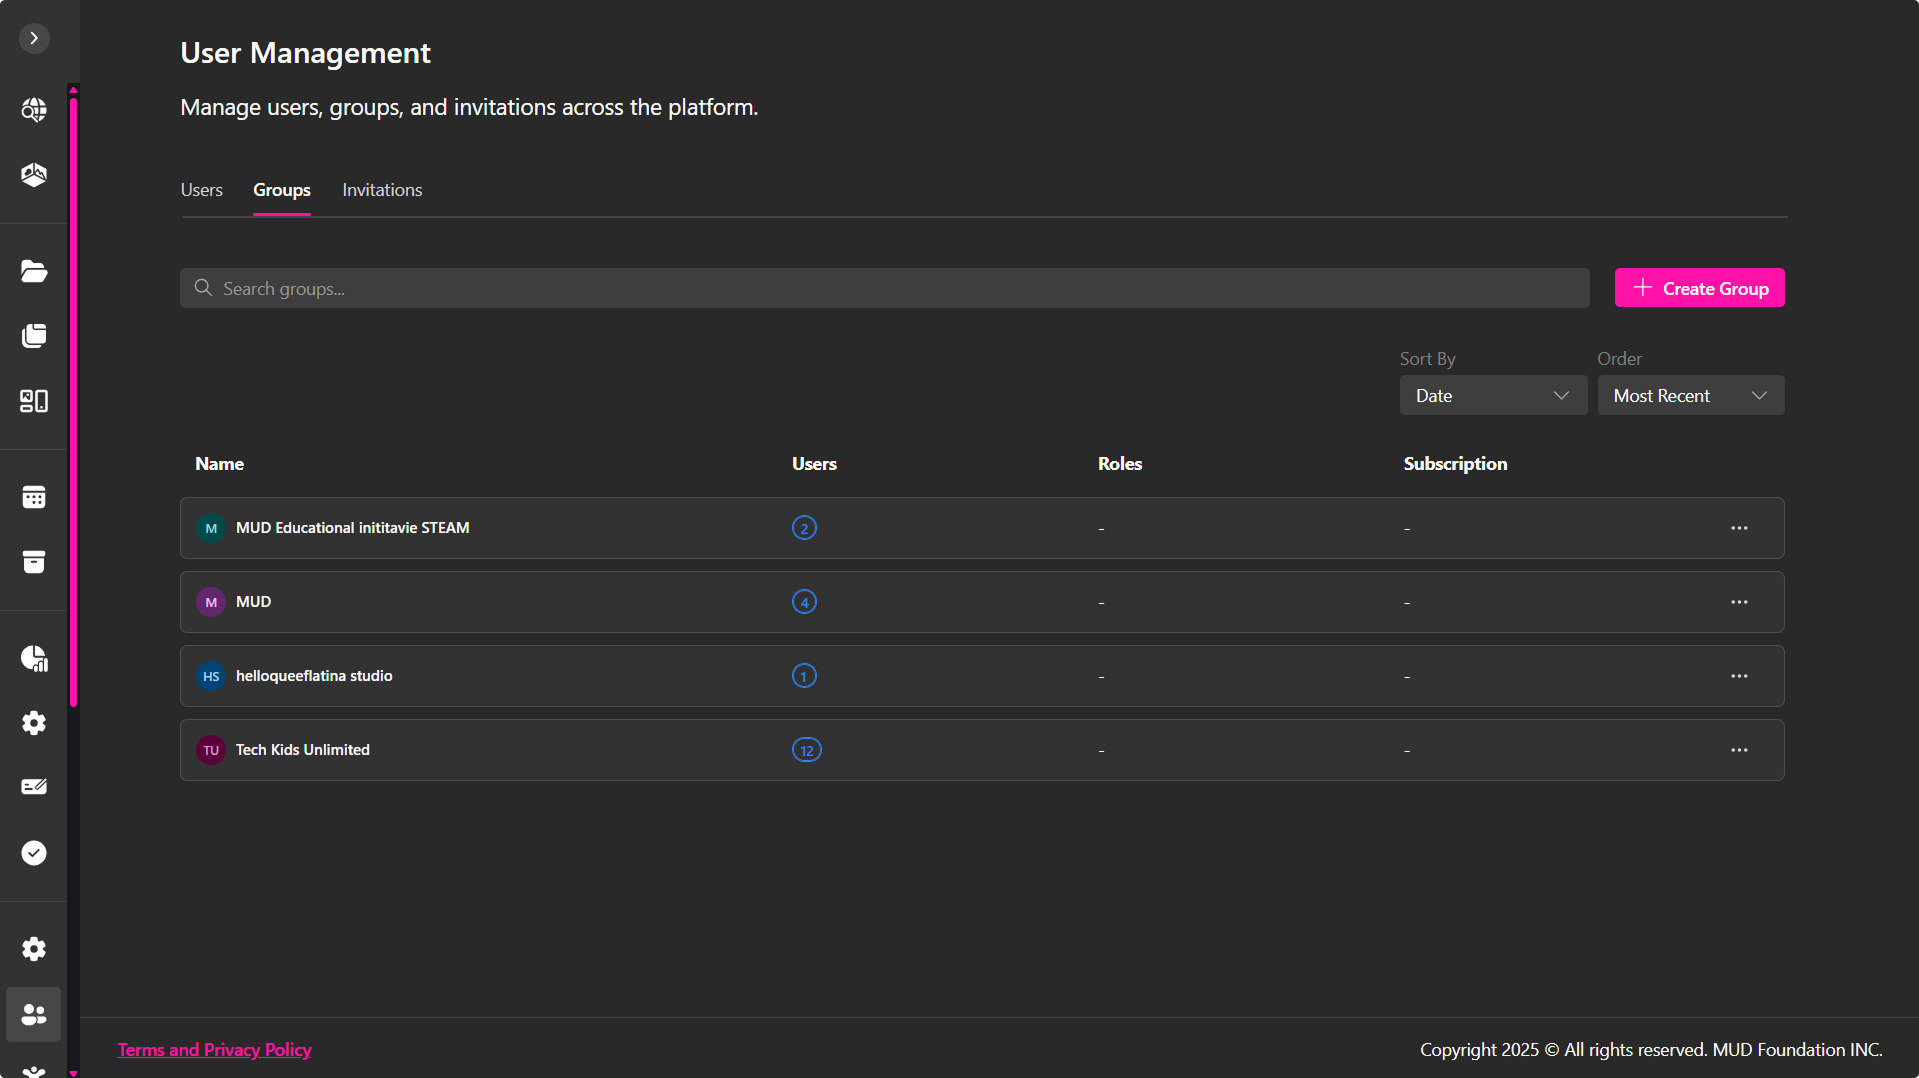
Groups allow you to:
- Assign a shared role – All members inherit the same permission level.
- Assign a shared subscription template – Members inherit the same limits.
- Assign verses to groups – Members gain access and can create instances.
- Manage group members – Add, remove, or promote users.
Creating and Managing Groups
Each group row includes a ⋯ menu with:
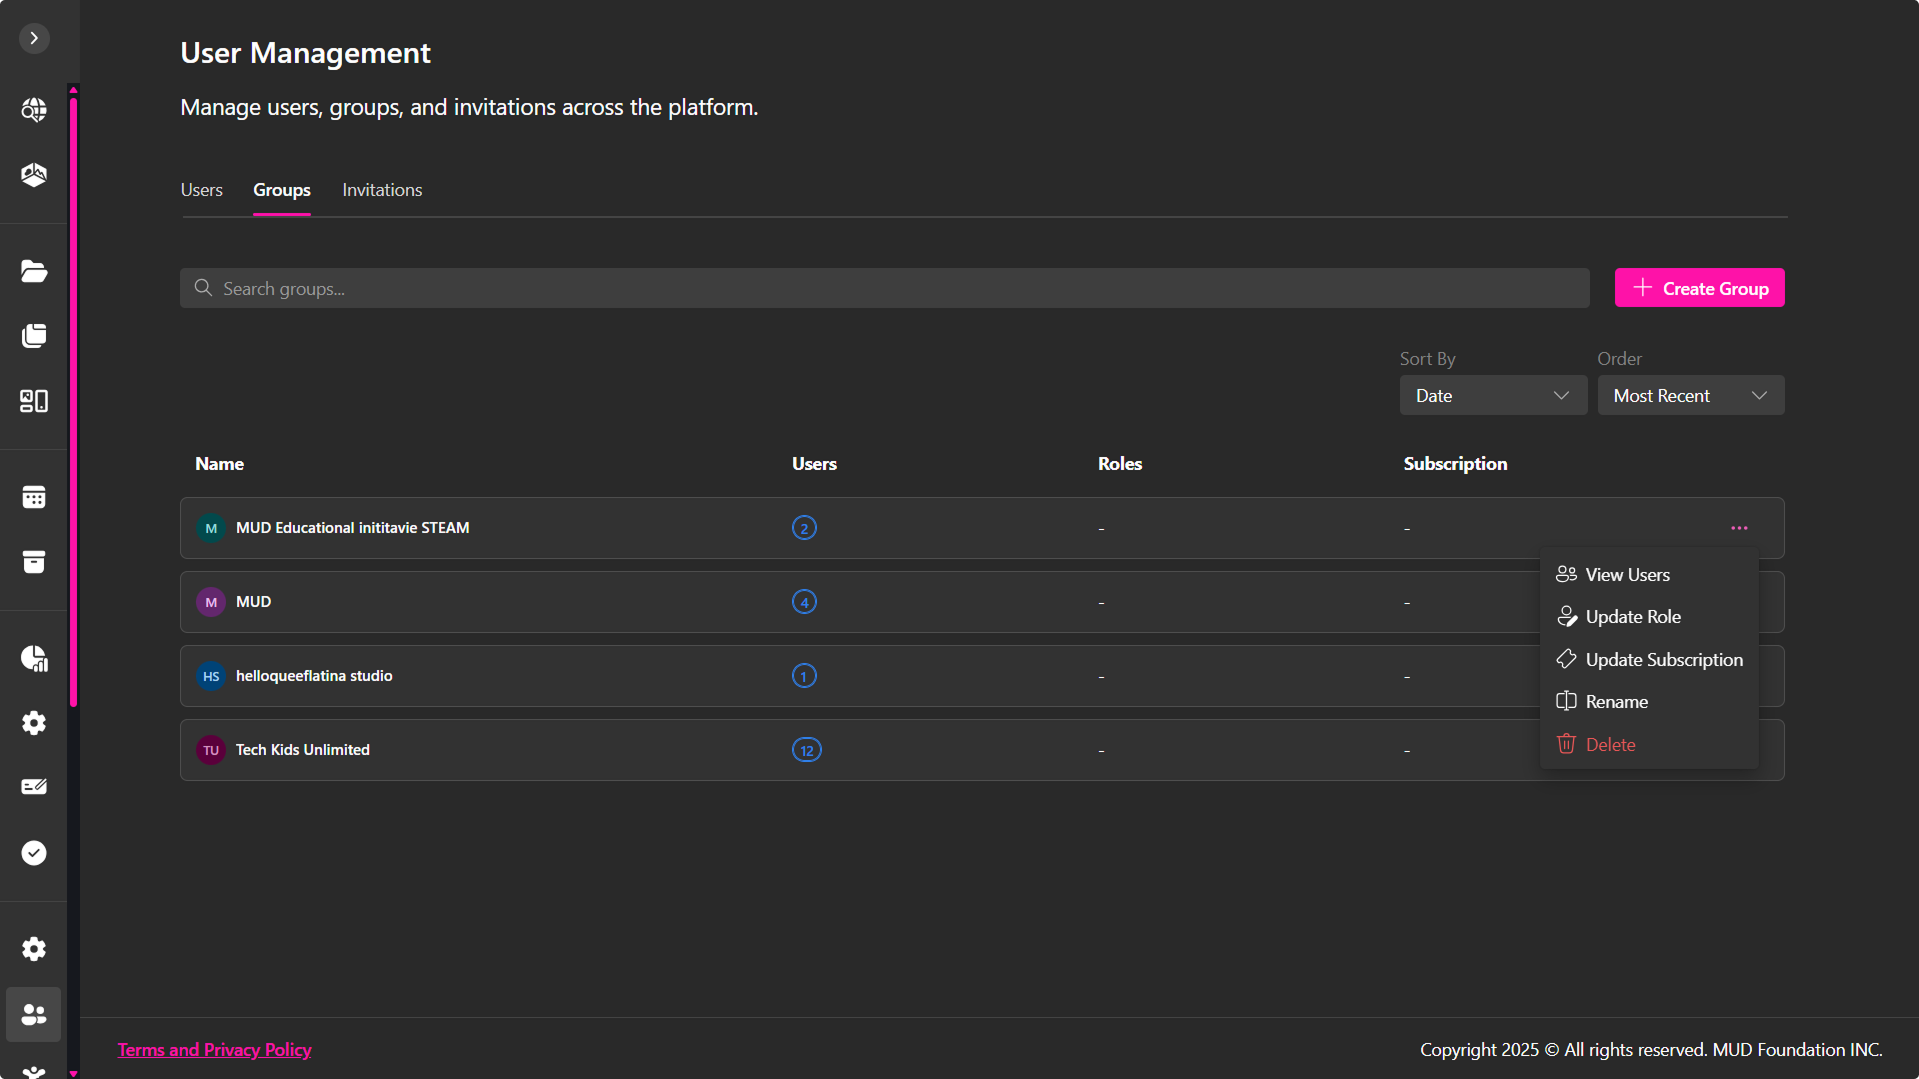
- View Users – Display group members.
- Update Role – Apply a shared role.
- Update Subscription – Apply shared limits.
- Rename – Change the group name.
- Delete – Remove the group entirely.
Managing Group Roles
- Open the group’s ⋯ menu and select Update Role.
- Choose a role from the role list (Admin, Landing Manager, Build Manager, Analytics, etc.). Roles are determined by permission sets, which you configure in the Access Management.
- Apply the role to the entire group.
All users in the group automatically inherit the updated role.
Assigning a Subscription to a Group
- Open the group’s ⋯ menu.
- Select Update Subscription.
- Choose a subscription template and review its limits. You can create new subscription templates or edit existing ones in the Access Management. page.
- (Optional) Set start and end dates.
- Assign the subscription.
Every member of the group inherits the subscription limits. If the suscription template sets higher limits than the base subscription, it will override the user’s current storage, user, and verse limits on the platform.
Viewing and Managing Group Members
Opening a group displays all members and their individual details. Each member row includes:
- Make Leader – Promote a user to group leader.
- Remove from Group – Remove the user without deleting their account.
Invitations Tab
The Invitations tab allows you to invite new users into your MAAS environment and track all pending invitations.
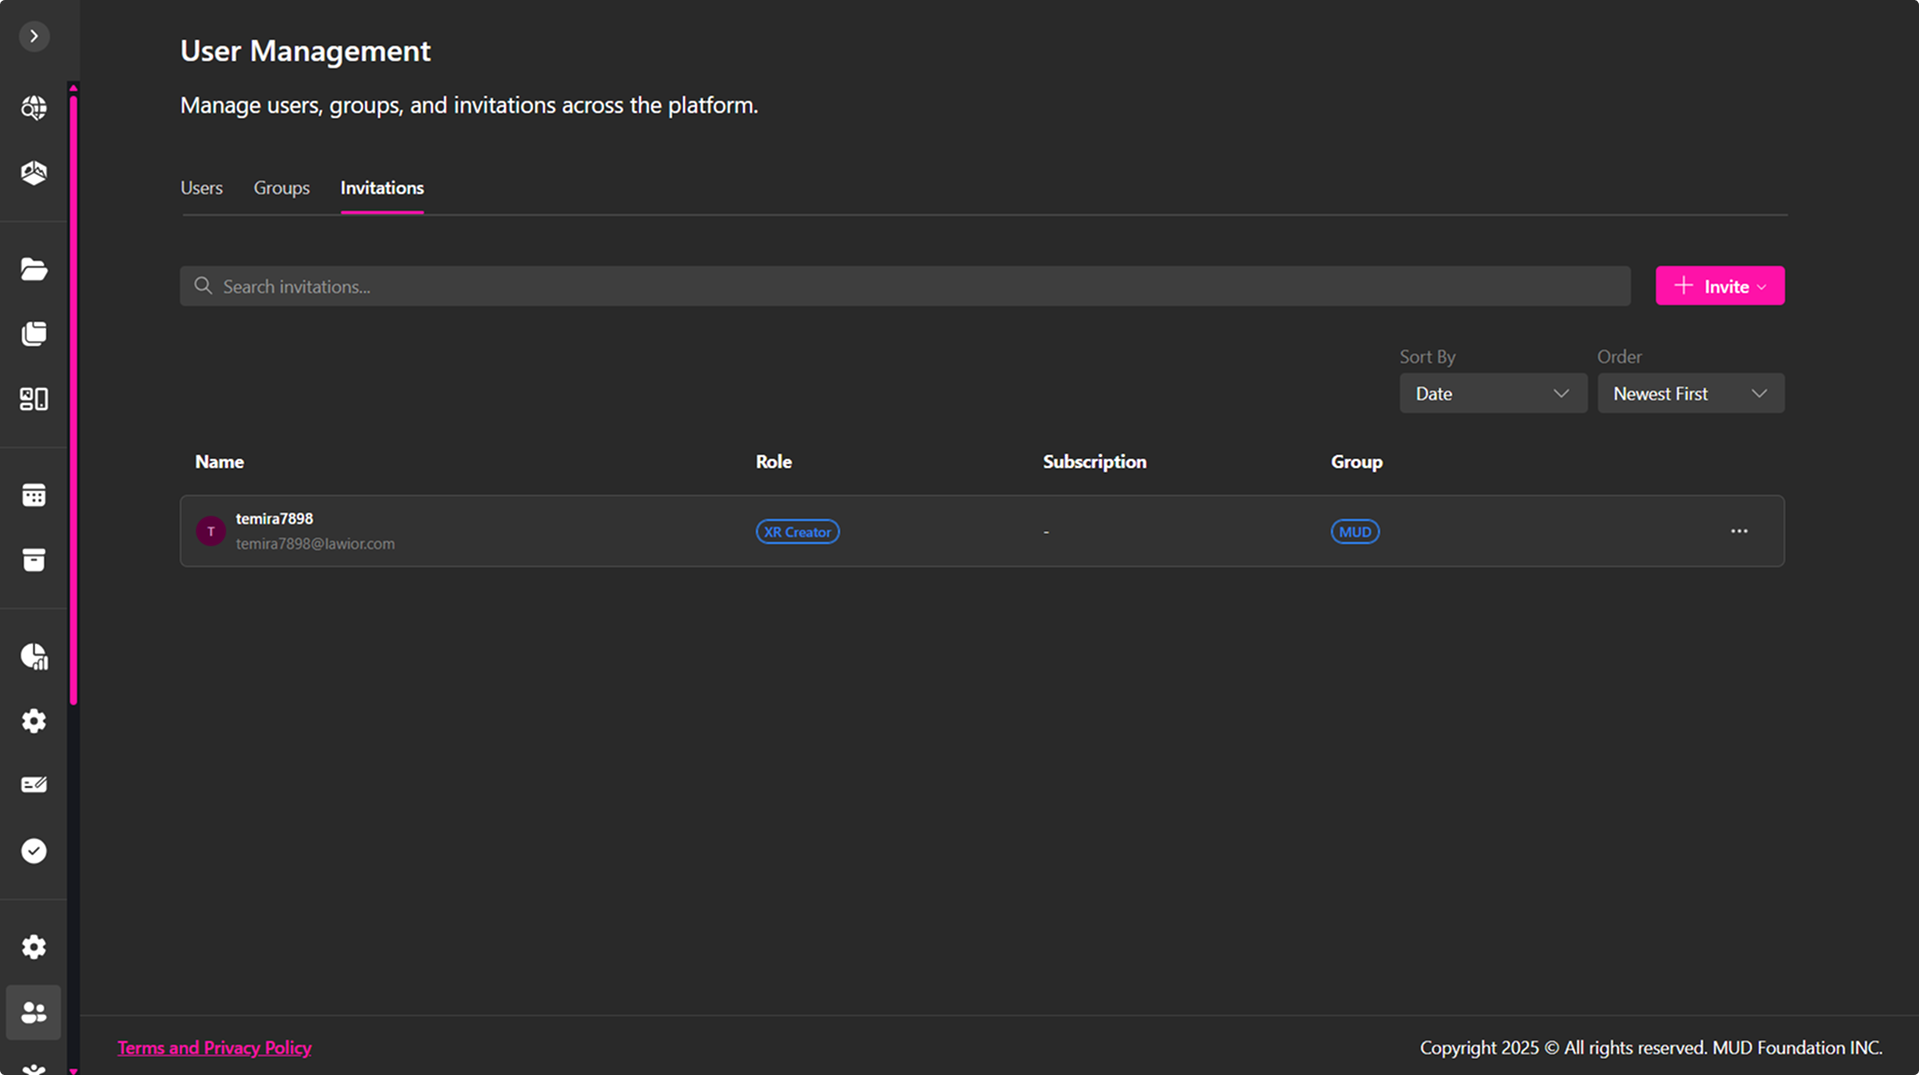
Each invitation entry displays:
- Email / Identifier
- Assigned Role
- Assigned Group (if selected)
- Subscription Template (if applied)
Invitations automatically expire after 7 days.
Invitation Actions
Each invitation row includes a ⋯ menu with:
- Resend – Send the invitation email again.
- Revoke – Cancel and remove the invitation.
Sending Invitations
Click Invite to open the invitation dialog. You can invite one or multiple users.

Invite Users Dialog
You can pre-configure the user's setup before they join:
- Role (Required) – The role the user will receive after accepting the invite. To review the permissions associated with each role, see Access Management. You can edit existing roles or create new ones as needed.
- Group (Optional) – Assign the user to an existing group or create a new one with the + button.
- Subscription Template (Optional) – Automatically apply resource limits upon account activation. You can create new subscription templates or edit existing ones in the Access Management. page.
- Add Email – Paste or type multiple emails; press Enter to add each one.
Click Send Invite to distribute all invitations.
Users automatically inherit the selected role, group membership, and subscription limits once they accept the invitation. If no selections are made, default settings apply.